Some Windows 10 users may receive an error message “We couldn’t install this update, but you can try again (0xc1420121)” when trying to update their OS or installing feature update to Windows 10. How to solve this problem? Well, this post from MiniTool Partition Wizard will offer you some solutions.
Some users reported that this error 0xc1420121 usually happened after installing Macrium Reflect. Certainly, there are other reasons that cause this error. But whatever case you are in, you can fix the error 0xc1420121 quickly. There are several methods below, and you can choose one of them to solve the problem.
Method 1: Run Windows Update Troubleshooter
Running Windows Update Troubleshooter may solve some update errors including the error 0xc1420121. How to do that? Here is the guide:
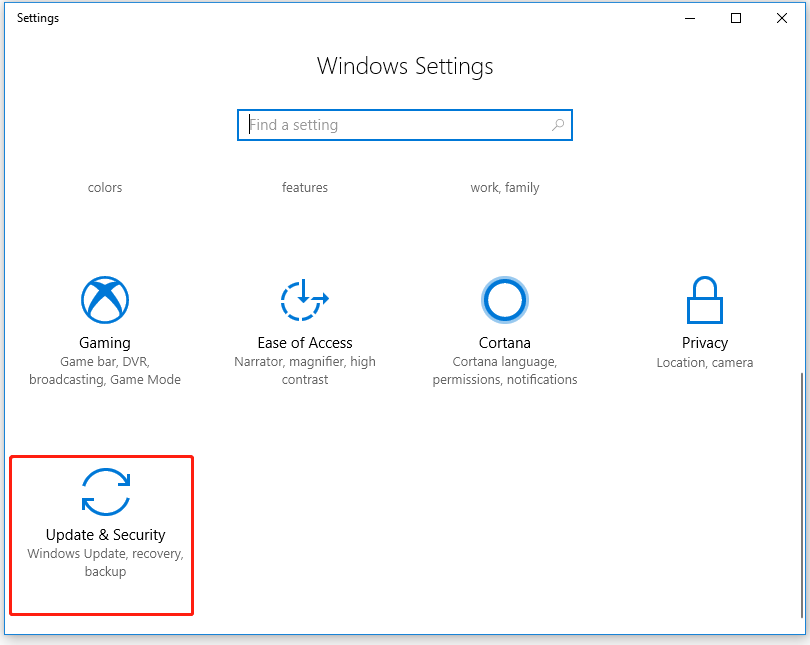
Step 1: Click the Start button, click the Settings button, and then choose Update & Security in the Settings page.
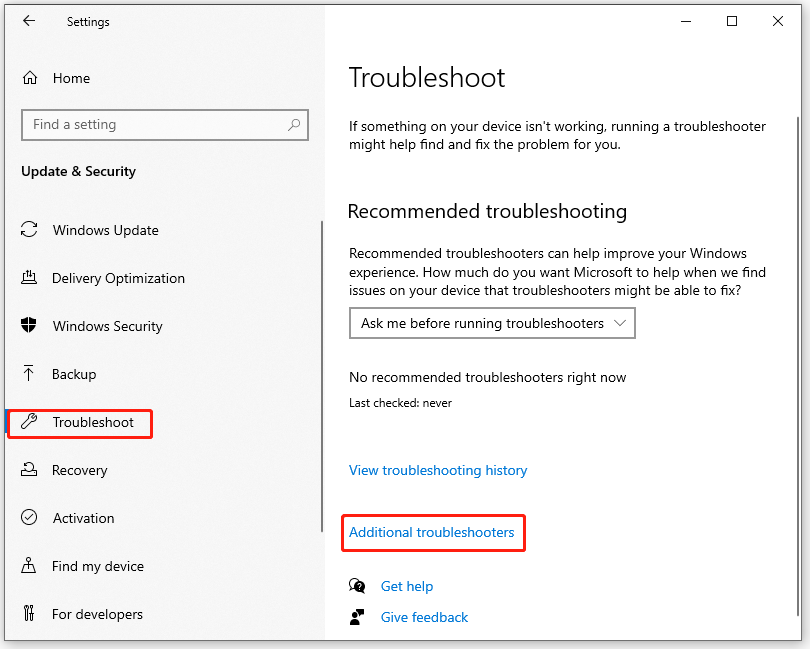
Step 2: Choose the Troubleshoot option in the left pane, and then click Additional troubleshoot.
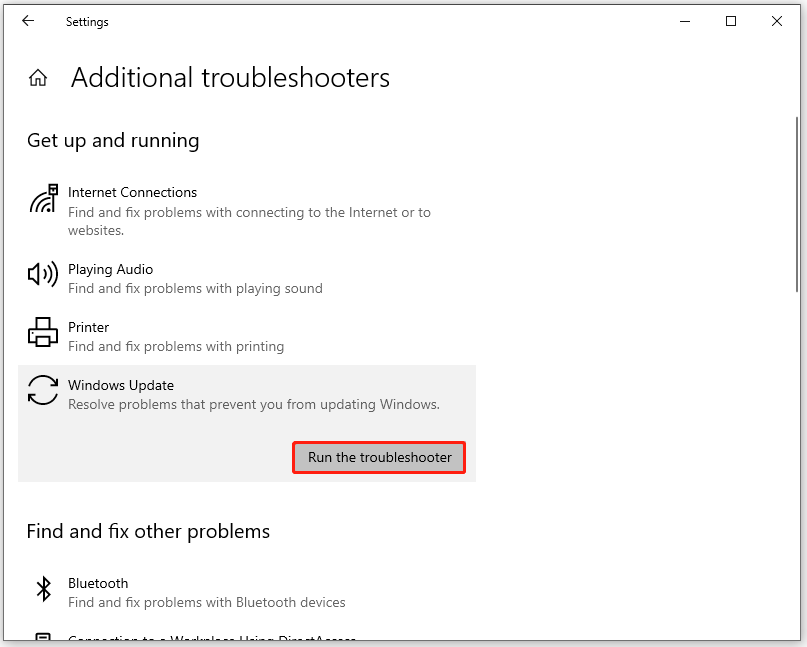
Step 3: Click Windows Update and then click Run the troubleshooter.
Step 4: Wait until the initial scan is complete. If there are some errors about Windows Update, please click Apply this fix and wait for the operation to complete.
After applying the recommended fixes, restart your computer to check if the problem “feature update to Windows 10, version 1903 – error 0xc1420121” is resolved.
Method 2: Run an SFC Scan
If the method above doesn’t work, you need to consider if the system files are damaged. Corrupt data in your system folders may also cause the error 0xc1420121. So, the second method is to scan your system files for errors. You can do that using the SFC (System File Checker) tool. Please follow the steps below:
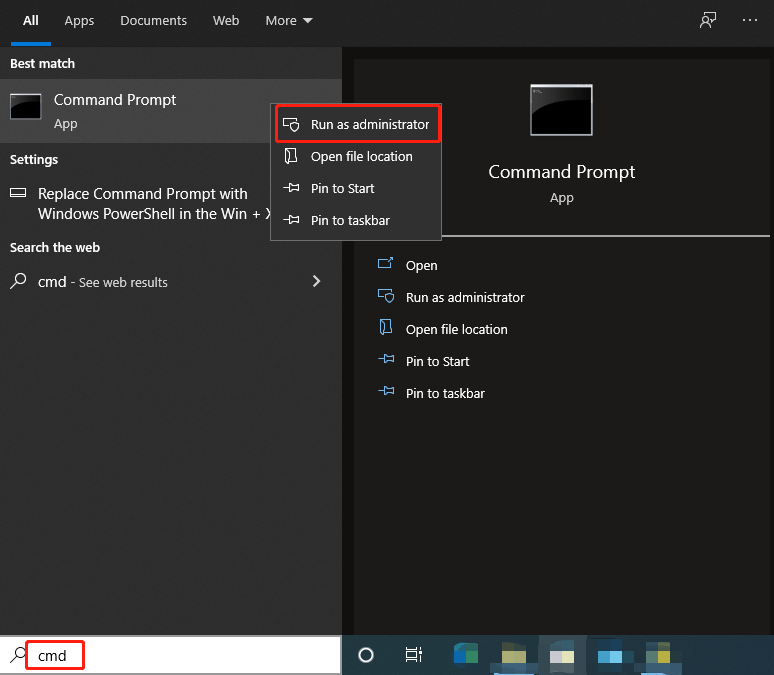
Step 1: Press the Win + S on the keyboard, type cmd in the search box. Then, right-click Command Prompt and choose Run as administrator.
Step 2: Type sfc /scannow in the Command Prompt and press Enter.
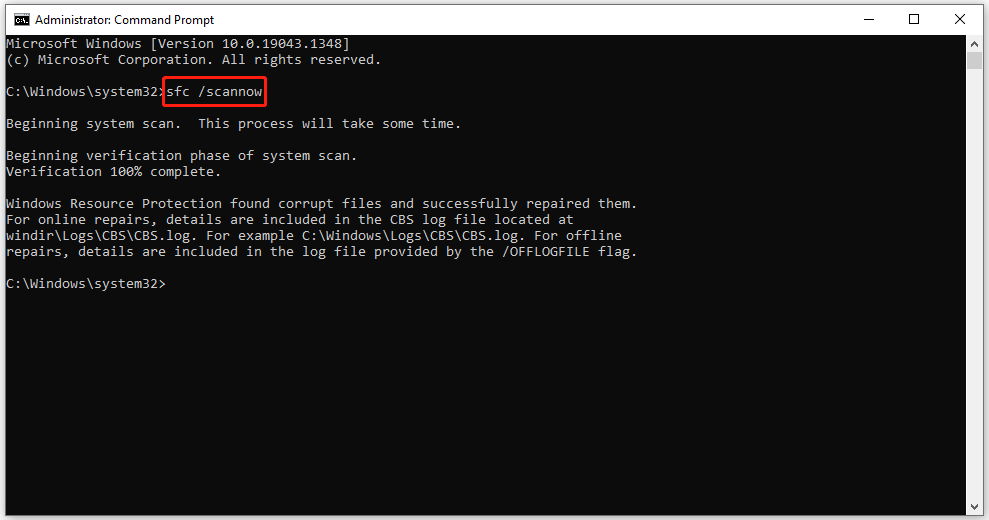
Wait for the process to complete. Then, the damaged system files will be found and replaced.
Method 3: Run CHKDSK
According to some Windows 10 users that still use traditional HDDs, if the sector used to store Windows files goes bad, it may cause this error 0xc1420121. In this case, you can try to run the CHKDSK utility to scan and fix the HDD. However, the long-term solution is to replace your hard disk with a new one.
So, how to use Windows inbuilt CHKDSK utility to scan and fix hard drive errors? Follow the steps below to do that:
Step 1: Follow Step 1 in Method 2 to open Command Prompt.
Step 2: Type chkdsk c:/r and press Enter to fix errors. (Usually, c: is the drive letter of the system drive. If your Windows installation isn’t located on the C: partition, please change the drive letter.)
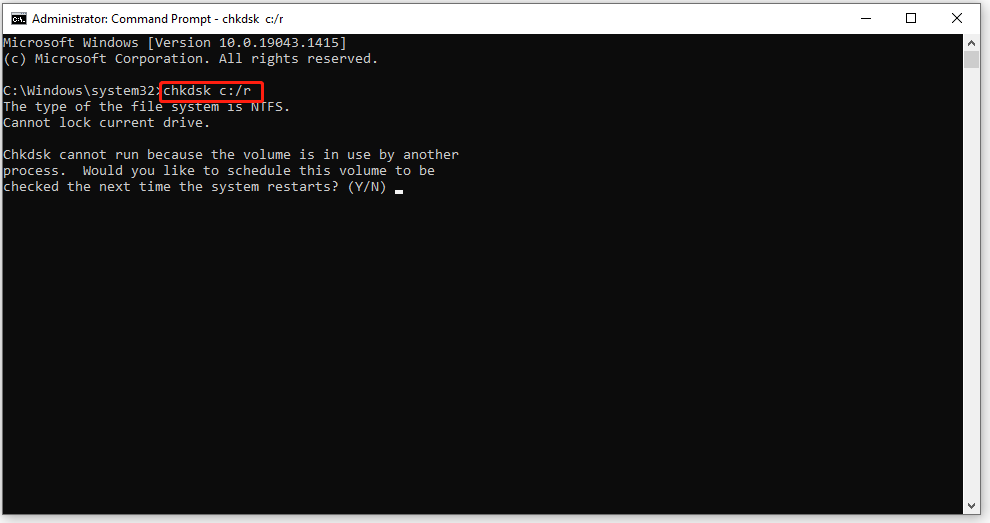
Step 3: Then, you will see the message “CHKDSK cannot run because the volume is in use by another process.” At this time, please type Y and hit Enter to schedule your scan the next time the system restarts.
Step 4: Exit Command Prompt and restart your computer. The CHKDSK utility will automatically start scanning and fixing your hard disk.
Once done, try to update your Windows OS to see if the problem “feature update to Windows 10, version 1903 – error 0xc1420121” is resolved.
That’s all about how to fix Windows 10 feature update error 0xc1420121. If you have any questions about this topic, please leave them in the comment zone and we will try to answer them as soon as possible.

![How to Fix Windows Update Error 0x8e5e03fa [New Tips]](https://images.minitool.com/partitionwizard.com/images/uploads/2020/07/0x8e5e03fa-thumbnail.jpg)
User Comments :