Many Windows 10 users reported that they failed to update the system and received the Windows Update error code 0x800700c1. This post from MiniTool Partition Wizard analyzes this error code and shows how to get rid of it.
What is 0x800700c1? How to fix 0x800700c1? Start reading.
0x800700c1 is one of Windows Update error codes, and its error message goes like this: “There were problems installing some updates, but we’ll try again later. If you keep seeing this and want to search the web or contact support for information, this may help. Feature update to Windows 10 – Error 0x800700c1”.
What triggers this Windows error code 0x800700c1 is various, from Internet connectivity issues to corrupted update components. But this error 0x800700c1 can be fixed using the following common ways:
- Disable or remove your antivirus program.
- Run SFC scan.
- Run the Windows Update troubleshooter.
- Delete update files from the SoftwareDistribution folder.
- Change the startup types of the Windows Installer service.
Disable or Remove the Antivirus Program
Antivirus programs can keep your computer from viruses and malware, but they sometimes might stop you from updating the system. So, when you receive the error 0x800700c1, you can try disabling such programs on your computer and see if you can update Windows 10; if you fail again, you need to uninstall them and see if the error disappears.
Run SFC Scan Using Command Prompt
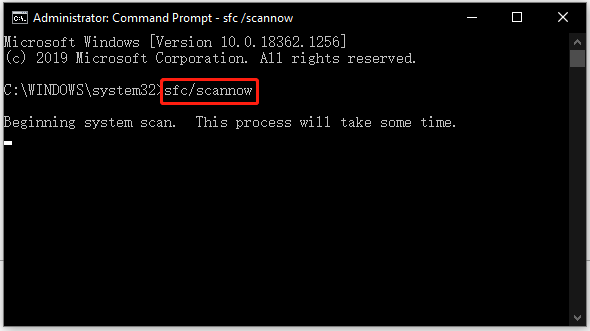
Run the sfc/scannow command using Command Prompt to check and repair corrupted system files. For that, here is the tutorial: Type Command Prompt into the Windows search bar, right-click the search result, choose Run as administrator, type sfc/scannow, and hit the Enter key.

The process will take some time, so be patient. When the process ends, you can try updating Windows 10 again and see if the Windows Update error code will appear.
Run the Windows Update Troubleshooter
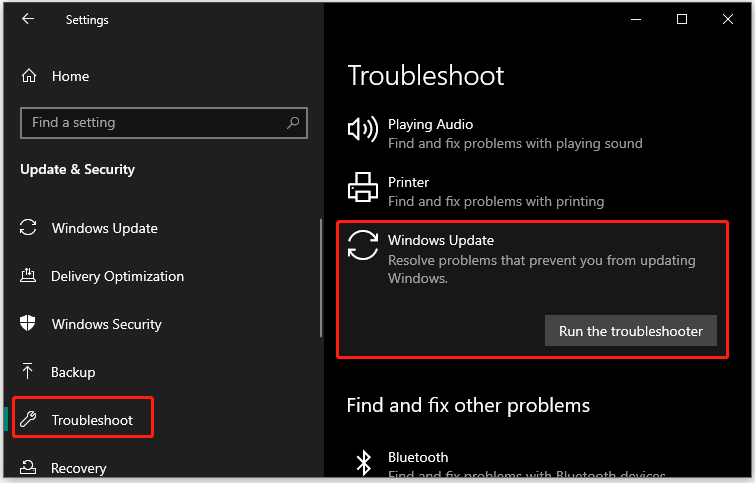
Windows 10 provides its users with a tool called Windows Update troubleshooter. This tool can resolve problems that prevent you from updating Windows. So, when you are stuck in the error code 0x800700c1, it is wise to run this tool.
How to run this tool? You just need to:
- Press Windows + I to bring up the Settings
- Choose Update & Security on the window.
- Switch to the Troubleshoot tab on the left side.
- Locate and click Windows Update on the right side and then click the Run the troubleshooter
- Wait for this tool to finish its work.

Delete Update Files from the SoftwareDistribution Folder
When the temporary Windows Update files are corrupted, the error code 0x800700c1. In this case, you need to delete all temporary Windows Update files from the SoftwareDistribution folder. The steps are as follows:
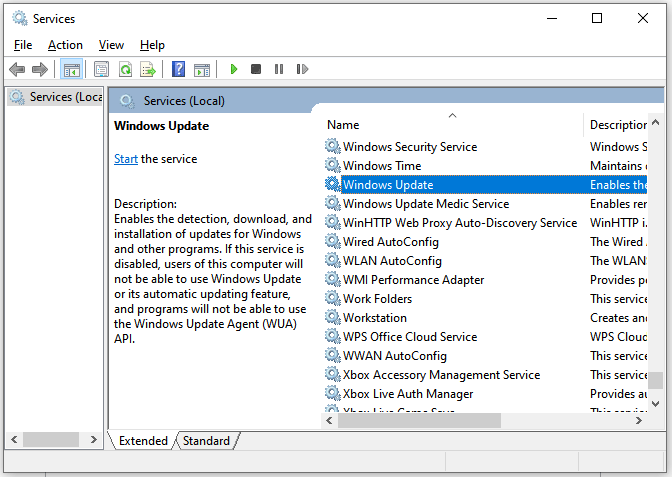
Step 1: Make sure that the Windows Update service has stopped.
- Type services into the Windows search bar and click the Enter
- Locate this service on the window.
- Right-click it and then choose the Stop

Step 2: Delete the files from the SoftwareDistribution folder.
- Go to the path: This PC > C drive > Windows > SoftwareDistribution > Download.
- Select all the files and folders available in the Downloads folder.
- Right-click the highlighted zone and choose the Delete.
Step 3: Repeat Step 1, but this time, right-click the Windows Update service and choose the Start option.
Change the Startup Types of the Windows Installer Service
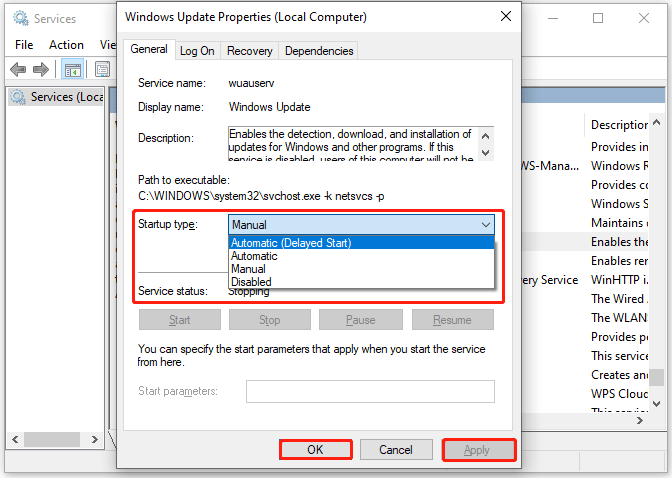
Changing the startup types of the Windows Installer Service to Automatic could help you get rid of the Windows Update error code 0x800700c1.
You just need to go to the Services app (follow the steps given above); then find and double-click the Windows Update service; next the Automatic option from the Startup type menu; finally, click the Apply button and the OK button to save this change.

Now try updating Windows 10 again. Does the process go smoothly? If the error code 0x800700c1 persists, the last solution is to update your Windows via Media Creation tool.
Read more: How to Upgrade Windows 10 to Windows 11? See a Detailed Guide!


User Comments :