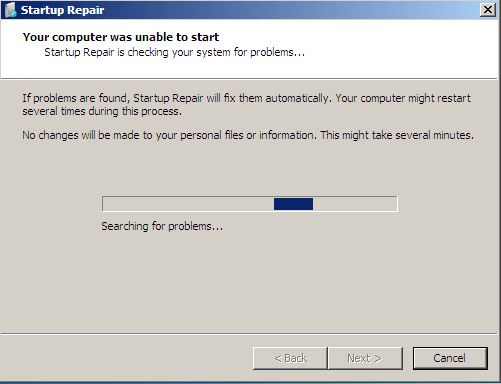
Are you bothered by the “your computer was unable to start” error while booting your Windows 10? How can you solve it? Here, this post from MiniTool Partition Wizard introduces effective solutions to this issue. You can follow them to work your problem out.
Sometimes you may fail to start your Windows 10. What’s worse, when you are trying to run Startup Repair, you might be stuck on a screen showing the message: your computer was unable to start. It always comes along with another message that says: Startup Repair is checking your system for problems.

Causes of the “Your Computer Was Unable to Start” Issue
Various factors may lead to the “your computer was unable to start Windows 10” issue. Here this post summarizes several possible reasons for this issue.
- The computer runs certain Windows updates improperly.
- System files get corrupted or missing.
- The Boot Configuration Data (BCD) is damaged.
- …
If you encounter the “Windows Startup Repair your computer was unable to start” issue, try the following methods to fix it.
MiniTool Partition Wizard DemoClick to Download100%Clean & Safe
Method 1: Enter Safe Mode
When your system won’t boot with the “Startup Repair is checking your system for problems” error message, you can try booting into Safe Mode. It’s a simple way to help find the cause of this annoying issue. You can enter Safe Mode via the given steps.
Step 1: Boot your Windows into Windows recovery mode (WinRE).
Step 2: Go to Troubleshoot > Advanced options > Startup Settings > Restart.
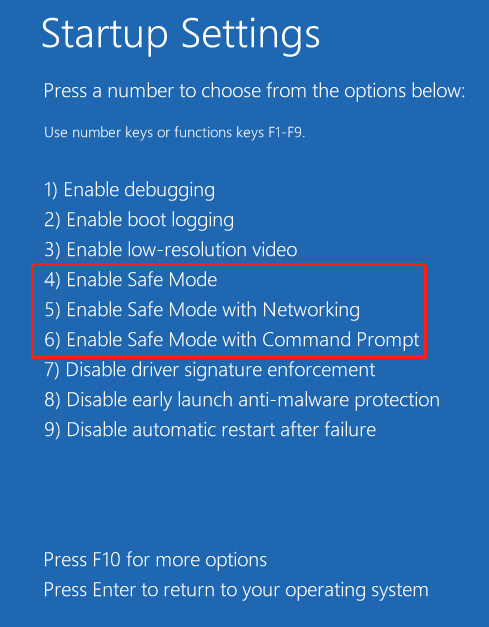
Step 3: After that, select Enable Safe Mode, Enable Safe Mode with Networking, or Enable Safe Mode with Command Prompt according to your preference.

Method 2: Repair System Files
The “your computer was unable to start Windows 10” issue may also show up due to corrupted or missing system files. In this case, you can try to fix it by running SFC and DISM scans. The following are details for this operation.
Step 1: Go to Troubleshoot > Advanced options > Command Prompt in WinRE.
Step 2: In the Command Prompt window, type sfc /scannow and press Enter.
Step 3: Wait until the process completes, restart your computer to see if it can boot up normally. If not, open Command Prompt in WinRE again.
Step 4: After that, run the DISM /Online /Cleanup-Image /RestoreHealth command.
Step 5: Once done, restart your PC to check if the error disappears.
Method 3: Rebuild BCD
If boot files get corrupted, you may fail to start your system with the “Windows Startup Repair your computer was unable to start” error as well. To fix it, we recommend you rebuild BCD. You need to execute the following commands via Command Prompt in WinRE.
- bootrec /fixmbr
- bootrec /fixboot
- bootrec /scanos
- bootrec /rebuildbcd
Method 4: Perform a System Restore
If you have create any system restore point before the “your computer was unable to start Windows 10” issue happens, you can try performing a system restore. By doing so, you can restore your system to an earlier well-running state.
Method 5: Reinstall Windows
The last but not least way to fix the “your computer was unable to start” issue is to reinstall your Windows. If possible, we’d like to recommend you use MiniTool Partition Wizard to directly migrate Windows 10 from another hard drive. It’s easy to operate and can save much time.
When facing the “your computer was unable to start” issue, you can try to fix it with the methods available in this post. If you have any problems with this issue, you can leave a message in the comment area below.

User Comments :