Are you bothered by the “XCOPY access denied” issue in your Windows 10/11? How can you fix it? In this post, MiniTool Partition Wizard provides several troubleshooting fixes that can help you solve the problem. You can have a try.
XCOPY, standing for extended copy, is a helpful tool that can be used to copy files or folders from one location to another location. However, sometimes when you use this command to copy files in Windows 10/11, you are likely to experience the “XCOPY access denied” issue. This issue can happen due to various reasons. Below we list some possible causes of this issue.
- You have no sufficient permissions to copy the specific files or folders.
- XCOPY is disabled on your PC.
- You want to copy the files from or to a different drive where you don’t have permission.
- There is something wrong with the files or folders to copy.
If you run into the “access denied XCOPY Windows 10/11” issue, you can try to fix it with the following methods.
MiniTool ShadowMaker TrialClick to Download100%Clean & Safe
Method 1: Enable XCOPY
When the “XCOPY access denied Windows 11/10” issue comes out, you should try enabling XCOPY first to see if it works. To do this, follow the steps below.
Step 1: Right-click the Start icon and then select Run.
Step 2: Type cmd in the Run dialog box and press Ctrl + Shift + Enter to open Command Prompt with administrative privileges.
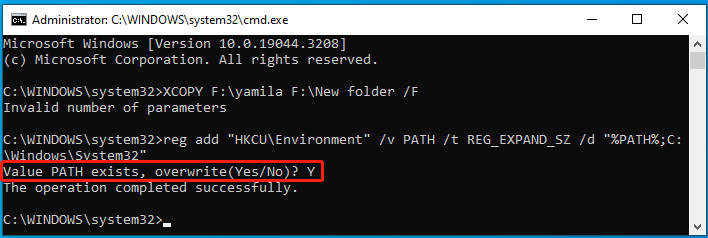
Step 3: In the elevated Command Prompt, type the following command and then press Enter to execute it.
reg add “HKCU\Environment” /v PATH /t REG_EXPAND_SZ /d “%PATH%;C:\Windows\System32”
Step 4: Input Y and press Enter to overwrite the value path.

Step 5: Once done, run the XCOPY command again to see if the “XCOPY access denied Windows 10/11” issue disappears.
Method 2: Take Ownership of the Target File or Folder
The “access denied XCOPY Windows 10” issue may also show up if you lack permission to copy the files or folders. In this case, you can try to fix it by taking ownership of the specific files or folders. Here’s a step-by-step guide on how to do this.
Step 1: Run Command Prompt as an administrator.
Step 2: To take ownership of the target file, type takeown /F [FilePath] in the Command Prompt and press Enter. You should replace [FilePath] with the right path of the problematic file.
Step 3: After that, type icacls [FilePath] /grant [Username]:F and press Enter to grant your user account full control permission for the specific file. Don’t forget to replace [Username] with your username.
Step 4: Once the operation completes, try using XCOPY to copy the file again to check if the error is solved.
Method 3: Use the T or Y Parameters
Another way you can try to solve the “XCOPY access denied Windows 11” issue is to use the T or Y parameters of XCOPY. The To execute this operation, you simply need to type the XCOPY [source destination] /T (or /Y) command in the elevated Command Prompt and press Enter. [source destination] represents the source or destination path of the file to copy.
Further reading:
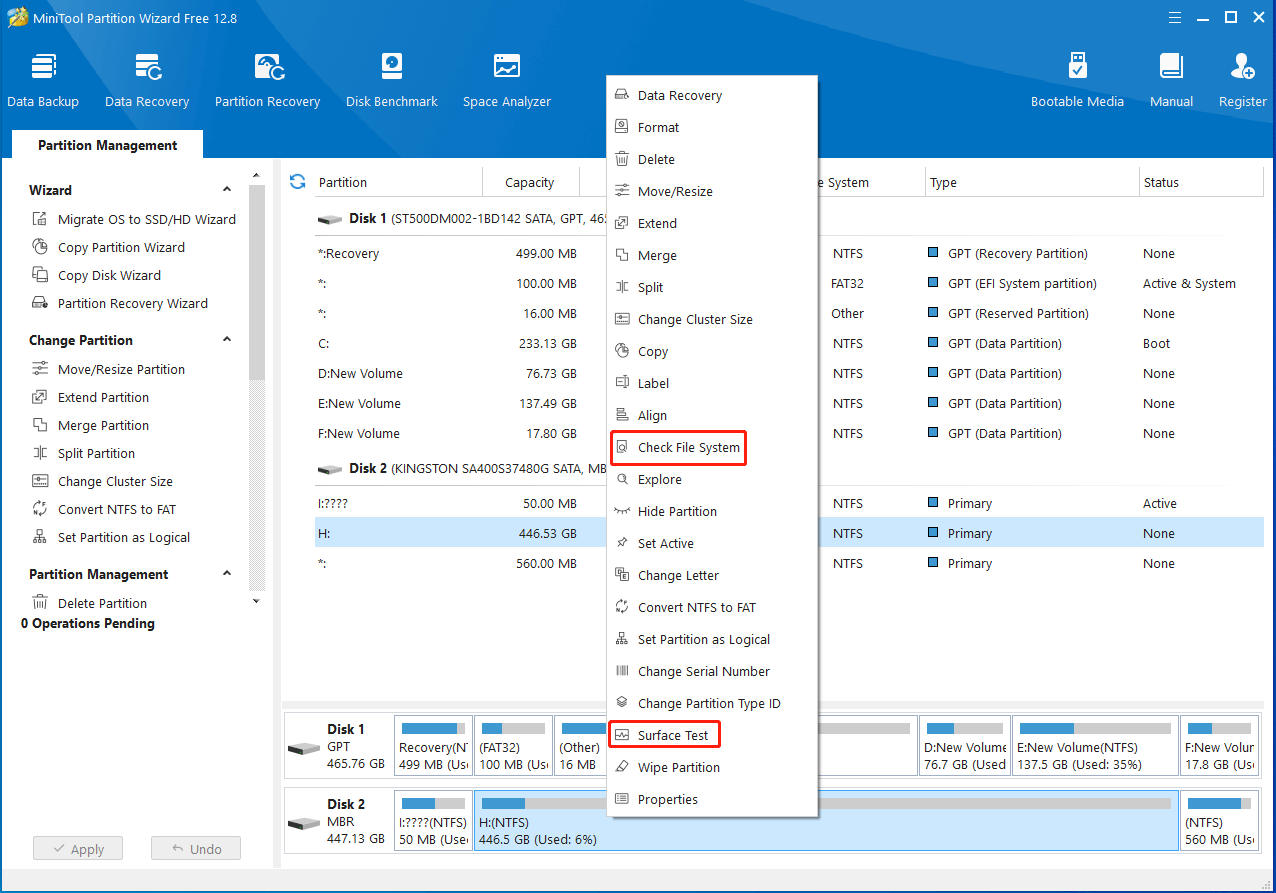
In some cases, bad sectors on the hard drive may result in the “XCOPY access denied Windows 10” issue as well. As for this, we recommend you run the chkdsk *: /r command to check for bad sectors and recover the readable information from the bad sectors. You should replace * with your drive letter.
If you don’t want to use command lines, you should turn to a third-party disk check tool. Here, MiniTool Partition Wizard is highly recommended. This free disk partition software allows you to check your disk for errors with ease. Besides, it also enables you to partition hard drive, clone hard drive, format USB to FAT32, and more.
MiniTool Partition Wizard FreeClick to Download100%Clean & Safe

When facing the “XCOPY access denied” issue in Windows 10/11, try to fix it with the above methods. If you have any problems with this issue, you can leave a message in our comment part below.

User Comments :