Why Wipe Hard Drives from BIOS
Generally speaking, you can erase data by formatting or wiping a hard drive while running the computer. However, if you are trying to wipe a system drive, you need to wipe it from BIOS because it can’t be done while the drive is in use.
BIOS is located on an erasable, programmable, read-only chip. It can be used to check if hardware items including the central processing unit, dedicated graphics card, as well as random access memory and hard drives are operational on startup.
You are also required to wipe or erase a hard drive from BIOS when you are going to reinstall Windows or clean install Windows on the device. To do so, you are required to format the system partition but this can’t be conducted within Windows.
You still have to wipe the hard disk in BIOS. Before starting the process, you’d better back up the data if there’s any important. Otherwise, you will experience data loss.
#1. Wipe Hard Drive from BIOS via an Installation Disc
Wipe or erase a hard drive from BIOS by following the steps below.
Step 1: Plug an installation disc into your computer.
Step 2: Enter the BIOS setup window.
If your computer runs normally, enter BIOS by using these steps.
- Power off your computer by clicking on the Windows icon > Power icon > Shut
- Power on the device.
- While the PC is starting up, keep pressing F2 or other available BIOS keys to enter the BIOS of your computer.
If your computer can’t boot properly, turn on and turn off it several times until you enter the BIOS.
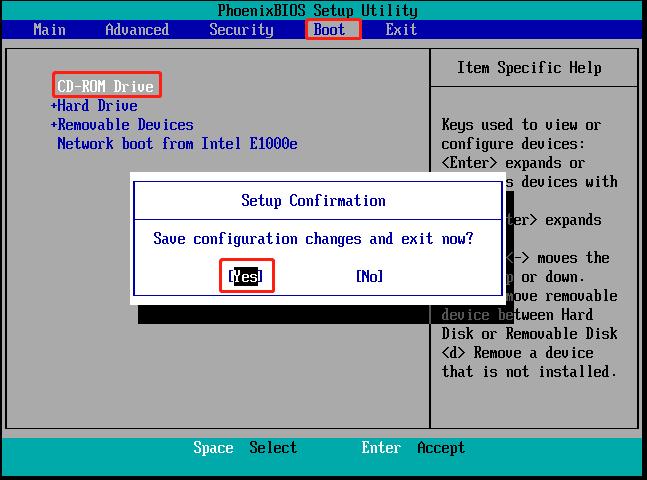
Step 3: Navigate to the Boot tab by using the arrow keys on the keyboard. Then press “+” key to move CD-ROM Drive to the first boot option. After that, press F10 and Enter keys to save the changes.
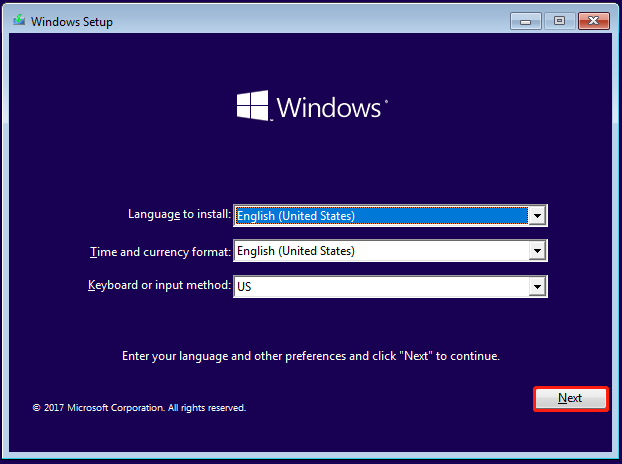
Step 4: Then you will be prompted with the installation screen as shown in the picture below. Click Next to move on.
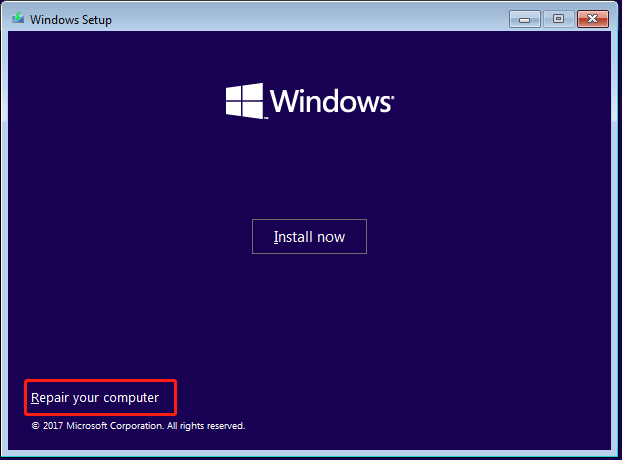
Step 5: Tap Repair your computer.
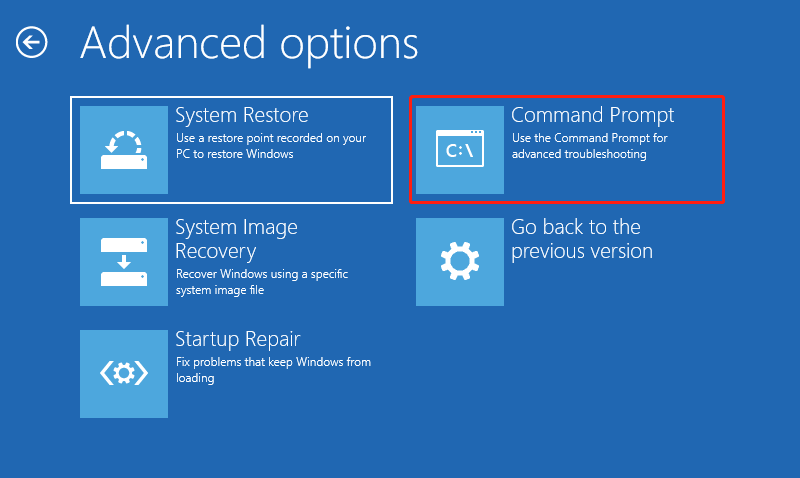
Step 6: Click Troubleshoot > Command Prompt.
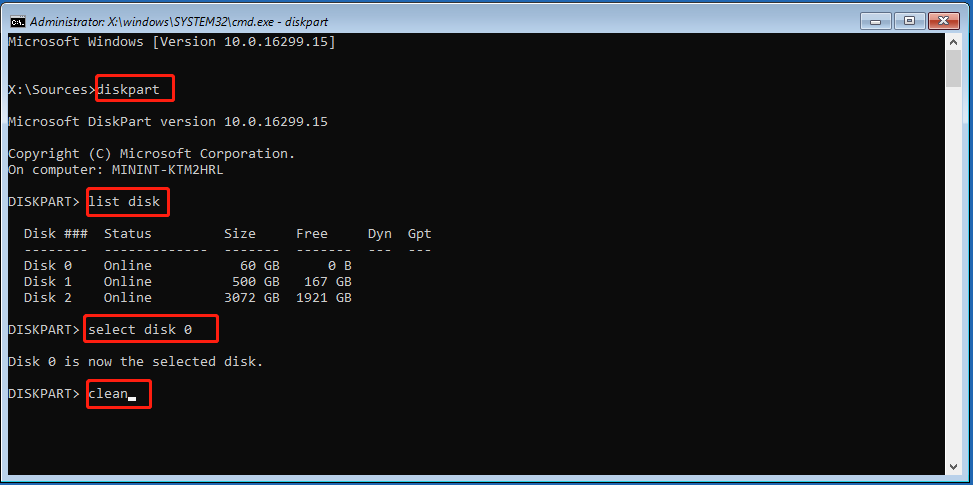
Step 7: In the elevated window, type the following commands and hit Enter after each.
- diskpart
- list disk
- select disk 0 (You can replace 0 with the number that stands for the disk to wipe.)
- clean
#2. Wipe or Erase a Hard Drive from BIOS via Third-Party Software
When your computer is unbootable, you need to boot with a bootable media. Well, you can create bootable a CD/DVD/USB by using MiniTool Partition Wizard and then boot your PC with the bootable media. After that, follow these steps to wipe or erase a hard drive from BIOS.
The tutorial below shows you all the steps. Simply follow them to complete the operation.
Step 1: Download and install MiniTool Partition Wizard on another properly running computer.
MiniTool Partition Wizard DemoClick to Download100%Clean & Safe
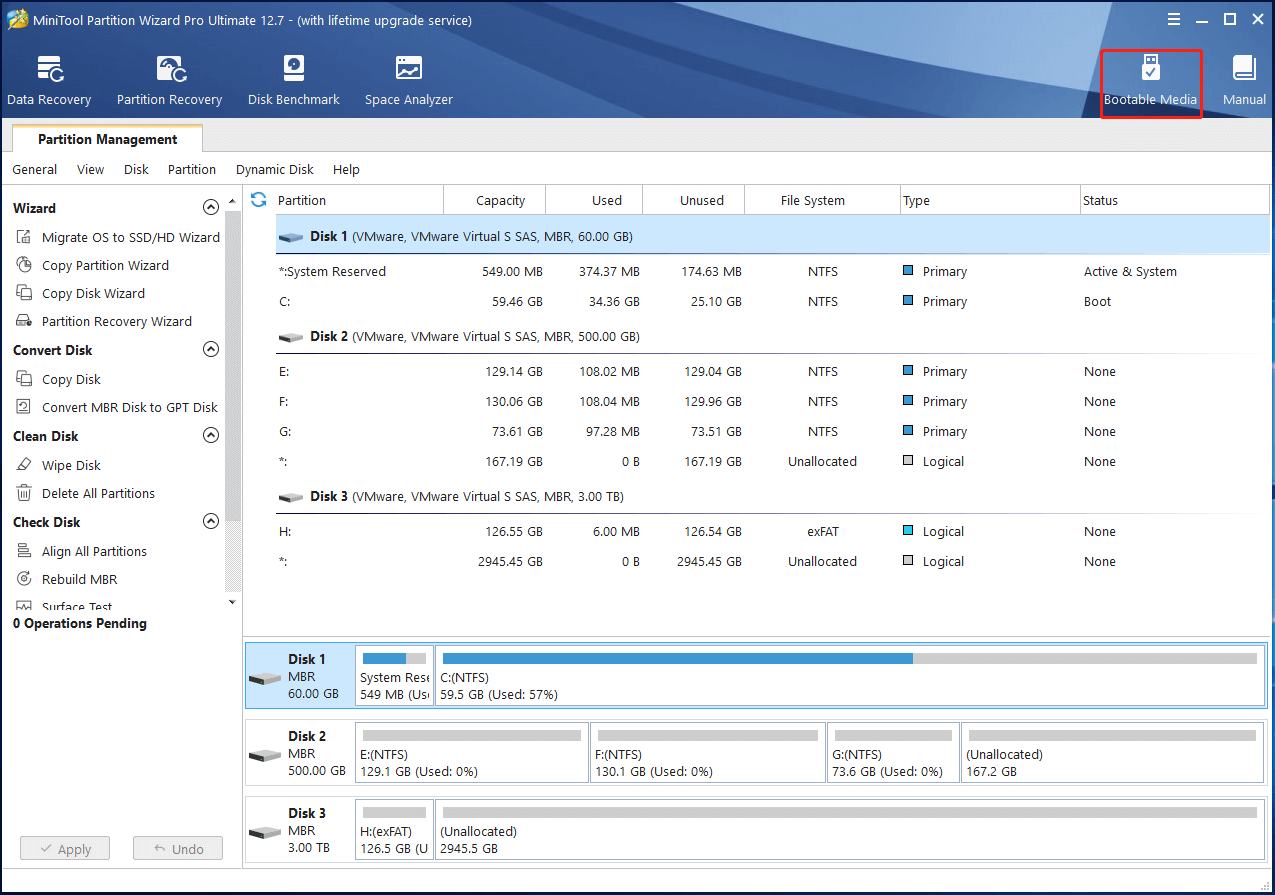
Step 2: Launch the software to enter its main interface. Then click Boot Media at the upper right corner of the program.
Plug a blank USB flash drive into this computer to hold the ISO file.
Step 3: In the prompted window, click Options to continue.
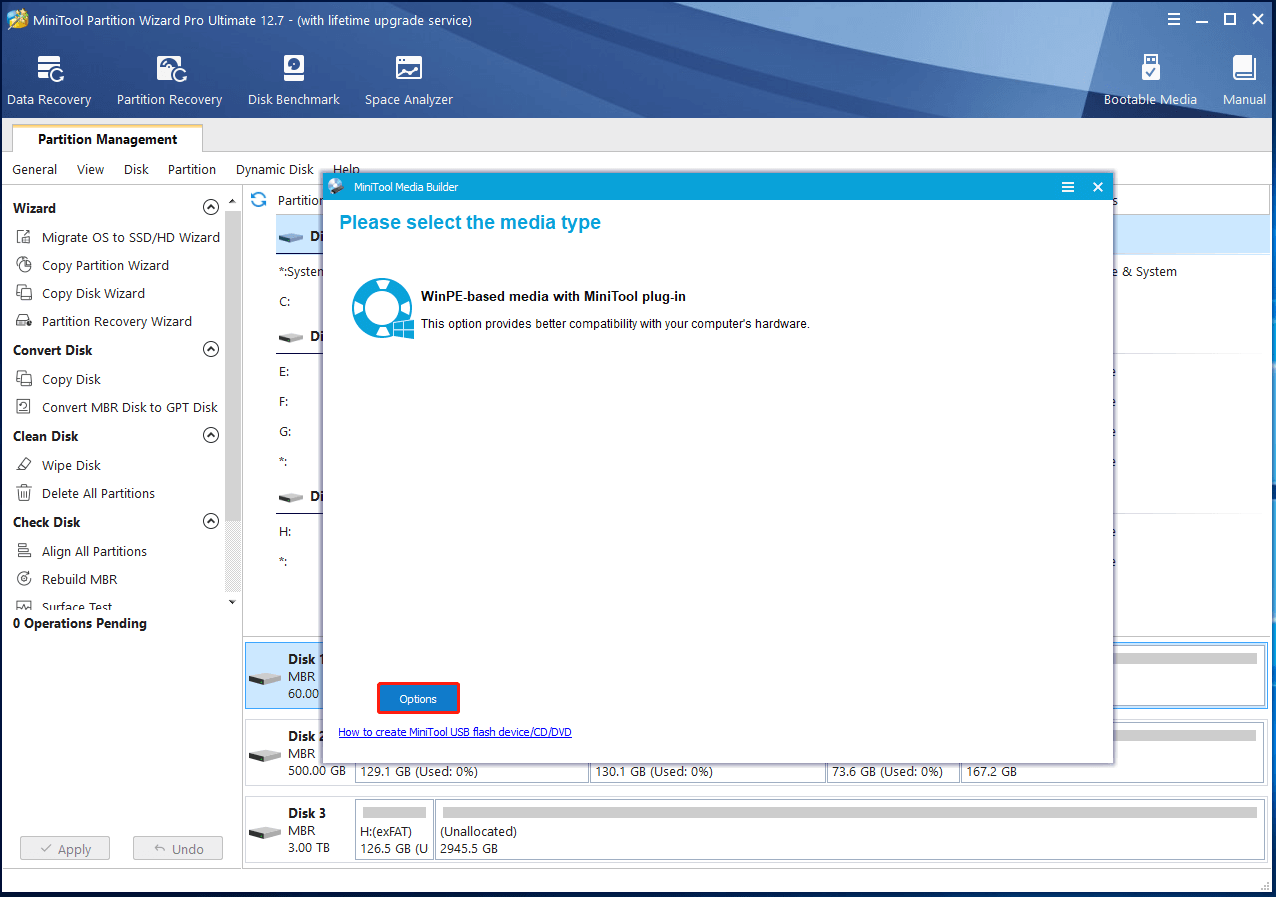
Step 4: Follow the on-screen instructions to download the ISO file to a USB drive. This will make your USB drive bootable.
Step 5: Once the process ends, click Finish to exit the operation. Then plug the bootable USB drive into your faulty computer.
Step 6: Boot the computer repeatedly to enter the BIOS page. Choose the plugged USB as the boot option and save the changes.
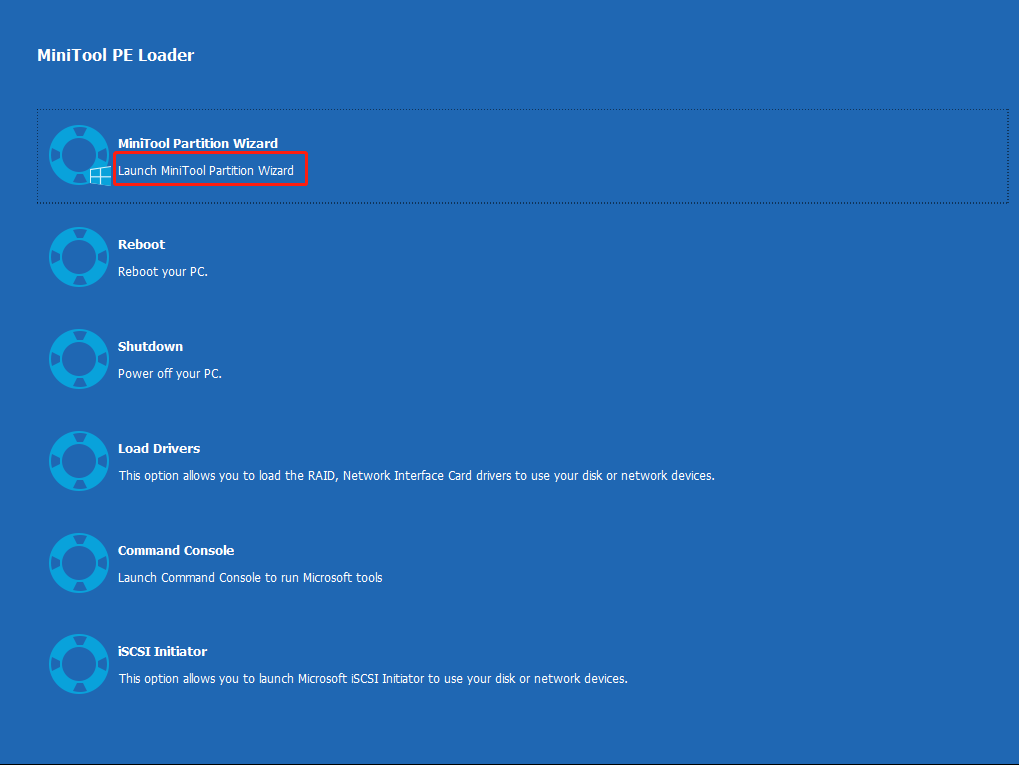
Step 7: Navigate to the page below step by step and then click Launch MiniTool Partition Wizard.
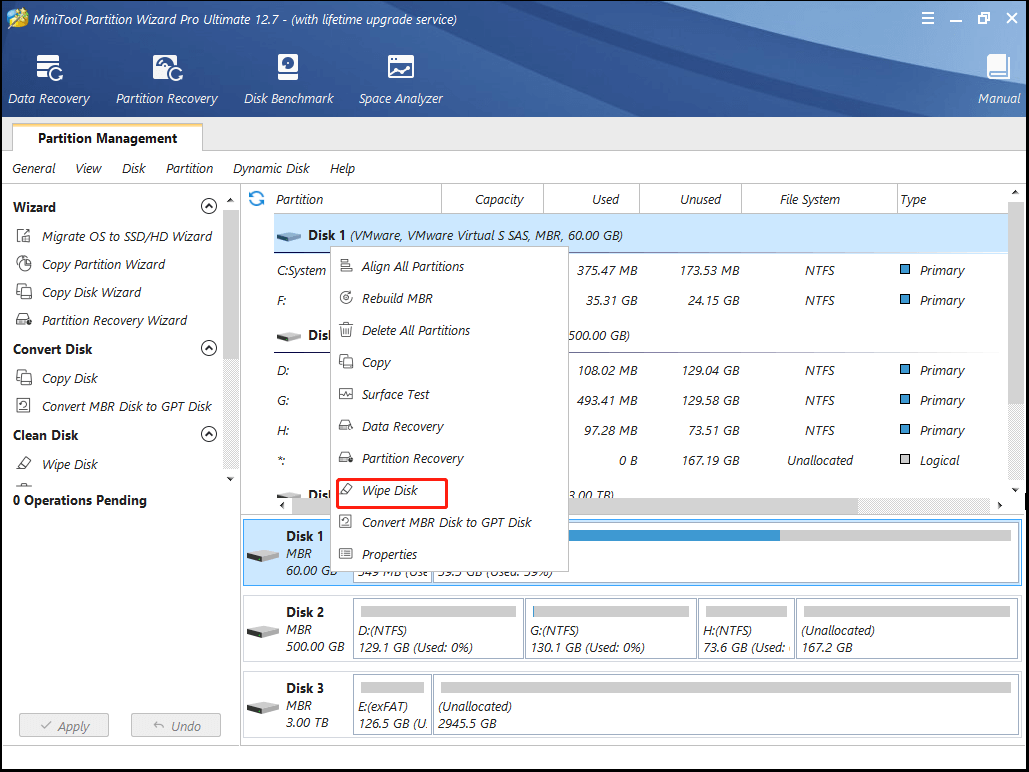
Step 8: After enter the home menu of the program, right-click on the target disk and click Wipe Disk.
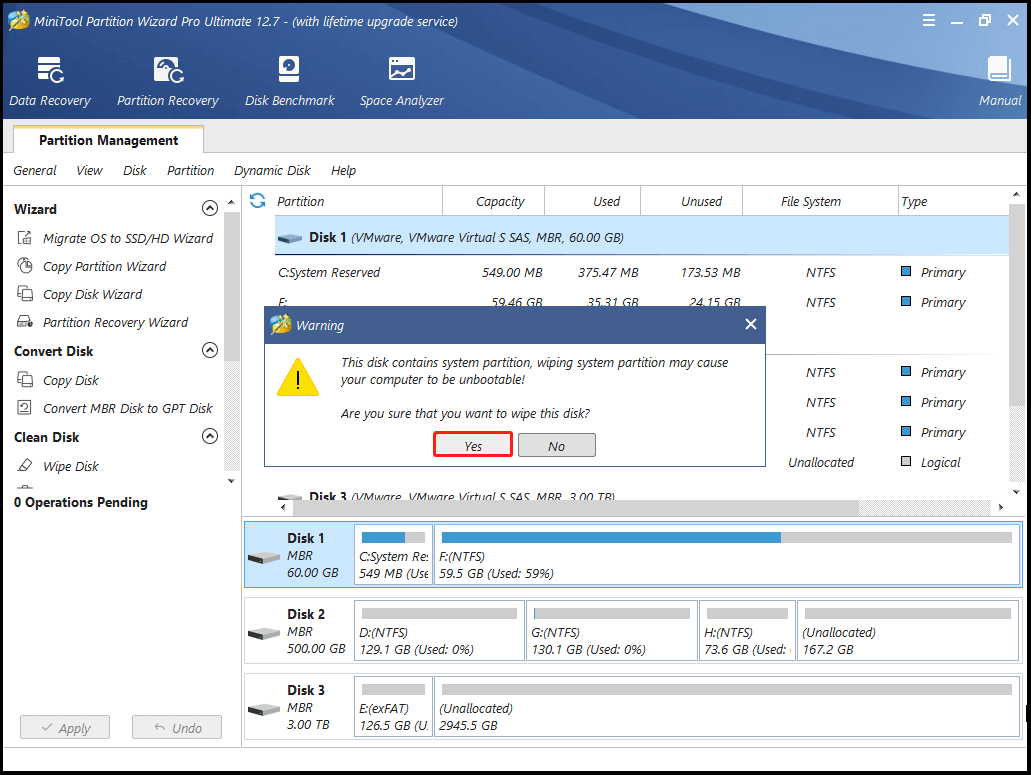
Step 9: The prompted warning window will tell you what does this operation do. If you still decide to do it, click Yes to confirm the operation.
As the system disk contains system partition, wiping it will cause your computer to be unbootable. You need to think twice before proceeding on.
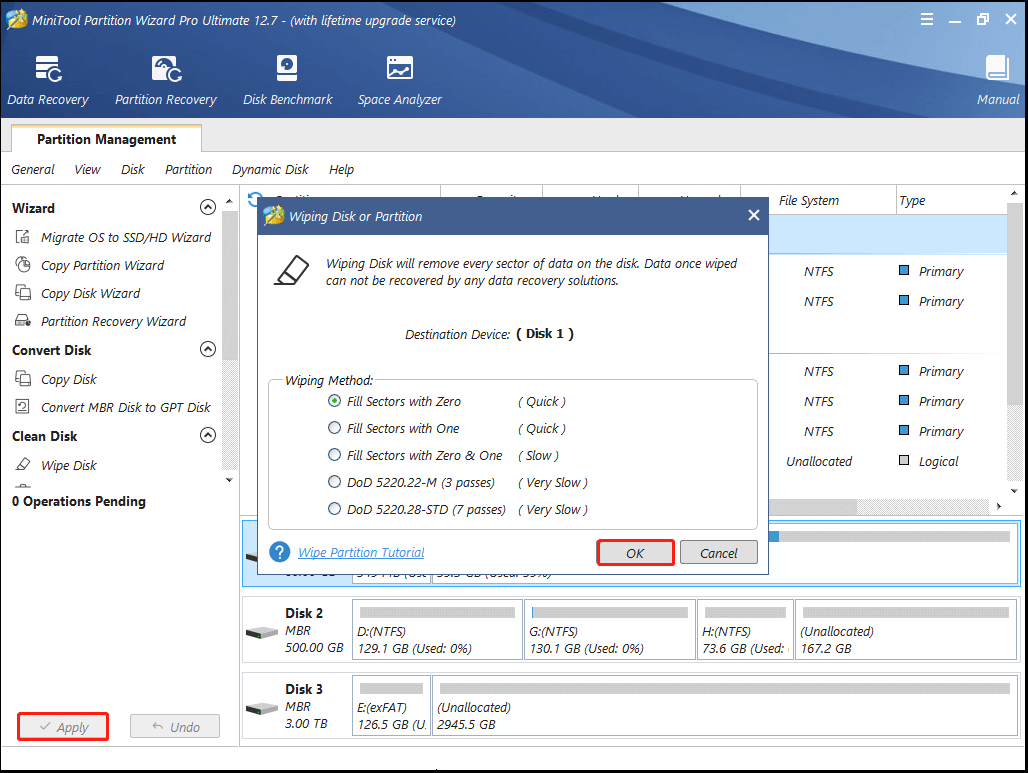
Step 10: Choose a wiping method and click OK to save changes.
Step 11: Finally, tap Apply to execute the pending operation.
How to wipe or erase a hard drive from BIOS? If you are looking for the answer, this post is what you need. It offers you two available methods.

![Format Floppy Disks: Why and How to Do That [Full Guide]](https://images.minitool.com/partitionwizard.com/images/uploads/2023/05/format-floppy-disk-thumbnail.jpg)
User Comments :