What to do if Windows can’t check the disk while it’s in use? Here, MiniTool Partition Wizard summarizes several methods to troubleshoot this issue. You can try them one by one until the error is solved.
Solution 1: Run CHKDK After a Reboot
Running CHKDSK after rebooting the PC is an available solution to “CHKDSK cannot run because the volume is in use by another process”. You can run CHKDSK after a boot simply by following these steps.
Step 1: Open the Run window by pressing Windows and R keys.
Step 2: Type cmd in the Run window and press Ctrl + Shift + Enter keys at the same time to run Command Prompt as administrator.
Step 3: In the pop-up Command Prompt window, type chkdsk C:/r/x and hit the Enter key.
Step 4: Then the message “CHKDSK cannot run because the volume is in use by another process” will appear on the screen. Input Y and press the Enter key to confirm the operation.
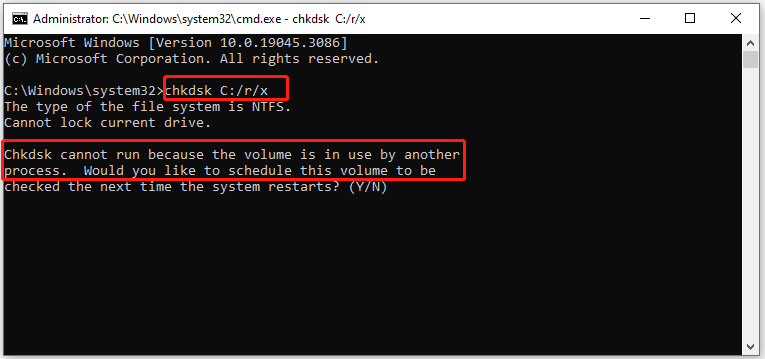
Step 5: Restart your computer and then the Check Disk utility will scan the system drive normally.
If Windows always check your C drive while booting, please refer to this tutorial to fix it: How to Stop Checking File System on C? Here’re Some Methods
Solution 2: Run CHKDSK in Pre-Boot Environment
To avoid the “Windows can’t check the disk while it’s in use” issue, try running CHKDSK in pre-boot environment via the steps below.
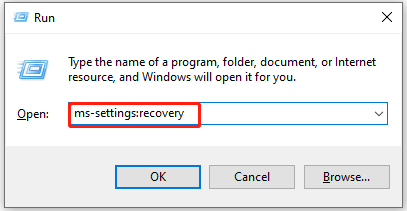
Step 1: Open the Run window. Then type ms-settings:recovery in it and click OK.
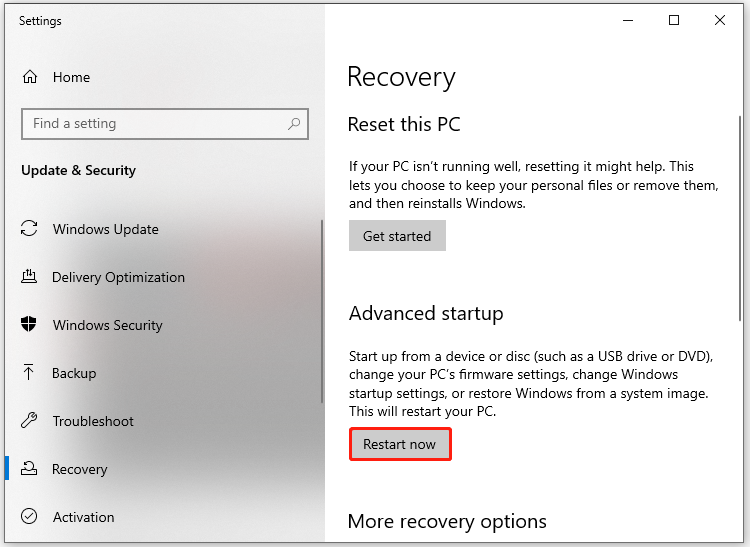
Step 2: In the pop-up window, click the Restart now button.
Step 3: Then click Troubleshoot > Advanced options > Command Prompt in the prompted screen.
Step 4: Choose the account that you would like to proceed with and then type the password for it. After that, click Continue.
Step 5: Once the Command Prompt window opens, type chkdsk C:/r/x and hit the Enter key on the keyboard to execute the command.
Step 6: After the process ends, close the window.
Solution 3: Perform a Clean Boot
In a clean boot state, all unnecessary programs won’t run. Then you may get rid of the “CHKDSK cannot run because the volume is in use by another process” error. The following steps tell you how to perform a clean boot.
Step 1: Open the Run window, type msconfig, and click OK.
Step 2: Move to the Services tab of the System Configuration window, check the “Hide all Microsoft services” option and click Disable all.
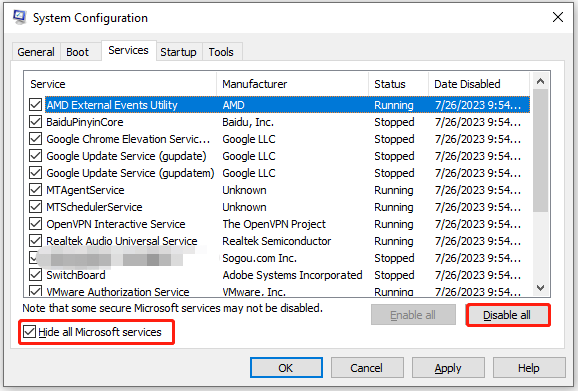
Step 3: Navigate to the Startup tab and click the Open Task Manager link.
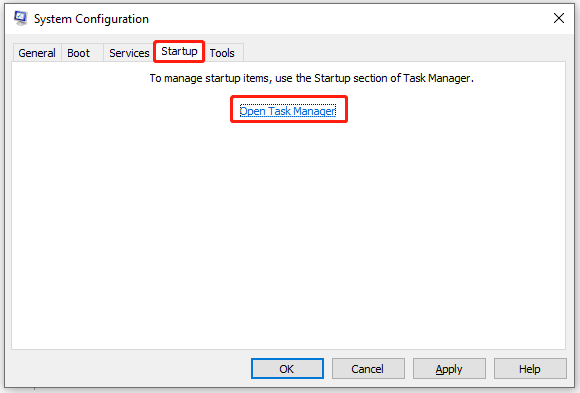
Step 4: In the Task Manager window, right-click on the unnecessary startup program and click the Disable option. Repeat this operation until all the unexpected programs are closed.
Step 5: Restart your computer to check if Windows can check the disk smoothly.
Solution 4: Use MiniTool Partition Wizard to Check Disk
In addition to the CHKDSK utility, MiniTool Partition Wizard also allows you to check hard drives for errors. Then you won’t receive the “Windows can’t check the disk while it’s in use” error. With this free partition manager, you can find if there are bad sectors and file system errors on the disk.
Get this partition software installed on your computer. Then follow the given steps to scan your hard drive.
MiniTool Partition Wizard FreeClick to Download100%Clean & Safe
Step 1: Launch MiniTool Partition Wizard to access its main interface.
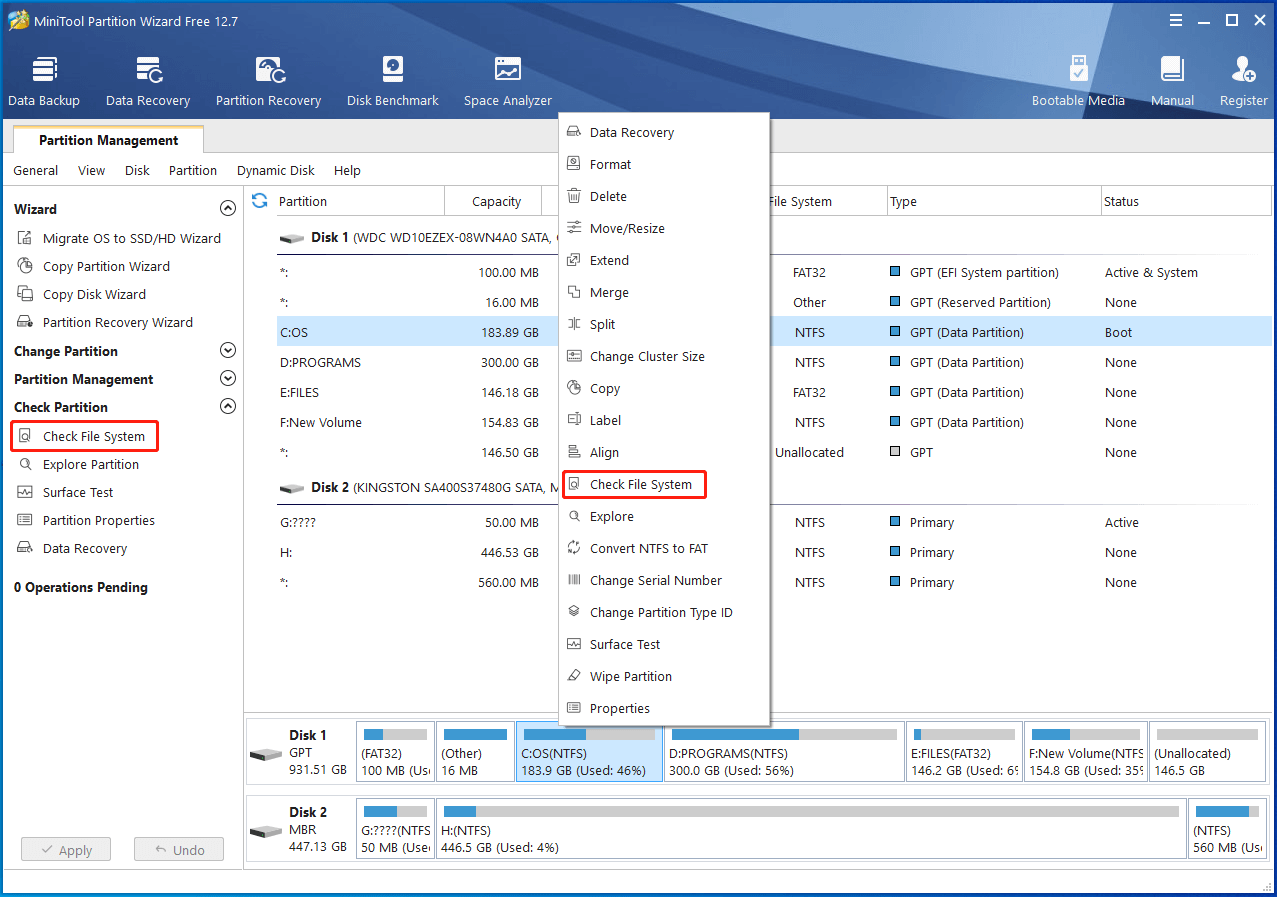
Step 2: Highlight the target partition or disk and tap Check File System in the left panel. Alternatively, right-click on the target partition and click Check File System.
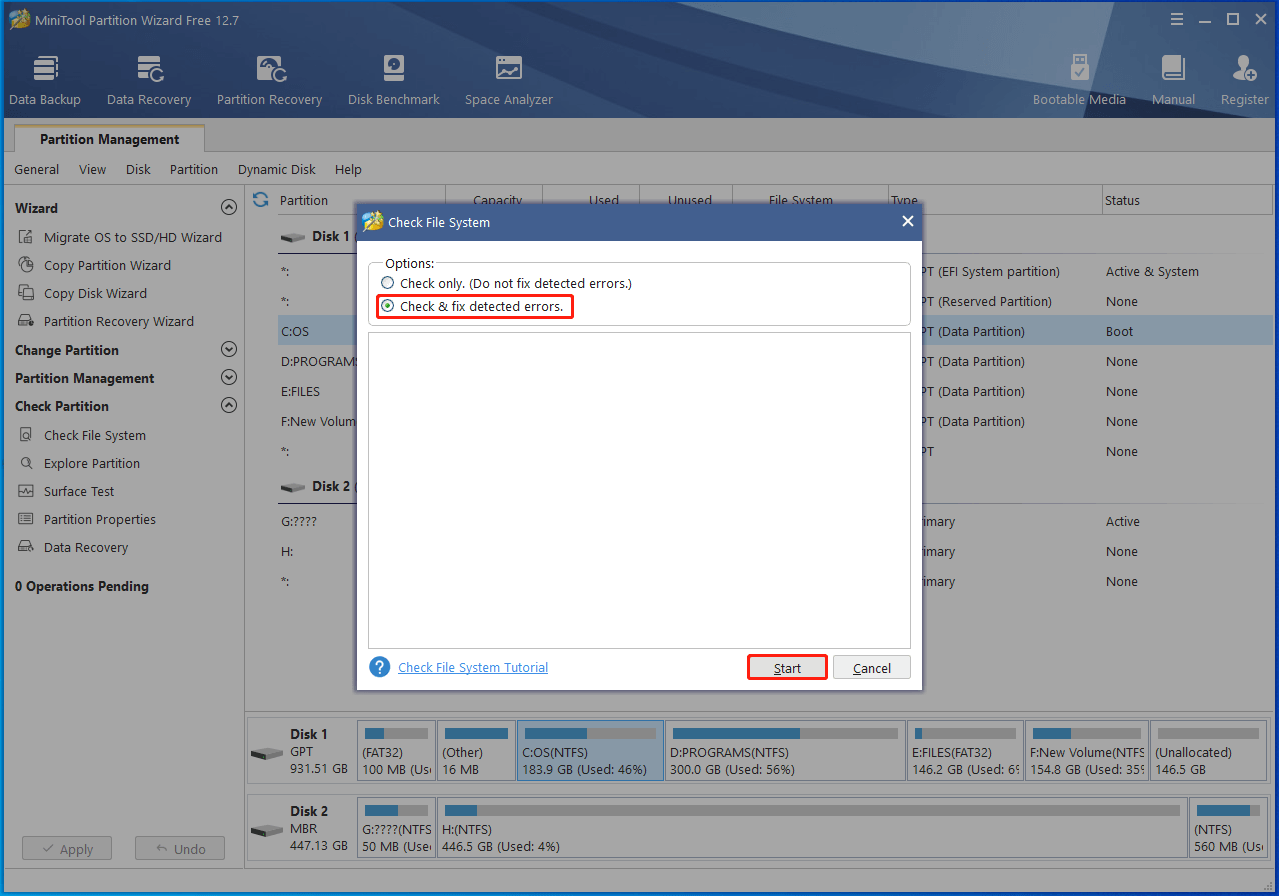
Step 3: In the next window, check the “Check & fix detected errors” option and click Start. Then wait for the finish of the process.
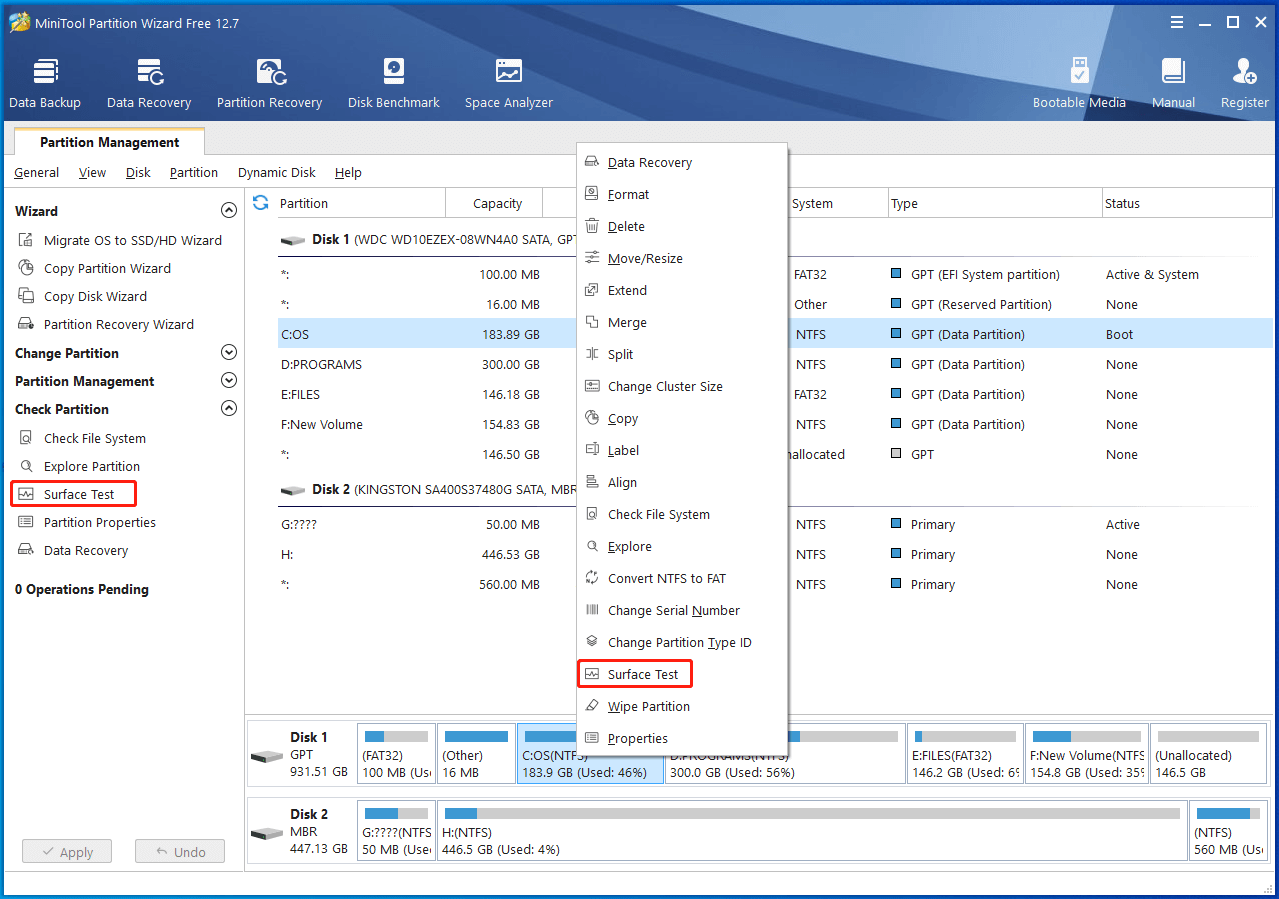
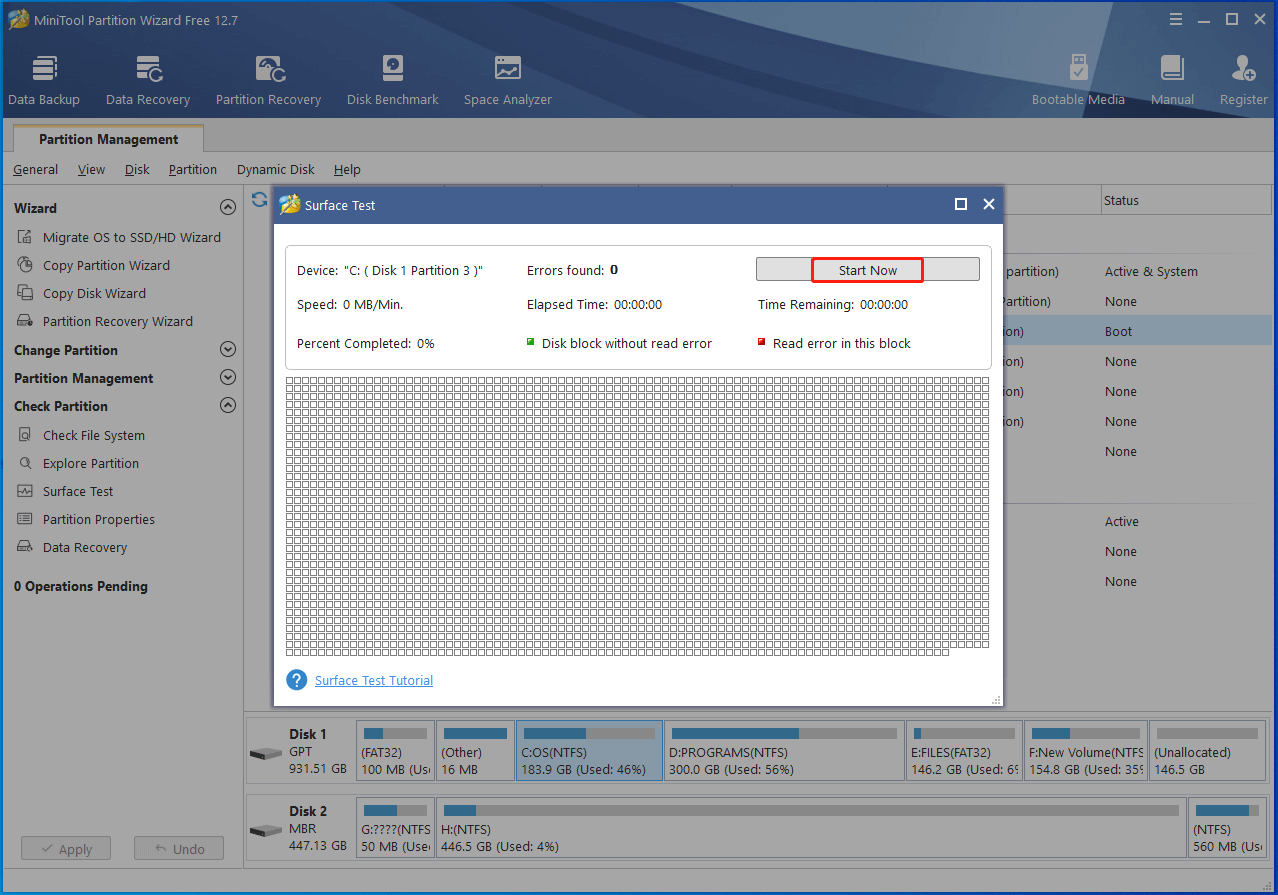
Step 4: To perform a surface test, right-click on the target drive and click the Surface Test option.
Step 5: In the next window, click the Start Now button to begin the process. After the scan process completes, check if there are blocks marked with red color in the scan area. If your drive has bad sector, refer to this bad sector repair guide to remove them.
Windows can’t check disk while it’s in use? This post collects 4 troubleshooting methods. Try them now!

User Comments :