A lot of users encountered the error code 0x80070003 - 0x40008 when upgrading/installing Windows 11. How do you fix the Windows 11 install error 0x80070003 - 0x40008? Now, let’s dive into the troubleshooting methods together with Partition Magic.
After investigating relevant user reports, I found that the Windows 11 install error 0x80070003 – 0x40008 often occurs when setting up Windows 11 with Windows 11 Installation Assistant. The main reason for the error is related to a misconfigured or missing EFI partition or some unknown factors.
Thus, I recommend you check your EFI partition first and try the following solutions. To do that, press the Win + X keys and select Disk Management from the context menu, then see if the EFI partition is in a normal state.
Solution 1. Restore the EFI Partition
As discussed above, the “Windows 11 Setup has encountered a critical error 0x80070003 – 0x40008” can be caused by a corrupted or missing EFI partition. If you find the partition is missing, you can try restoring it using an expertized data recovery tool – MiniTool Partition Wizard.
The MiniTool program can help you recover data from different types of partitions, such as RAM, unallocated, system reserved, NTFS/FAT/exFAT partitions, and so on. Here’s how to recover the EFI partition using the tool.
MiniTool Partition Wizard DemoClick to Download100%Clean & Safe
Step 1. If your computer cannot boot due to the Windows 11 upgrade error 0x80070003 – 0x40008, don’t worry. You can create a bootable CD/DVD/USB drive using MiniTool Bootable Media Builder, which can boot your computer into the WinPE.
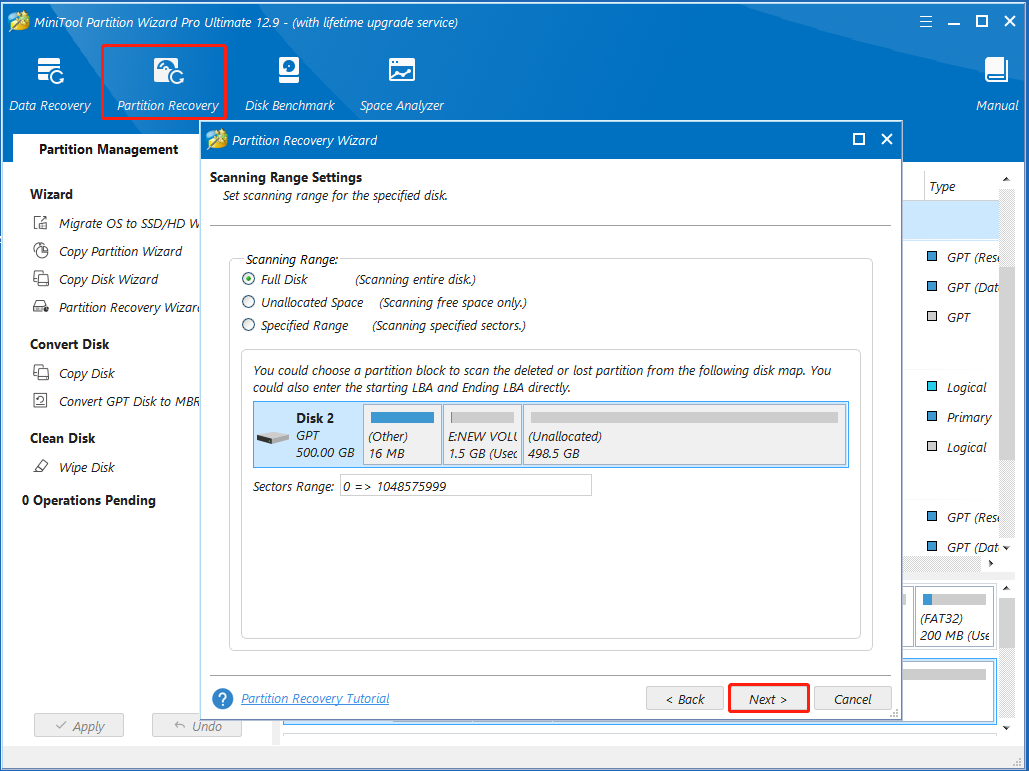
Step 2. In the main interface, select Partition Recovery from the top menu and click on Next.
Step 3. Select the disk in which the lost EFI partition is located and click on Next if you have multiple disks on the computer.
Step 4. Select the Scanning Range and click Next to continue. Here I select Full Disk.
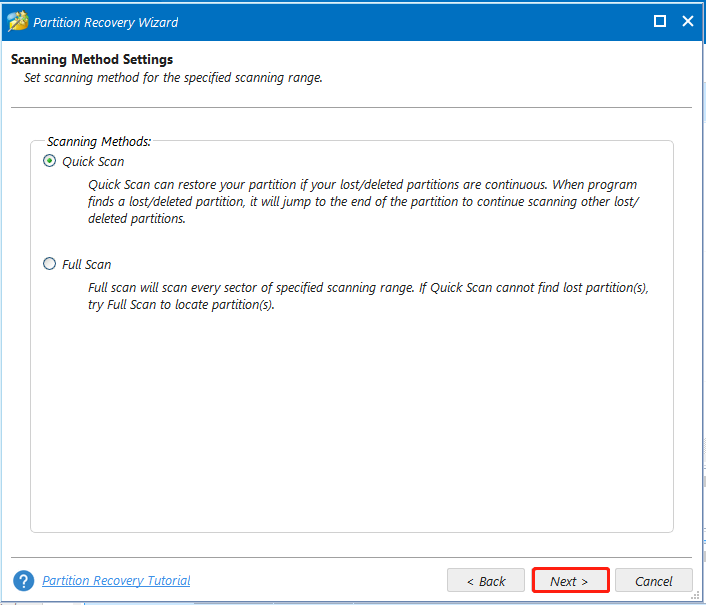
Step 5. Select the Scanning Methods based on your preferences and click Next.
Step 6. Once scanned, tick all checkboxes of partitions and click on Finish. Then click Apply to execute the operation.
Now, you can reboot your computer to update again and see if the Windows 11 upgrade error 0x80070003 – 0x40008 disappears.
Solution 2. Recreate the EFI Partition
If the above method can’t fix Windows 11 install error 0x80070003 – 0x40008, you can try creating the EFI partition. This has been proven by some users to be helpful. Let’s follow the guide below:
Step 1. Press the Win + R keys to open the Run dialog box, and then type cmd in it and press Ctrl + Shift + Enter keys together to open the elevated Command Prompt window.
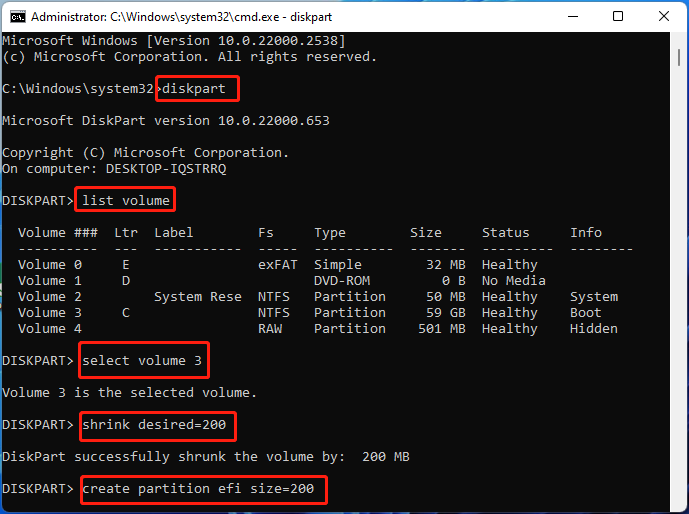
Step 2. In the elevated Command Prompt window, type the following commands in order and press Enter after each one. After that, you also can resize the EFI partition if needed.
- diskpart
- list volume
- select volume n (replace n with the volume number you want to shrink)
- shrink desired=200 (shrink the partition by MB)
- create partition efi size=200
- format fs=fat32 quick
- exit (exit diskpart)
- bcdboot X:\windows /s Y: (replace X with the drive letter of the Windows OS partition)
Once done, you can update again and see if the Windows 11 install error 0x80070003 – 0x40008 gets solved.
Solution 3. Run a Startup Repair
In addition, you can try repairing your computer to fix the “Windows 11 Setup has encountered a critical error 0x80070003 – 0x40008”. If you have a Windows installation media, this method can help you.
Step 1. Insert the Windows installation disc into your computer and restart it from the disc. Then press any key to boot from the media.
Step 2. Follow the on-screen prompts to go on until you arrive at the Install Now screen. Click on Repair Your Computer to access the Advanced Settings menu.
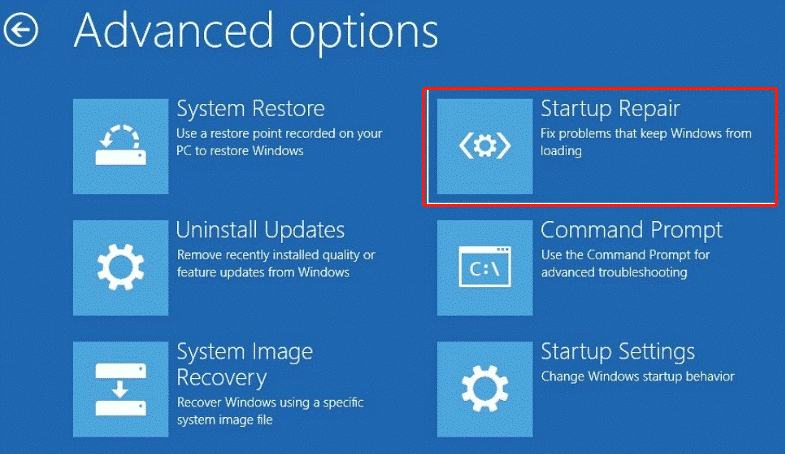
Step 3. Select Troubleshoot, access Advanced Options, and click Startup Repair. Then your computer system will be repaired automatically. Wait for the repair to finish and reboot your computer to see if the error code 0x80070003 – 0x40008 is away.
Solution 4. Use an Alternative Way to Upgrade Windows 11
As mentioned above, the Windows 11 setup error 0x80070003 – 0x40008 mainly occurs when using the Windows 11 Installation Assistant tool. If this scenario also applies to you, try an alternative method to install/update Windows 11. You can directly download the Win11 ISO file and burn it using Windows Media Creation Tool or Rufus, and install it on your computer.
To Sum Up
Now, here comes the end of the post. It introduces 4 feasible solutions for the Windows 11 setup error 0x80070003 – 0x40008. If these methods helped you get rid of the error, you can share this post in your community to help others.
About The Author

Position: Columnist
Ariel has been working as a highly professional computer-relevant technology editor at MiniTool for many years. She has a strong passion for researching all knowledge related to the computer's disk, partition, and Windows OS. Up till now, she has finished thousands of articles covering a broad range of topics and helped lots of users fix various problems. She focuses on the fields of disk management, OS backup, and PDF editing and provides her readers with insightful and informative content.
User Comments :