A lot of users reported that Windows 11 can't install from USB. Why can't install Windows 11 from USB? How to fix the problem? If you are also trying to figure them out, this post from MiniTool Partition Wizard is worth reading.
As the latest version of the Windows operating system, Windows 11 has attracted a large number of users to install. However, Windows 11 installation is not always smooth and may be stuck on various issues, such as “Windows 11 installation takes forever”, “Windows 11 installation failed”, and “Windows 11 can’t install from USB”.
Unable to install Windows 11 from USB. I wanted to reinstall Windows 11 as a clean installation. I am having several issues. I restart once I create the installation media using the USB flash and I restart and set the USB flash as first to boot. When I get into install it says 'can't find signed drivers' or load signed drivers.https://answers.microsoft.com/en-us/windows/forum/all/clean-installation-of-windows-11-via-usb-flash/254962f3-53d7-4dc3-8461-1d40c94c15b3
Why Can’t Install Windows 11 from USB
A lot of users choose a USB drive to reinstall or clean install Windows 11. However, many of them reported that they were unable to install Windows 11 from USB. Why can’t install Windows 11 from USB? After analyzing extensive user reports and references, we found the problem can be caused by the following several factors:
- The USB drive is not bootable
- The USB drive is not compatible with Windows 11
- Outdated USB drivers of your computer
- The USB drive gets failing
- Insufficient free space on the system drive
- Improper UEFI firmware settings
How to Fix Windows 11 Can’t Install from USB
How to fix Windows 11 won’t install from USB? Here are 9 effective troubleshooting methods. Let’s try them one by one until the problem gets solved.
# 1. Switch to a Different USB Port
First of all, you’d better make sure the USB port is working properly on Windows 11. To check that, try inserting the USB to another port and install Windows 11 to see if the problem gets solved. If not, proceed with the following methods.
# 2. Check If the USB Is Bootable
Another important thing is to confirm if the USB is bootable for Windows 11. If not, you will be unable to install Windows 11 from USB. Here’s how to check that:
Step 1. Click the Start button in the taskbar and select the Power icon.
Step 2. Press and hold the Shift key and click Restart.
Step 3. Then your computer will restart and boot into the Advanced Startup Options menu. Click Use a device and select the target USB drive and see if your PC can boot from it.
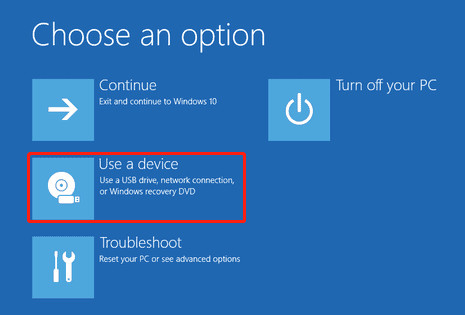
If your PC can boot from the USB successfully, then it indicates that the “Windows 11 won’t install from USB” issue can be caused by other reasons.
# 3. Free up Your Drive to Install Windows 11
As you know, Windows 11 requires your system drive to have at least 64GB of free space and USB to have more than 20GB of free space. If not, you will be unable to install Windows 11 via USB flash drive. In this case, you need to free up your drive. You can delete all unnecessary files and uninstall some apps.
However, if you don’t want to delete anything on your storage drive, you can extend the system partition using a professional partition manager like MiniTool Partition Wizard. This partition software can extend/resize partitions easily on Windows 10/11. Besides, it can analyze your disk space, convert NTFS to FAT32 without data loss, recover lost data, migrate OS to SSD, and more.
MiniTool Partition Wizard DemoClick to Download100%Clean & Safe
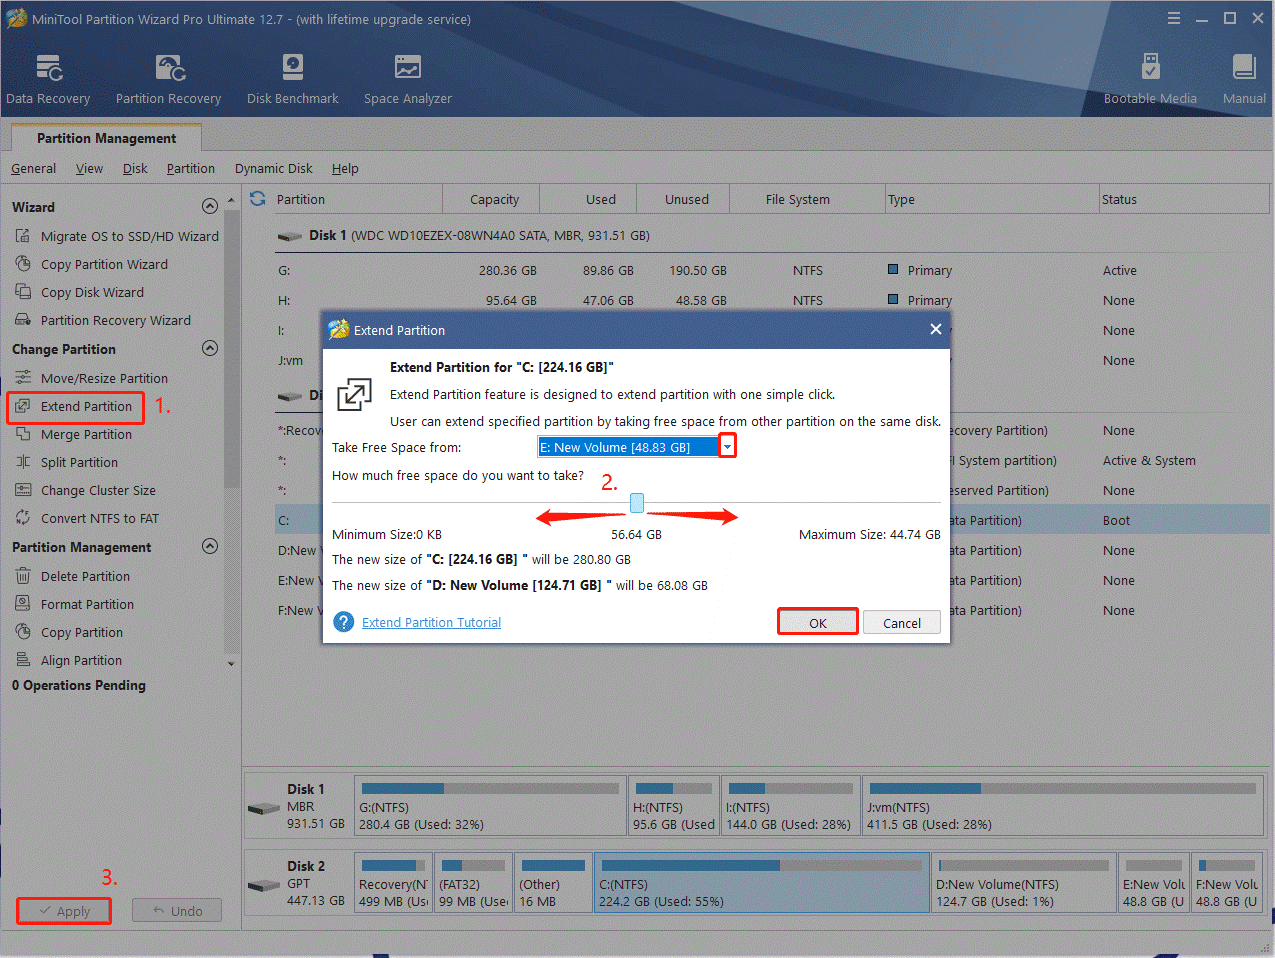
Step 1. Run MiniTool Partition Wizard to enter its main interface, select the system or C partition where the Windows updates are stored, and click on Extend Partition from the left pane.
Step 2. Select the drive that you want to take free space from the drop-down menu, and then drag the slider bar to occupy the free space. Then click on OK.
Step 3. Click on Apply to execute the process.
Once done, you can reinstall and see if you are still unable to install Windows 11 via USB.
# 4. Check If the USB Gets Corrupted
If the USB drive is too old, then it can get corrupted and cause Windows 11 unable to install from USB. So, we recommend you perform a check for the USB using CHKDSK.
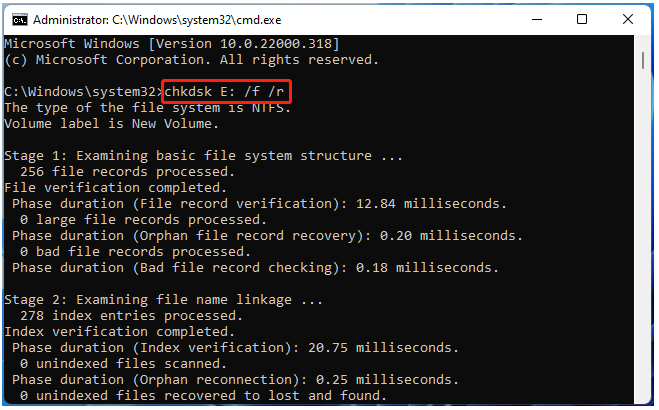
Step 1. Type cmd in the Windows Search bar, right-click the Command Prompt app and select Run as administrator. Then click on Yes in the UAC window to confirm it.
Step 2. In the pop-up window, type the following command and press Enter. Here make sure to replace E with the drive letter of your USB. After the errors are repaired, you can try installing Windows 11 from the USB and see if it works.
# 5. Update the USB Driver
Sometimes an outdated USB driver is also responsible for Windows 11 can’t install from USB. In this case, you’d better update the USB driver on your computer.
Step 1. Press Win + X keys and select Device Manager from the context menu.
Step 2. Expand the Universal Serial Bus Controllers category, and then right-click the affected USB driver and select Update driver.
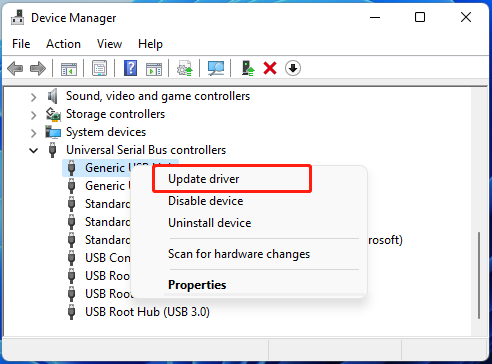
Step 3. In the pop-up window, you will have 2 choices to update the USB controller driver. You can update it automatically or manually based on your preference. Then follow the on-screen prompts to complete this update.
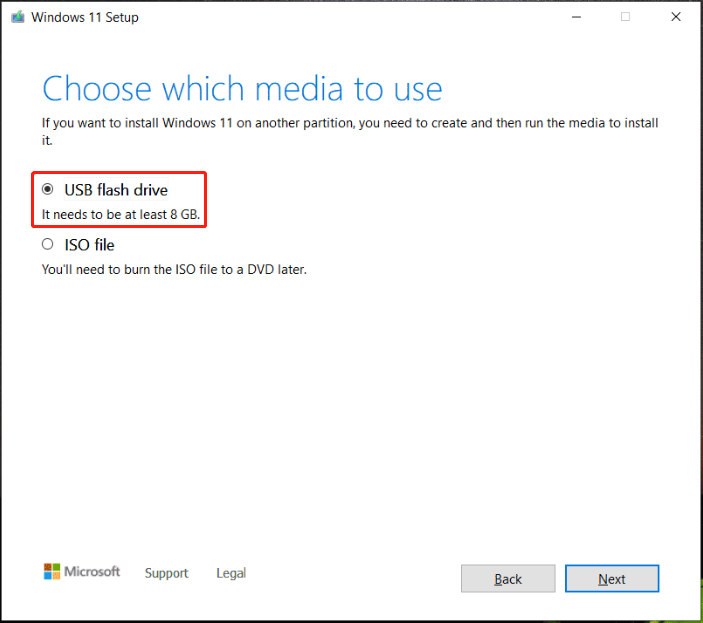
# 6. Recreate the Bootable USB
If some important files of the installation are missing or corrupted, Windows 11 won’t install from USB. In this case, we recommend you recreate a new Windows 11 installation USB using Media Creation Tool. Here you can read this post “How to Create Windows 11 Installation Media on PC” to know more details.
# 7. Reset UEFI Firmware Settings
As mentioned above, improper UEFI configurations can lead to you being unable to install Windows 11 via USB. Don’t worry. You can follow the guide below to reset the UEFI firmware settings.
Step 1. Press Win + I keys to open the Settings window, and then select Update & Security > Recovery and click on Restart Now under the Advanced startup section.
Step 2. Select Troubleshoot and then Advanced options in the Advanced Startup menu.
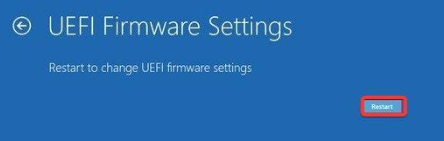
Step 3. Select UEFI Firmware Settings and click Restart to change the UEFI firmware settings of your PC.
# 8. Format the USB Drive
If your PC is using the UEFI boot mode, then the USB needs to be formatted FAT32 if you want to install Windows 11 from the drive smoothly. If not, follow the steps below to reformat the USB and recreate a Windows 11 installation media.
Step 1. Insert the USB drive into your computer properly.
Step 2. Press Win + R keys to open the Run dialog box, type diskpart in it, and press Enter. Then click on Yes to further confirm.
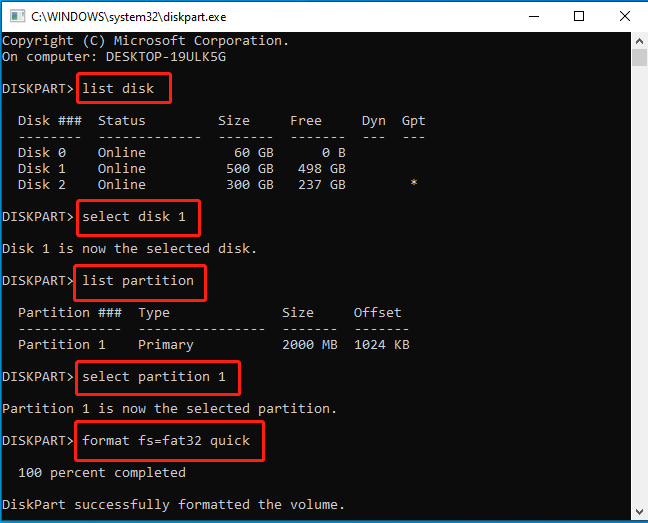
Step 3. Type the following commands in order and press Enter to format the drive.
- list disk
- select disk x (replace x with the disk number of your USB)
- list partition
- select partition x (replace x with the USB partition number)
- format fs=fat32 quick
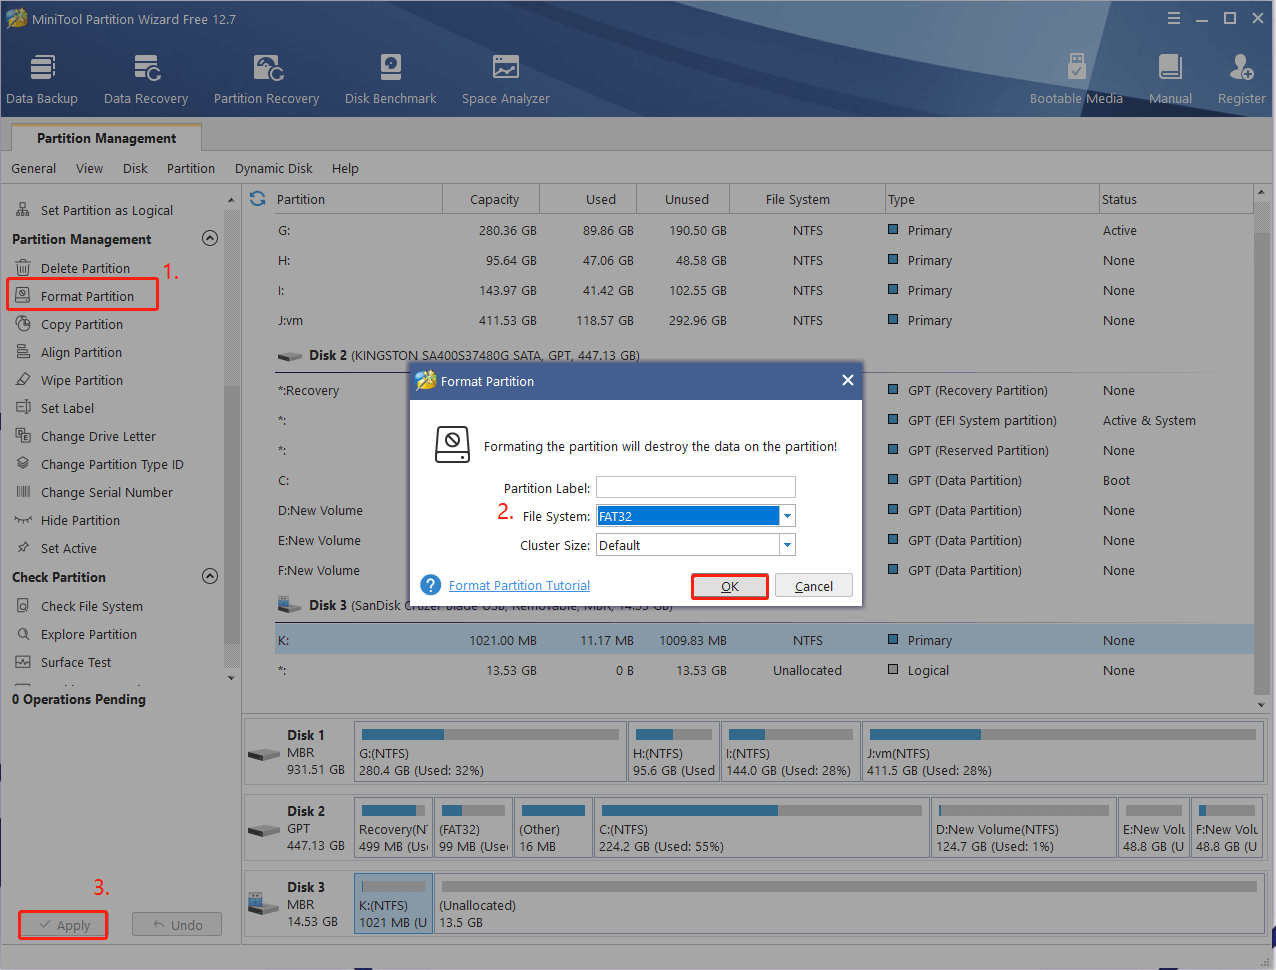
However, DiskPart has some limitations while formatting a drive and often runs into various errors, such as “cannot format a drive larger than 32GB to FAT32”, “DiskPart format stuck at 0”, etc. So, we highly recommend you use a professional USB formatter – MiniTool Partition Wizard. This freeware can not only format a USB to FTA32 but convert NTFS to FAT32 without data loss.
MiniTool Partition Wizard FreeClick to Download100%Clean & Safe
After that, you can recreate an installation media as we explained above and see if the Windows 11 unable to install from USB issue gets fixed.
# 9. Use a New USB
If none of the above methods can fix the “unable to install Windows 11 via USB flash drive” issue, you may consider purchasing a new one. You’d better buy a USB drive with a newer interface like 3.0.
About The Author

Position: Columnist
Ariel has been working as a highly professional computer-relevant technology editor at MiniTool for many years. She has a strong passion for researching all knowledge related to the computer's disk, partition, and Windows OS. Up till now, she has finished thousands of articles covering a broad range of topics and helped lots of users fix various problems. She focuses on the fields of disk management, OS backup, and PDF editing and provides her readers with insightful and informative content.
User Comments :