Are you annoyed by the Windows 11 24H2 setup error with Sysprep image? Don’t worry. You are not alone. To fix the Win11 24H2 Sysprep image error, Partition Magic dives into the possible causes of the error and summarizes several proven fixes.
Recently, the Windows 11 24H2 ISO is officially released to the public. A lot of users have updated to Windows 11 24H2 since its release. However, various error codes and issues also come into being, such as Win11 24H2 update error 0x800f0838, Win 11 24H2 update black screen, Windows 11 24H2 installation error 0x80042444 – 0x4002f, and so forth.
For example, some users from Reddit are discussing the Windows 11 24H2 setup error with Sysprep image.
Windows 11 24H2 Setup Error with sysprep'd image. Hi folks, I sysprep my image for customizations, and with 24H2 it broke my Windows Setup. I encounter some errors when installing the setup.https://www.reddit.com/r/sysadmin/comments/1fwnnyg/windows_11_24h2_setup_error_with_sysprepd_image/
About the Windows 11 24H2 Setup Error with Sysprep Image
Sysprep is a system preparation tool designed by Microsoft to replicate, test, and deliver new installations of the Windows operating system based on established installations. It is a command-line tool that can be run manually or through a script.
Win11 24H2 Sysprep image error often occurs when upgrading to Windows 11 24H2 on an old installation setup. The problem is accompanied by different error codes, like Windows 11 24H2 Sysprep failed error 0x80070050 – 0x50015/0x50016 and Windows 11 24H2 Sysprep BCD error c000000d.
According to a survey, we found the problem is related to the left Windows.old folder. If the Windows 11 24H2 Sysprep image interfered with private unattended.xml or unattend-original.xml files, you may encounter the problem. Besides, corrupt BCD files, unknown shell extension packs, and BitLocker drive are also responsible for the Sysprep failed error on Windows 11 24H2.
How to Fix the Win11 24H2 Sysprep Image Error
Here we concluded 6 proven methods to fix the Windows 11 24H2 Sysprep failed error after analyzing extensive user reports. Let’s start trying.
# 1. Delete the Windows.old Folder
Windows will create a folder named Windows.old on the system drive. If you encounter the Win11 24H2 Sysprep image error 0x800700B7 – 0x50016, delete the folder in audit mode or afterward in the captured install.wim, or remove it at DISM /Capture-Image Windows-Setup. To know more details, you can refer to this post – Can’t Delete Windows.old on Windows 11/10.
# 2. Delete the Unattend.xml and Unattend-original.xml Files
Some users from Reddit reported that the Windows 11 24H2 Sysprep failed error can be solved by deleting the unattend.xml file. If you enter the audit mode via the file, try the method. To do that, press the Win + E keys to open File Explorer, navigate to the C:/Windows/Panther path or C:\$WINDOWS.~BT\WINDOWS\Panther, and delete the unattend.xml and unattend-original.xml files.
# 3. Remove the WinRAR. Shellextension in PowerShell
Some users found that the Sysprep failed error on Windows 11 24H2 is related to WinRAR shellextension package. In this case, you can follow the guide below to remove the package.
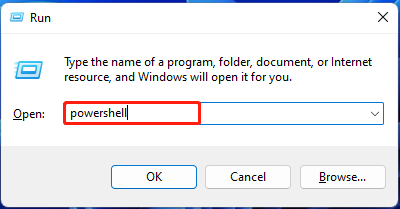
Step 1. Press the Win + R keys to open the Run dialog box, type powershell in the box, and press Ctrl + Shift + Enter and click Yes to open Windows PowerShell with admin rights.

Step 2. In the pop-up window, type the following command and press Enter. Right-click a file to make sure the WinRAR is gone.
get-appxpackage winrar.shellextension | remove-appxpackage
# 4. Revert to the Classic Setup
As mentioned above, the Windows 11 24H2 setup error with Sysprep image mainly occurs with a new Windows setup. In this case, you can try reverting to the classic setup and see if it works. To do that, locate the C:/Windows/Panther path, right-click the autounattend.xml file, select Open with > Notepad, add the following content to the file, and press Ctrl + S to save the change.
<component name=”Microsoft-Windows-Setup” processorArchitecture=”amd64″ publicKeyToken=”31bf3856ad364e35″ language=”neutral” versionScope=”nonSxS”>
<RunSynchronous>
<!– Use Classic Setup –>
<RunSynchronousCommand wcm:action=”add”>
<Description>Switch to Legacy Setup</Description>
<Order>1</Order>
<Path>cmd /c reg add “HKLM\SYSTEM\Setup” /v CmdLine /t REG_SZ /d “X:\sources\setup.exe” /f</Path>
</RunSynchronousCommand>
</RunSynchronous>
</component>
# 5. Disable BitLocker for the Sysprep Image
If the drive is BitLocker enabled, you may encounter the Win11 24H2 Sysprep image error. Here’s how to disable BitLocker for the drive.
Step 1. Open the elevated Windows PowerShell as we showed in # 3.
Step 2. Type the following command and press Enter to unlock the drive C. You need to replace the C drive and password according to the actual situation.
manage-bde -unlock C: -Password
Step 3. Run the following command to turn off BitLocker encryption for the C drive.
manage-bde -off C:
# 6. Rebuild BCD
If you receive the Windows 11 24H2 Sysprep BCD error, you can try rebuilding BCD in Windows Recovery Mode. Here are the detailed steps:
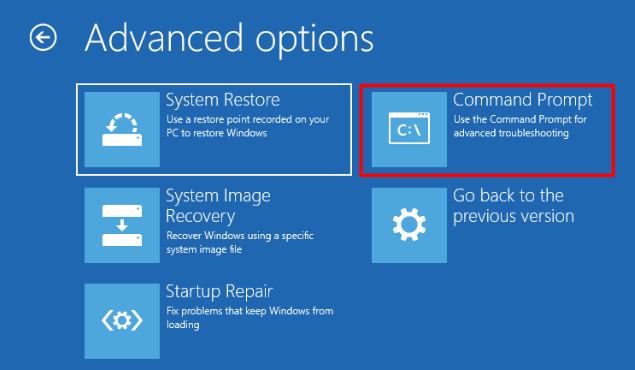
Step 1. Boot your computer from a Windows 11 installation media, choose your language and other settings, and click Next > Repair your computer > Troubleshoot > Command Prompt in order.

Step 2. In the elevated Command Prompt window, type the following commands in order and hit Enter after each one. After that, restart your PC and see if the Windows 11 24H2 Sysprep BCD error gets fixed.
- bootrec /fixmbr
- bootrec /fixboot
- bootrec /scanos
- bootrec /rebuildbcd
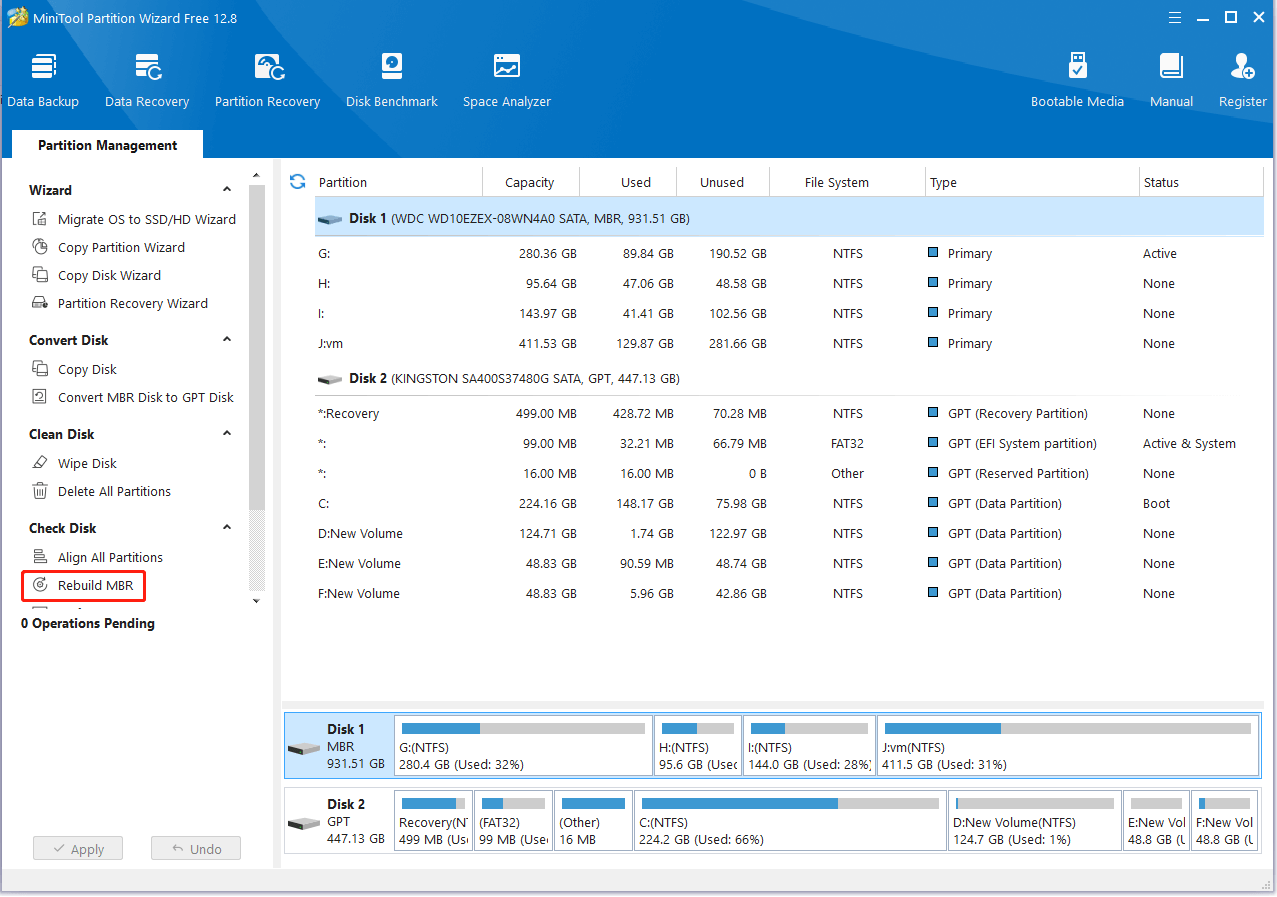
Besides, you can rebuild MBR using a professional tool – MiniTool Partition Wizard. It is an all-in-one disk partition manager that can rebuild MBR, extend/resize/move partitions, migrate OS to SSD, clone hard drive, and more even when the computer is not bootable.
MiniTool Partition Wizard DemoClick to Download100%Clean & Safe

Bottom Line
Here comes the end of the post. I hope the above 6 methods can help you fix the Sysprep failed error on Windows 11 24H2. Of course, you can share this blog post in your communities to help more affected users.

User Comments :