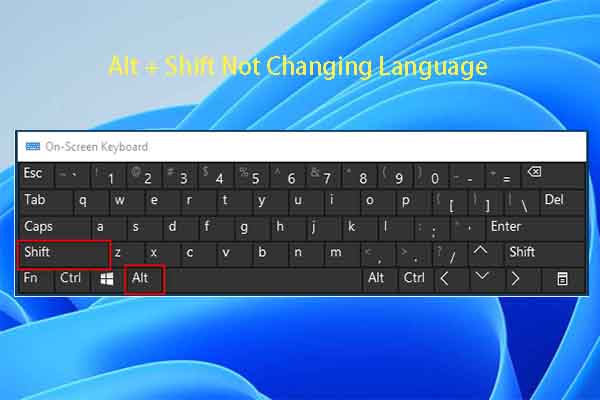
What to do if Windows 11 won't change language or change it thoroughly? This post from MiniTool Partition Wizard offers you the solutions. In addition, it also tells you the reasons.
Windows 11/10 Won’t Change Language
Sometimes, you may need to change the Windows 11/10 system language. As we all know, if you want to change the Windows default language, you need to download and install a language pack and then change the Windows display language in Settings > Time & Language > Language & region.
However, some people report that Windows 11 won’t change language or change it thoroughly. The details are as follows:
Case 1. Windows 11/10 won’t change language.
You can add a language pack and then input that language. However, you are not allowed to select that language as the system language. If you try to do that, you are told that “your Windows license supports only one display language.”
Case 2. Windows 11/10 won’t change language thoroughly.
You can change the Windows 11/10 system language, but only part of it. Some PC components like the welcome screen, the notification window, the widgets, etc. still use the original language.
What to Do If Windows 11/10 Won’t Change Language
If Windows 10 won’t change language or change it thoroughly, you can try the following solutions.
Solution 1. Change Administrative Language Settings
If Windows 11 won’t change language thoroughly, this method may work. Here is the guide:
- Press the Windows logo key + I to open Settings.
- Go to Time & language > Language & region.
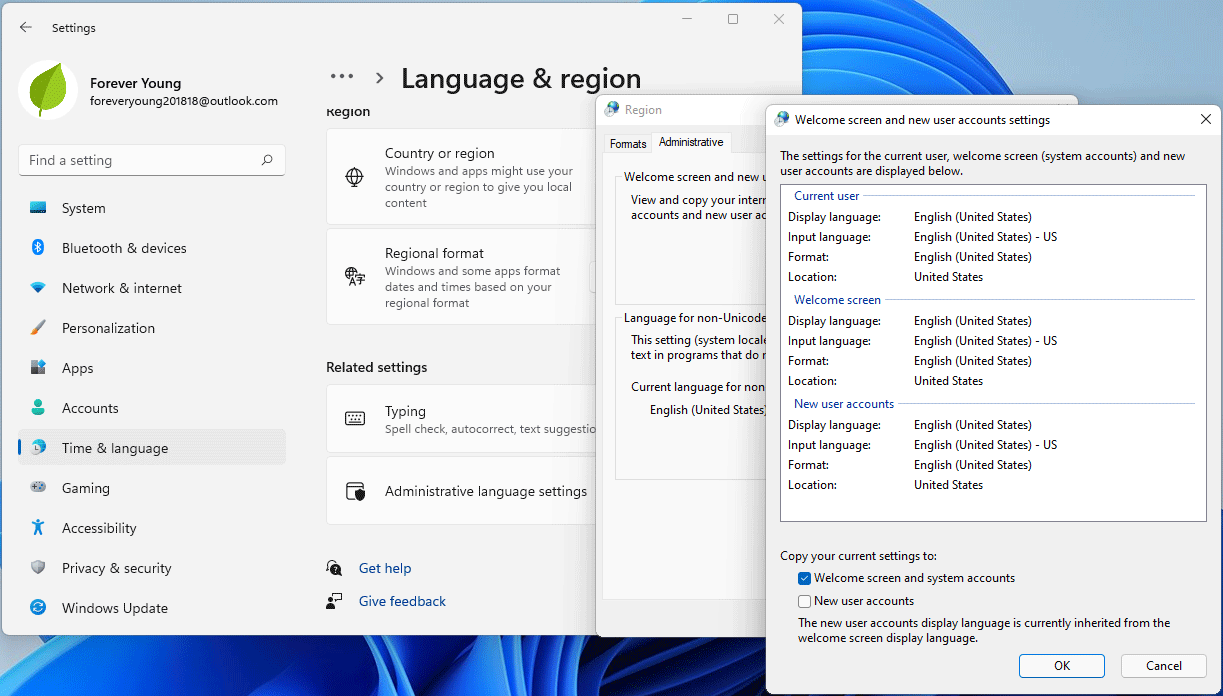
- Scroll down and then click the Administrative language settings link.
- On the pop-up Region window, click the Copy settings button.
- On the Welcome screen and new user accounts settings window, under the Copy your current settings to: section, check the Welcome screen and system accounts option. Then, click OK to save changes.
- On the Region window, click the Change system locale button. Make sure the current system locale is the area where the selected language is used. Then, click OK to save changes.
- On the Region window, click OK to save all changes.

Solution 2. Use Registry Editor
If Windows 10 won’t change language or the system language is messed up, using Registry Editor may solve the issue. This way also works for Windows 11. Here is the guide:
- Go to the Available languages for Windows page to check the Language/region ID. You should note down the ID of the language that you want to use (for example, en-US’s ID is 0x0409).
- Press the Windows logo key + R to open the Run box. In the box, type “regedit” and click OK to open Registry Editor.
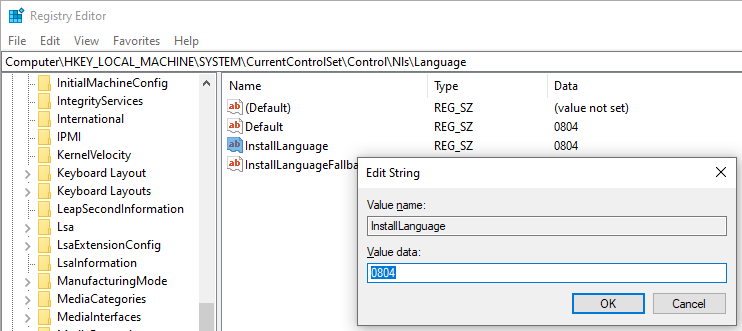
- Go to Computer\HKEY_LOCAL_MACHINE\SYSTEM\CurrentControlSet\Control\Nls\Language.
- Double-click the InstallLanguage entry and then change its Value data to the ID of the language you want (0x is removed). Click OK to save changes.
- Do the same on the Default entry.

Solution 3. Break Through the Limitation of the Windows 11/10 Home Single Language Edition
In most cases, the reason why you are not allowed to change the system language is that you are using the Windows 11/10 Home Single Language edition, which is usually preinstalled by PC manufacturers.
Therefore, if Windows 11 won’t change language, you can try to break through the limitation of the Windows 11/10 Home Single Language by upgrading to Windows 11/10 Pro edition or using some commands.
Do you need to partition a hard drive, migrate OS, clone disks, or recover data? If so, MiniTool Partition Wizard can help you.
MiniTool Partition Wizard DemoClick to Download100%Clean & Safe


User Comments :