You may encounter the “Windows 10 KB4093112 fails to install” issue while installing the update. What can you do if the Windows 10 KB4093112 Update fails to install? Here, MiniTool Partition Wizard collects some solutions to the issue.
Windows 10 KB4093112 Fails to Install
A lot of users update their Windows systems to experience new features and get bug patches that come with the new update. However, the Windows updating process is not always smooth. You can encounter various Windows update errors, such as Windows 10 won’t update, Windows 10 update not showing up, Windows updates stuck at 0% downloading, KB5029263 not installing on Windows 11, Windows Update error 0x80070539, KB4093112 not installing, etc.
This post mainly discusses the KB4093112 not installing issue. If Windows 10 KB4093112 Update fails to install, you can pay attention to this post. It explores some fixes for the issue.
If you cannot install Windows 10 KB4093112 due to low disk space, increase disk space using MiniTool Partition Wizard – an all-in-one partition manager for Windows PCs. Its Space Analyzer feature allows you to check what’s taking up your hard drive space and free up space, while its Extend Partition and Move/Resize Partition functions help you enlarge partition capacity by taking free space from other partitions or unallocated space.
When you upgrade your hard drive to a larger one, clone the drive to avoid data loss via the Copy Disk or Migrate OS to SSD/HD feature of MiniTool Partition Wizard.
MiniTool Partition Wizard FreeClick to Download100%Clean & Safe
Way 1: Run the Windows Update Troubleshooter
A simple way to fix the KB4093112 not installing issue is to run the Windows Update Troubleshooter.
Step 1: Hold the Windows and I keys to open the Settings app.
Step 2: Click on Update & Security > Troubleshoot > Additional troubleshooters.
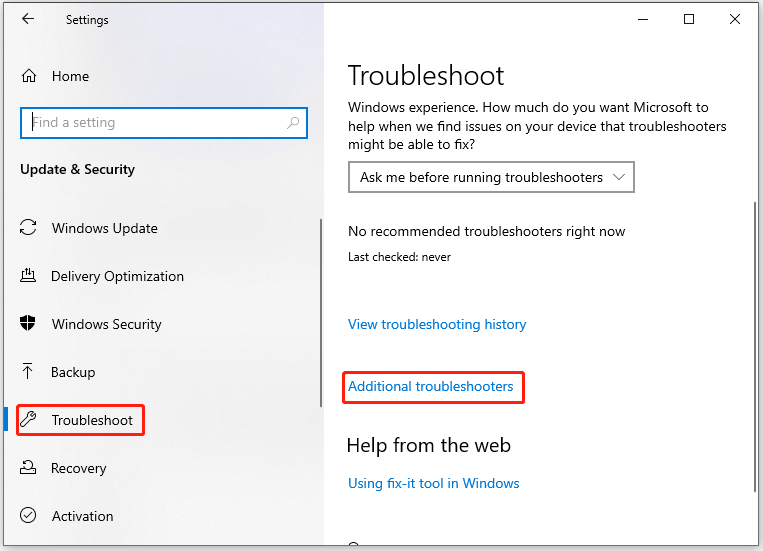
Step 3: In the prompted window, find and click on Windows Update. Then click on the Run the troubleshooter option.
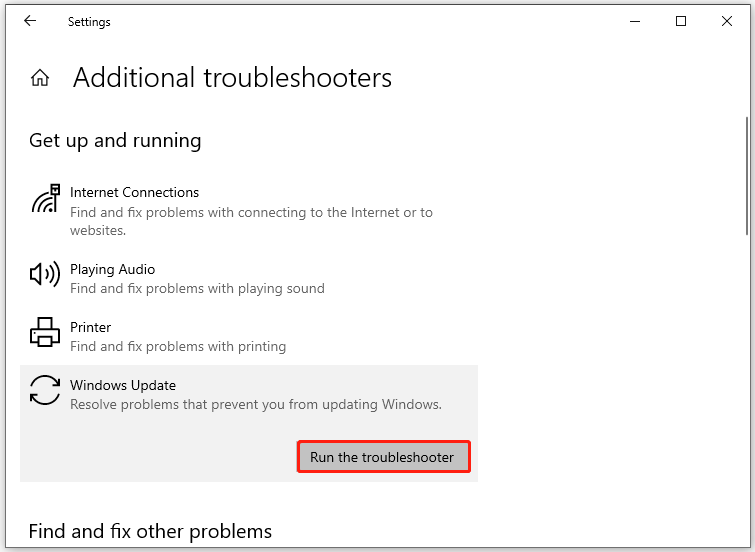
Step 4: Follow the on-screen instructions to complete the operation.
Way 2: Manually Reinstall the Update KB4093112
The “C:\Windows\SoftwareDistribution” is the place where Windows stores the Windows Updates. If it gets corrupted, you will receive the KB4093112 not installing issue. Re-create the SoftwareDistribution folder and then download and install updates from scratch. Here’s the full tutorial for you.
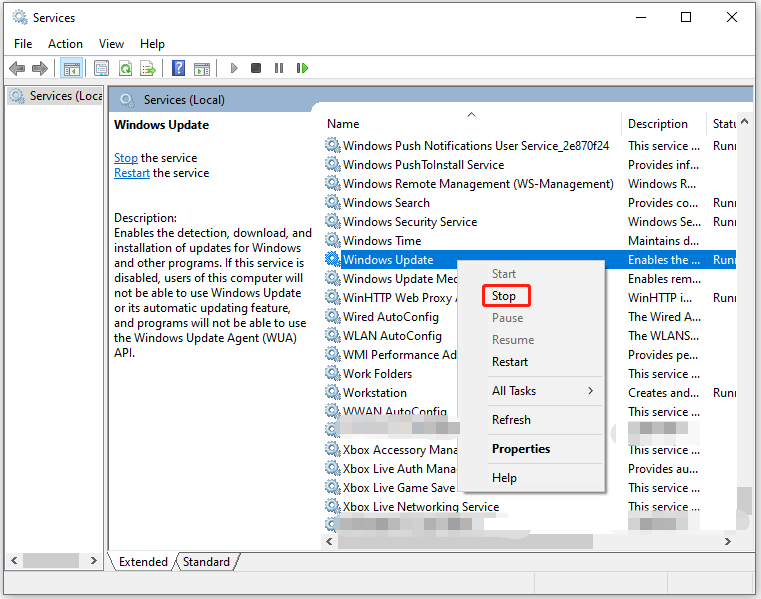
Step 1: Stop the Windows Update service from the Services window.
- Open the Run dialog window by pressing the Windows and R keys.
- Type services.msc and click OK.
- Find and right-click on the Windows Update service, and then click Stop.
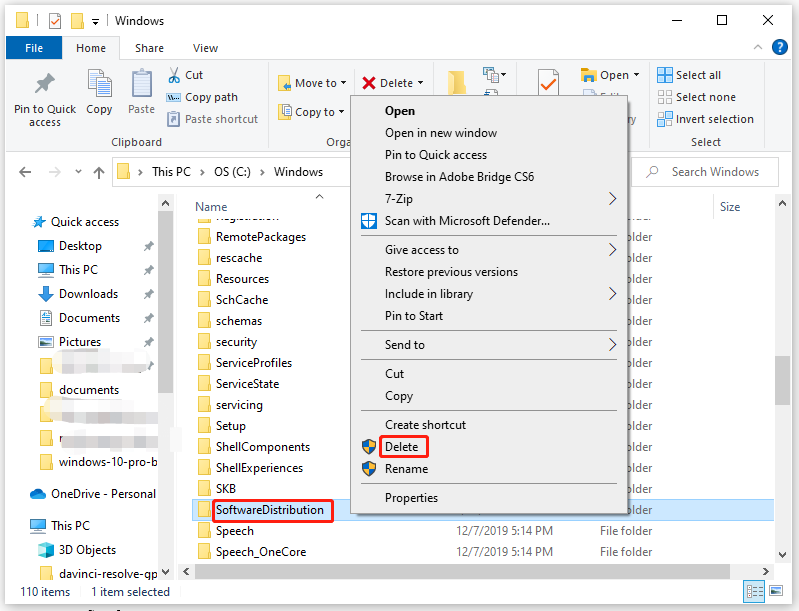
Step 2: Navigate to C > Windows after opening File Explorer. Find and delete the SoftwareDistribution folder by right-clicking on it and hitting the Delete option. Then right-click on the empty space and click New > Folder to re-create the folder.
Step 3: Now, start the Windows Update service in the Services window.
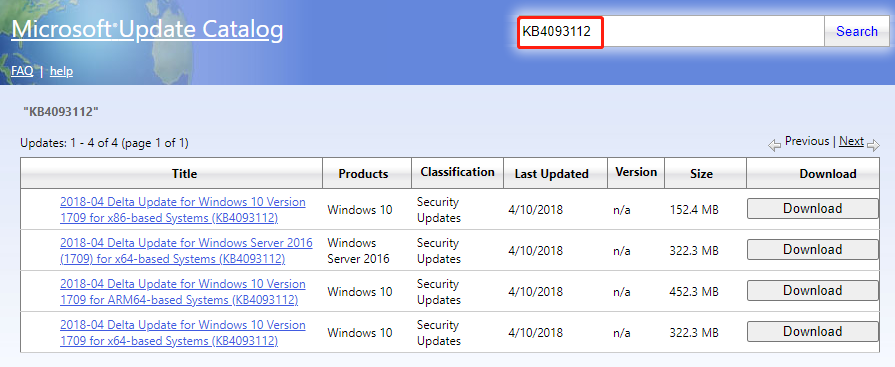
Step 4: Head to Microsoft Update Catalog and search KB4093112 in the search box. Then download a preferred version from the displayed result.
Way 3: Block the KB4093112 Update
To get rid of the KB4093112 not installing issue, you can block the KB4093112 manually.
Step 1: Download the Show or Hide Updates (wushowhide.diagcab) tool from Microsoft.
Step 2: Launch the tool and click Next on the prompted screen.
Step 3: Then this tool will automatically look for the available updates.
Step 4: Tap on the Hide updates option.
Step 5: Check the 2018-04 Cumulative Update KB4093112 and click Next.
Also read: Get Security Update KB5036909 for Windows Server 2022
What if Windows 10 KB4093112 fails to install? This post summarizes 3 ways to troubleshoot it. You can have a try!


User Comments :