Why Couldn’t Windows Set My Default Save Location?
Some people report that they encounter the “We couldn’t set your default save location” error on their PC. However, different people encounter the error with different error codes, such as error code 0x80070005 and error code 0x80070539.
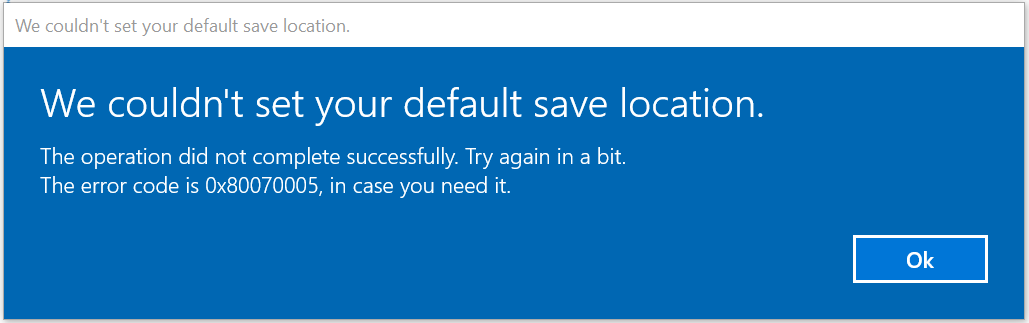
When this error occurs, you can see a pop-up window on your screen with an error code on it. Just like the following picture. After searching for this error on the Internet, I found the error is often caused by corrupt files in crucial folders (like WindowsApps and Spsystem folders) and a lack of permission.
If you also encounter the “We couldn’t set your default save location” error, this post is worth reading.
![[Full Guide] How to Fix the Windows Update Error 0x800f0823?](https://images.minitool.com/partitionwizard.com/images/uploads/2023/09/0x800f0823-thumbnail.png)
Solution 1. Log in to an Administrator Account
The user account permissions are the culprit of the “We couldn’t set your default save location” error. So, you can try elevating your user account to Administrator status to fix this error. To do that, you can do as follows:
- Press the Windows and I keys to open the Settings window.
- Navigate to Accounts > Family & other users.
- Navigate to the Other users section and select the targeted account.
- Now, click the Change account type button and then set it to Administrator.
Solution 2. Rename WindowsApps Folder
If the basic files related to your installed apps in the WindowsApps folder are corrupt or unable to be accessed, it may result in the “We couldn’t set your default save location” error.
In this situation, you can try renaming the WindowsApps folder to create a new directory to store data for Windows and then fix the error. Here’s the guide:
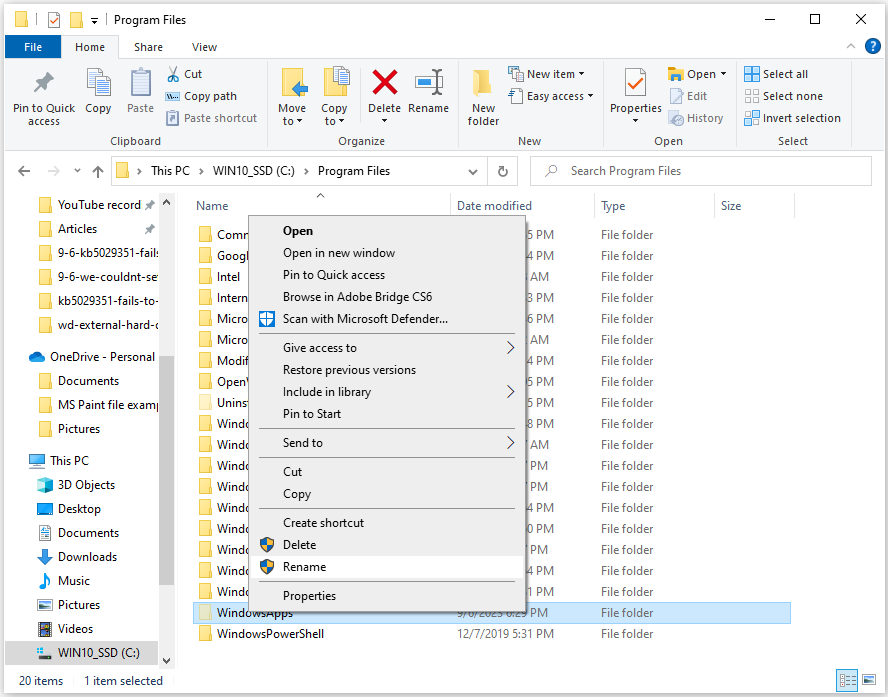
- Press the Windows and E keys simultaneously to open the File Explorer window.
- Navigate to C:\Program Files where you installed the apps.
- Go to the View tab and tick the Hidden Item option to unveil concealed folders.
- Then, scroll down to find the WindowsApps folder.
- Right-click it and select Rename to name it “WindowsApps_OLD” or any other name of your choice.
Solution 3. Take Full Control Over the WindowsApps Folder
Some people report that taking full control over the Windows Folder helps them fix the “We couldn’t set your default save location” error. You can also have a try. Here’s the tutorial:
- Navigate to the location of the WindowsApps folder.
- Right-click the WindowApps folder and select Properties.
- Go to Security tab and click Advanced button.
- If TrustedInstaller is listed as the owner of the folder, click the Change link.
- Next, enter your user account name in the object name box and click the Check Names button.
- Click the OK button to confirm the action.
- Check the box before the Replace owner on subcontainers and object option and click Apply.
- Click the Add button in the bottom left corner and choose Select a principal.
- Then, enter your user account name, click the Check Names button, followed by OK.
- Tick the box next to Full Control on the principal page and click OK.
- Click the Apply button followed by OK.
- Go back to the Advanced Security settings window and click the Enable inheritance option.
- Click the Apply button, followed by OK, and restart your PC.
- Once done, if the error persists, navigate to the path “C:/Users/<username>/AppData/Local” and repeat the steps above for the Packages folder in the location (replace <username> with your user account name).
Solution 4. Delete or Rename the WpSystem Folder
When certain apps are installed from the Microsoft Store, a folder called WpSystem is created to store their data. WpSystem is located in the same directory as the WindowsApps folder.
The problems in the WpSystem folder can also cause the “We couldn’t set your default save location” error. So, if you have a WpSystem folder on your PC, you can try deleting or renaming the WpSystem folder to fix this error. Here’s how to do it:
- Open the File Explorer window.
- Navigate to C:\Program Files where you installed the apps.
- Scroll down and find the “WpSystem” folder.
- Right-click it and then select Delete or Rename to name it as “WpSystem_old” or any other name.
- After that, check if the error has been resolved.

Solution 5. Set Full System Permission for the System Volume Folder
Setting full system permissions for the System Volume folder may also help you fix the “We couldn’t set your default save location”. It is a confirmed fix, so you can also have a try. Here are the detailed steps:
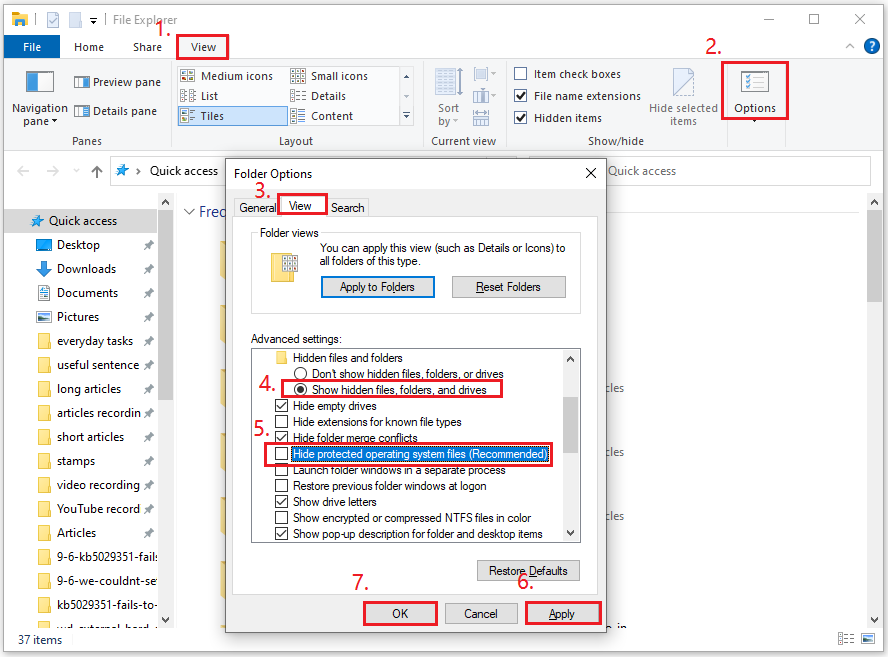
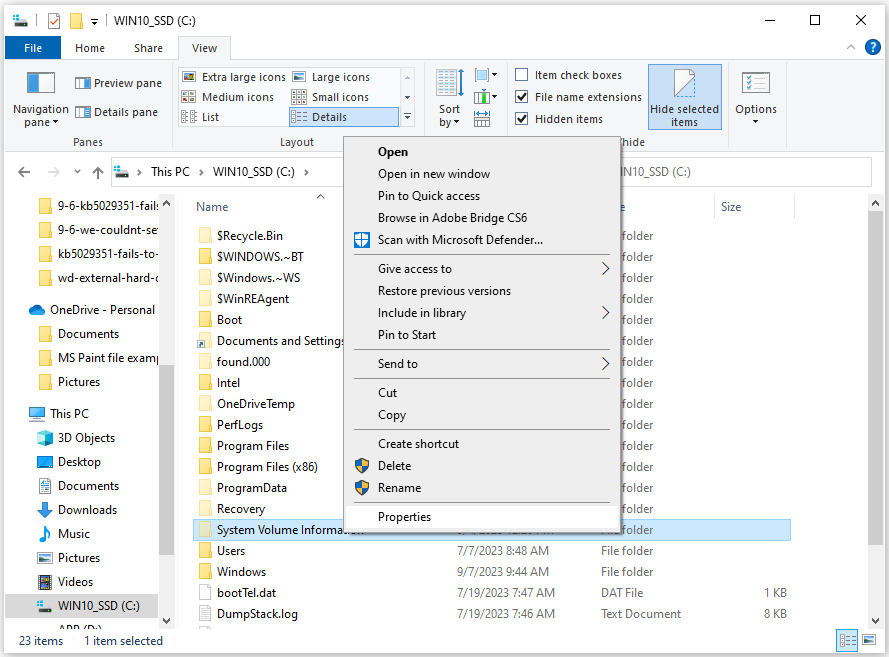
Step 1. Open the File Explorer window. Go to the View tab and click Options. In the pop-up window, go to the View tab. Then, select Show hidden files, folders, and drivers and uncheck Hide protected operating system files (Recommanded).
Step 2. Select the drive where apps should save data. Right-click System Volume Information folder and choose Properties.
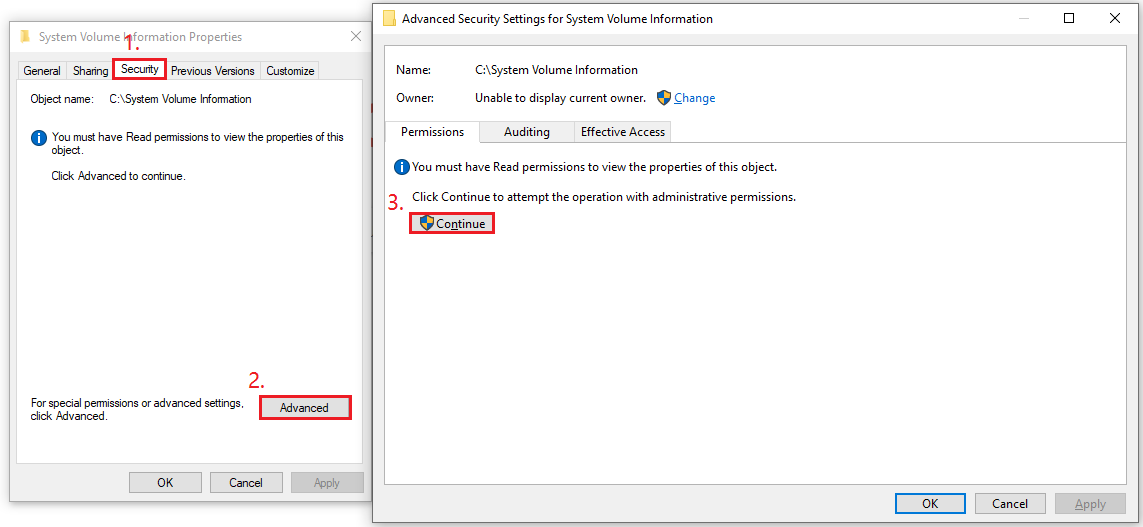
Step 3. In the pop-up window, go to the Security tab, click Advanced, and then click Continue.
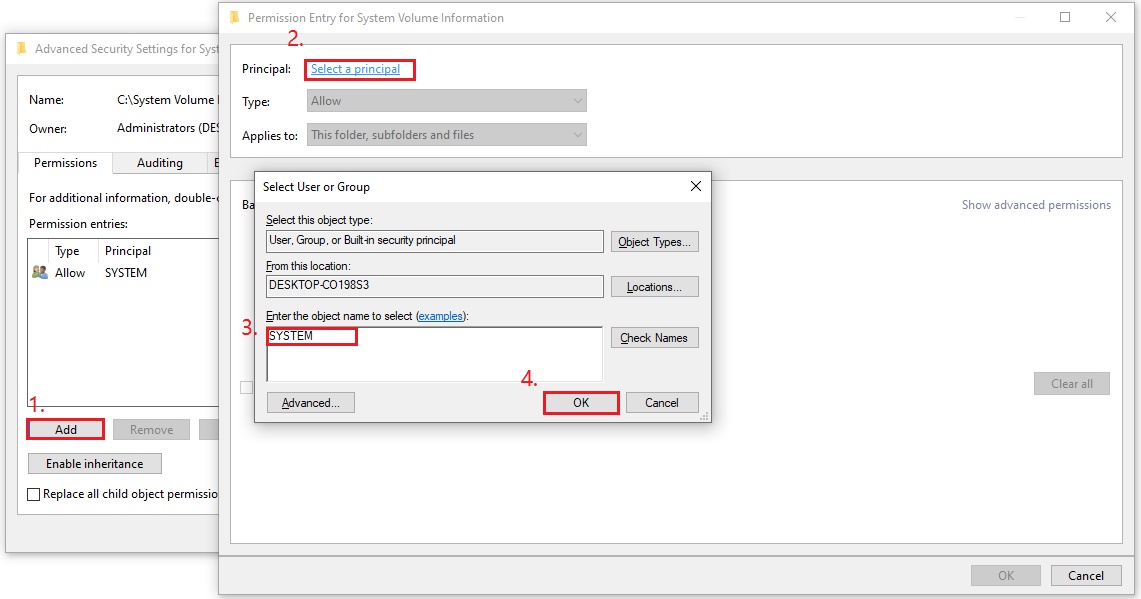
Step 4. Click Add and then click the Select a principal option. Next, type “SYSTEM” in the box and click OK.
Step 5. Select the Full control permission setting. Then select the OK options on the Permission Entry and Advanced Security Settings windows.
Step 6. Once done, close all the windows, restart your PC, and try changing the default save location.
In Conclusion
This post provides 5 solutions to fix the “We couldn’t set your default save location” error. No matter if you encounter the error with the error code 0x80070005 or error code 0x80070539, you can use these methods in this post to solve the error.
In addition, MiniTool Partition Wizard is a functional tool. It can migrate OS, clone disk, recover partitions, recover data from hard drive, etc. If you have this need, download it to have a try.
MiniTool Partition Wizard DemoClick to Download100%Clean & Safe
About The Author

Position: Columnist
Charlotte is a columnist who loves to help others solve errors in computer use. She is good at data recovery and disk & partition management, which includes copying partitions, formatting partitions, etc. Her articles are simple and easy to understand, so even people who know little about computers can understand. In her spare time, she likes reading books, listening to music, playing badminton, etc.
User Comments :