Are you bothered by USB tethering not working Windows 11? If so, read this post now! It offers you 7 troubleshooting methods for it.
MiniTool Partition Wizard FreeClick to Download100%Clean & Safe
Method 1: Restart the Computer
The first solution to USB tethering not working is to restart the computer. A restart can close background apps, solve conflicts, and sort out connected devices and other peripherals. This method is simple and effective. You can have a try!
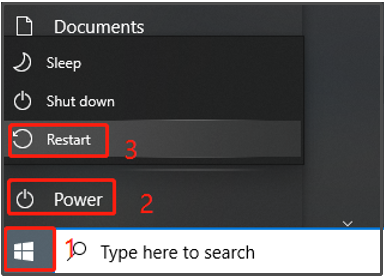
Click on the Windows icon, hit the Power button, and click Restart. Then your computer will automatically restart. After the PC starts up, check if USB tethering works properly.
Method 2: Disable Wi-Fi
You should avoid weak Wi-Fi if you want to use USB tethering to share the Internet between a smartphone and a PC. So, try disabling Wi-Fi when the USB tethering not working issue appears. The steps for doing that vary according to the specific device.
Smartphone: Find the Wi-Fi option under Settings and then toggle off the option.
Windows 10: Find the Wi-Fi icon at the bottom right of the taskbar and click on it to turn off it.
Windows 11: Navigate to Settings > Network & internet > Advanced network settings. Then click the button next to Wi-Fi to disable it.
Method 3: Try a Different USB Port
Sometimes, USB tethering is not working due to faulty USB ports. When the USB tethering not working issue occurs, connect the smartphone to the PC via a different port. If you have another working PC, try connecting to it to see if the port is the culprit.
Method 4: Use a Different Cable
USB cables can malfunction too, especially if they are damaged. It’s hard to inspect the cable for issues. Hence, directly use a different cable to connect USB tethering. Then check if USB tethering works properly.
Method 5: Run Windows Troubleshooter
Windows Troubleshooter is a built-in utility that helps fix various Windows issues. Here, you can also run Windows Troubleshooter to get rid of the USB tethering not working Windows 11.
Step 1: Open Settings and click Update & Security.
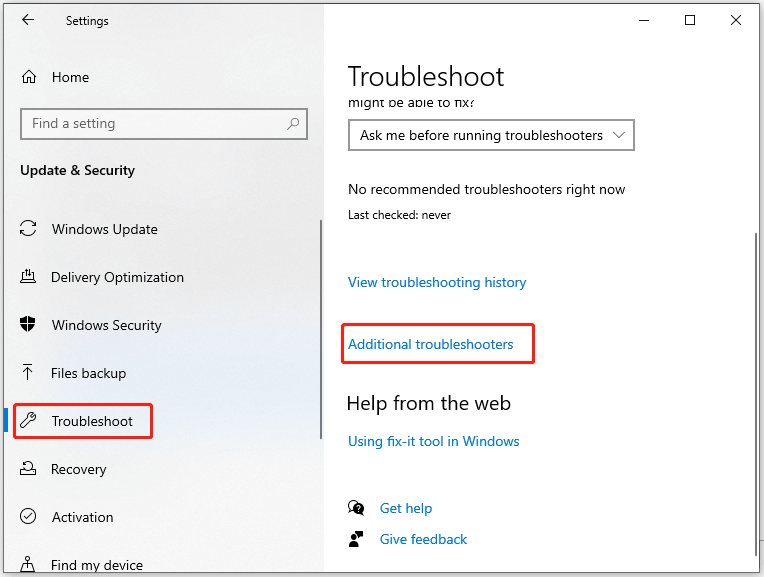
Step 2: Hit the Troubleshoot option in the left panel.
Step 3: Click on Additional troubleshooters to move on.
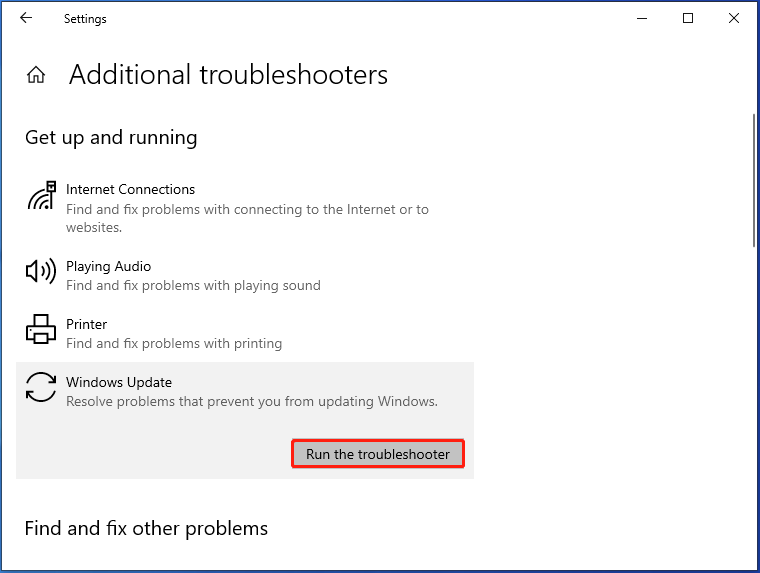
Step 4: Click Windows Update and hit the Run the troubleshooter button.
Step 5: Follow the prompted instructions to complete the operation.
Method 6: Update USB Drivers
Outdated USB drivers are also responsible for USB tethering not working Windows 11/10. You can update USB drivers to fix the issue. Here’s how to do that.
Step 1: Right-click the Windows icon and then click Device Manager from the menu.
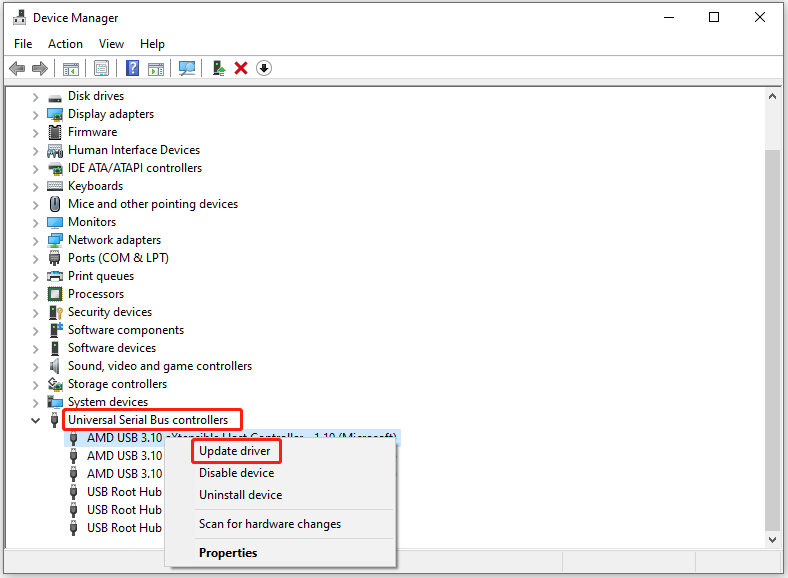
Step 2: Find and expand Universal Serial Bus controllers. Then right-click on the USB driver and choose Update driver. Repeat this operation to update all USB drivers.
Step 3: In the next window, choose a way to update the driver. To automatically update the driver, choose Search automatically for drivers. To update the driver manually, pick Browse my computer for drivers instead.
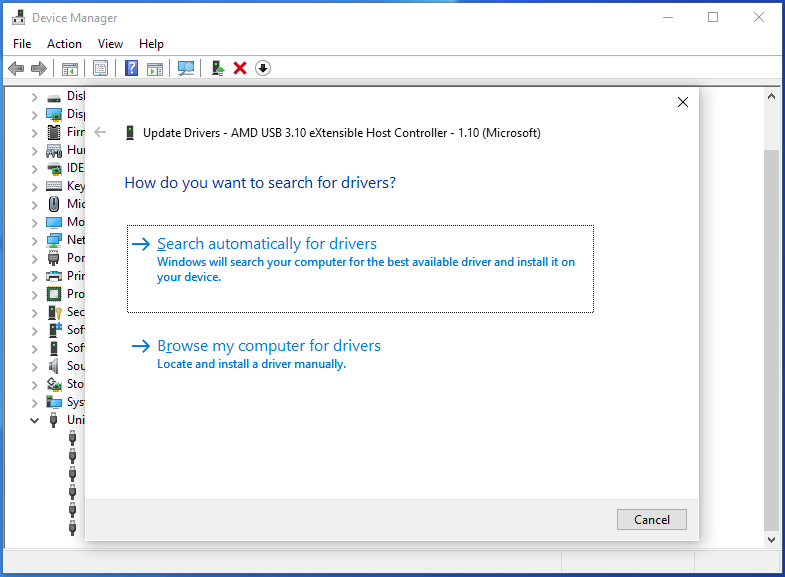
Step 4: Then follow the on-screen instructions to complete the operation.
Method 7: Update Windows
If the above methods don’t work, try updating Windows to fix the issue. Generally speaking, Windows will automatically download and install updates for you. However, sometimes you need to manually update Windows.
Step 1: Open Settings by holding the Windows and I keys.
Step 2: Click Update & Security > Windows Updates > Check for updates. If there are any available updates, they will be displayed under Windows Update.
Step 3: Tap on the Download and Install button next to the update.
Step 4: Wait for the finish of the process.
Related articles:
- KB5041592: What’s New and How to Download and Install the Update
- Windows 11 24H2 Update KB5041571 for Copilot+ PCs: Get It Now
- Download Instructions and Known Issues of KB5040437
Conclusion
This post collects 7 methods for the USB tethering not working issue. You can try them if you receive this issue.

![Shut Down or Restart Your PC Without Updating Windows [5 Ways]](https://images.minitool.com/partitionwizard.com/images/uploads/2023/07/shut-down-restart-pc-without-updating-windows-thumbnail.jpg)
User Comments :