Some Windows users are seeing an unsupported processor blue screen after updating their computers. Due to this BSOD error, their system suddenly crashed. This error is usually caused by unsupported updates or drivers installed on the system.
If you’re seeing an unsupported processor blue screen Windows 10/11, this article will help you fix it.
MiniTool Partition Wizard DemoClick to Download100%Clean & Safe
Since you encounter this unsupported processor blue screen error, you cannot log in normally. So, you need to boot into Safe Mode.
Before that, make sure your processor supports Windows 11 22H2. You can check if your computer is compatible with Windows 11 22H2. If the system is not compatible with the version of Windows, you may receive this error and you need to roll back to a previous version to resolve the issue.
But if the system is compatible and you get this error, then follow the solutions mentioned below.
Fix 1. Run the Blue Screen Troubleshooter
As the blue screen of death error frequently happens on Windows, Microsoft introduced a Windows Blue Screen Troubleshooter in the operating system. It can help you solve almost all stop errors. To run it, you can follow the steps below:
Step 1: Press the Win + I key to open Settings.
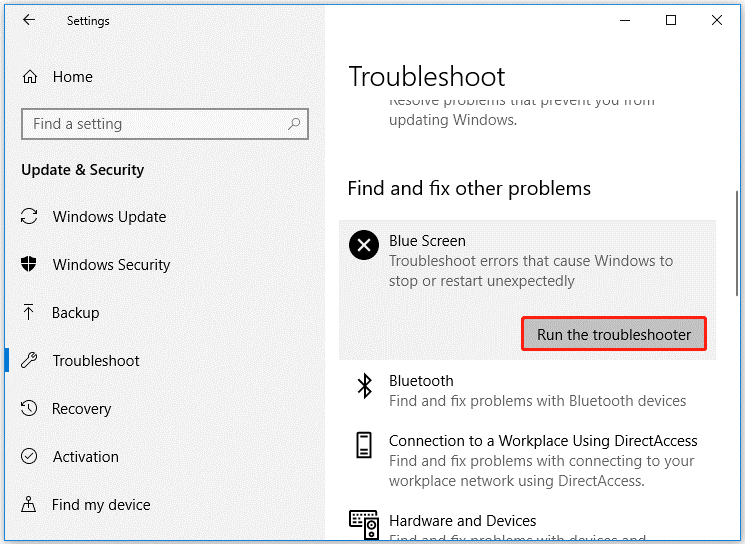
Step 2: Click Update & Security > Troubleshoot > Blue Screen.
Step 3: Click Blue Screen and then click Run the troubleshooter. Then this utility will automatically detect the blue screen error and fix it.

Fix 2. Run DISM and SFC Tools
Corrupted system files can trigger this unsupported processor blue screen error. You can repair them by running DISM and SFC tools. Here shows how to use DISM and SFC in Command Prompt.
Step 1: Type cmd in the Windows search bar. Then right-click on Command Prompt and select Run as administrator.
Step 2: In the Command Prompt window, type sfc /scannow and press Enter.
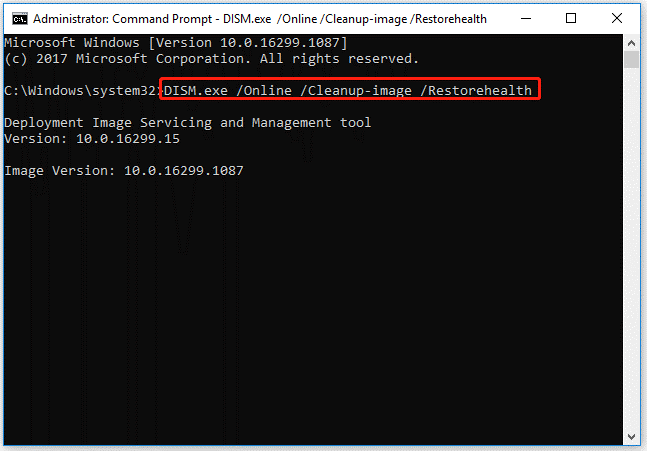
Step 3: When the SFC tool completes its task, type DISM.exe /Online /Cleanup-image /Restorehealth and press Enter.

Step 4: Wait patiently until the process is 100% complete.
Fix 3. Update or Roll Back Your Drivers
If you encounter the unsupported processor blue screen error after updating certain drivers, you should perform a rollback and return the drivers to the previous version before the update. To do so, here’s the guide:
Step 1: Press the Win + X key to open the WinX menu and select Device Manager.
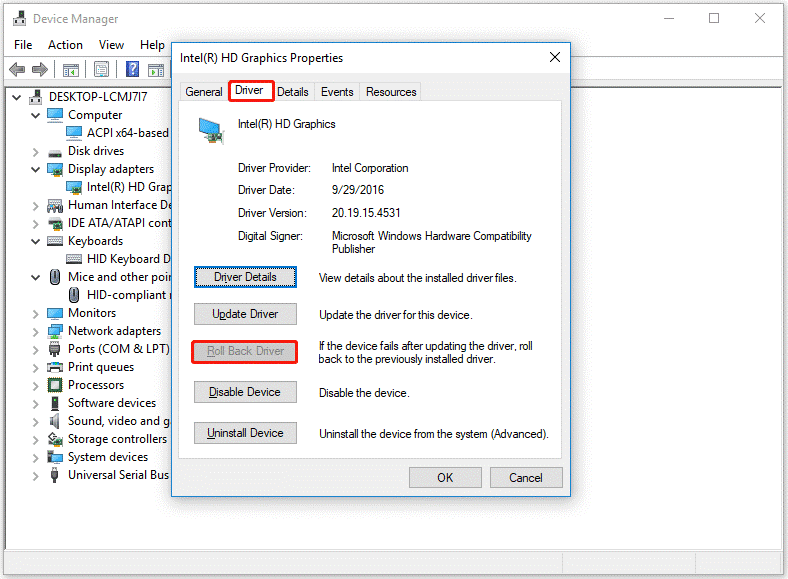
Step 2: In the Device Manager window, expand the target hardware categories. Then right-click on the target device driver and select Properties from the pop-up menu.
Step 3: In the Properties window, switch to the Driver tab, and then click on the Roll Back Driver button.

Step 4: Then follow the on-screen instructions to finish the operation.
The unsupported processor blue screen can occur due to outdated drivers. If you haven’t performed a driver update in a while, you should update your drivers and see if that fixes the problem.
Fix 4. Update BIOS
You will encounter this BSOD if the BIOS firmware is outdated or has some bugs. In this case, you need to update the BIOS and check if the issue is resolved.
Bottom Line
The unsupported processor blue screen error is annoying. 4 Ways to this error are displayed above and you can try them one by one. Besides, you can try to use the Data Recovery feature of MiniTool Partition Wizard to recover the lost data.

![How to Fix ntkrnlpa.exe BSOD Error on Windows 10/11? [5 Ways]](https://images.minitool.com/partitionwizard.com/images/uploads/2023/07/ntkrnlpa-exe-bsod-thumbnail.png)


User Comments :