When you access the Properties window of your drive in Windows 10/11 and try to change the drive label, you may receive an error message: the volume label is not valid. To help you fix this issue, this post from MiniTool Partition Wizard provides a detailed guide. You can take a look at it.
When you are attempting to rename the drive label via the Properties window of the specific drive in your Windows 10/11, you probably run into an invalid drive label error with the message saying: the volume label is not valid.
How to Fix this “the volume label is not valid Windows 10/11” issue? This post summarizes two possible solutions to help you. If you have no idea, you can pay attention to the following content.
Solution 1: Use Another Way to Change the Volume Label
Multiple ways are available to change the volume label. If you fail to change the label in the drive’s Properties window with the “the volume label is not valid Windows 11/10” issue, you should turn to another different way to perform the operation. Here’re several ways listed below. Just keep reading and choose one according to your preference.
Way 1: Via Command Prompt
If the drive you want to rename has a drive letter assigned, you can use Command Prompt to change the volume label. The following are detailed steps for how to bypass the “invalid drive label Windows 10/11” issue by changing the drive label with Command Prompt.
Step 1: Press Windows + R to open the Run dialog.
Step 2: Type cmd in the text box and then press Ctrl + Shift + Enter to open Command Prompt as an administrator.
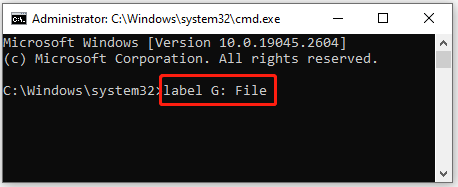
Step 3: In the elevated Command Prompt window, type label *: [DriveLabel] and press Enter.
Replace * with the drive letter of your drive and [DriveLabel] with the desired name, e. g. label G: File.

Way 2: Via MiniTool Partition Wizard
MiniTool Partition Wizard is a professional third-party partition manager that offers Set Label and other effective features related to partitions and disks. For instance, you can use this program to create/format/resize/delete partitions, copy/wipe disks, convert disks to MBR/GPT, etc. To change the drive label with MiniTool Partition Wizard, follow the steps below.
Step 1: Download and install MiniTool Partition Wizard on your PC. Then launch this program to enter its main interface.
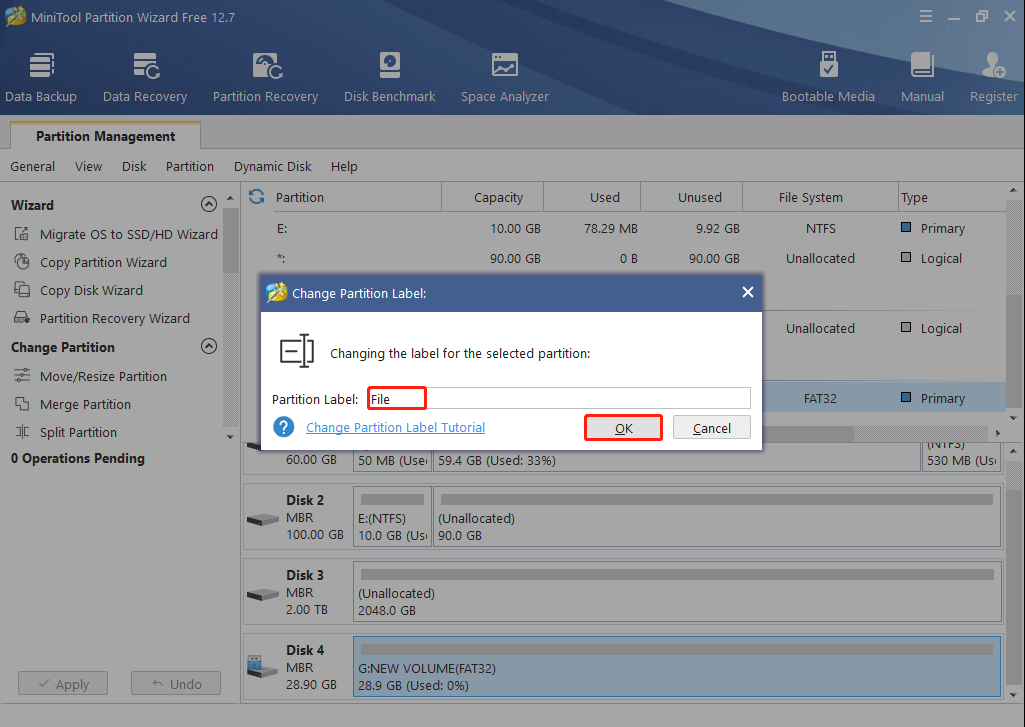
Step 2: Right-click the partition you want to rename and then select Label.
Step 3: In the prompted window, enter the desired name in the Partition Label field. Then click OK.

Step 4: At last, click Apply to execute the pending operation.
Both the above ways may help you solve the “the volume label is not valid Windows 10/11” issue effectively. If you fail to change your drive label, you can continue with the next solution.
Solution 2: Format the Problematic Drive
To change the label successfully without the “invalid drive label Windows 10/11” issue, you can also try formatting the specific drive. Here’s a step-by-step guide to performing a format.
A format will erase all the data on your drive. Therefore, you’d better make a backup of the drive before formatting it.
Step 1: Right-click the Start icon and select Disk Management.
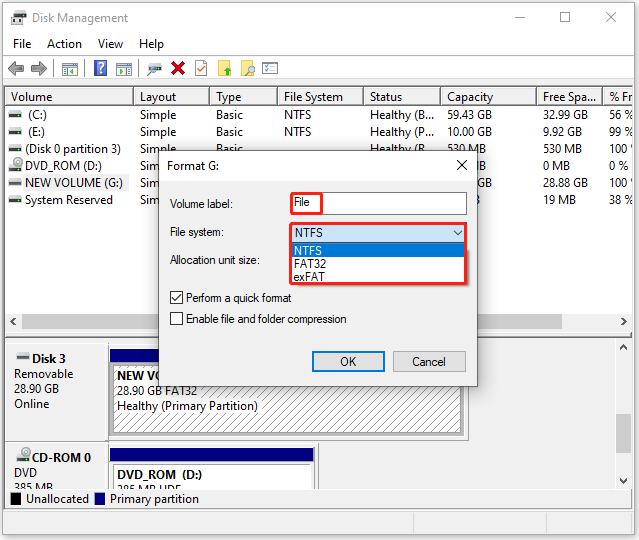
Step 2: Right-click the target partition and select Format.
Step 3: In the pop-up window, you can set a label for this drive. Then select a preferred file system from the drop-down menu.

Step 4: After that, check the Perform a quick format option and click OK. Click OK to confirm if prompted.
Once the process is finished, you can see the drive is formatted to the selected file system with the label you entered before.
Faced with the “the volume label is not valid Windows 11/10” issue, you can try the above solutions to get rid of it. If you have any problems with this issue, you can leave a message in our comment part below.


User Comments :