Many users encounter the “System Restore failed to extract the file” error on Windows 10/11. Are you also troubled by this problem? Now, you come to the right place. This post from MiniTool summarizes 8 effective troubleshooting methods.
System Restore is a practical Windows built-in feature used to revert a computer’s system to an earlier state. It is very helpful especially if you get into some common system issues like freezing and crashing. Sometimes, however, this tool often runs into various errors like “System Restore taking up too much space”, “System Restore stuck”, and the one discussed in this post.
Here’s a true example from the answers.microsoft.com forum:
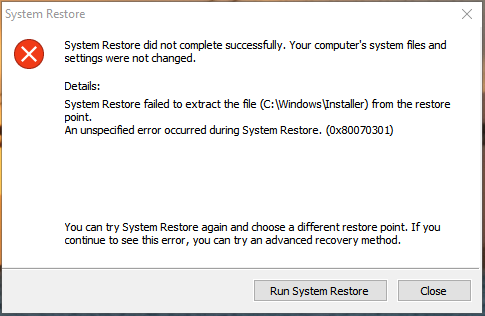
Can't do System Restore (failed to extract the file, 0x80070301). System Restore did not complete successfully. Your computer's system and settings were not changed. How to fix the error? Please help me!https://answers.microsoft.com/en-us/windows/forum/all/cant-do-system-restore-failed-to-extract-the-file/67a5488f-6647-4c46-951a-36f05af91146
What Causes the System Restore Failed to Extract the File Error
What causes the failed to extract the file System Restore error? According to a survey, the problem can be caused by different reasons, such as corrupted system files, low disk space, bad sectors on the hard disk, issues with the system restore point, etc. Let’s keep reading to know the troubleshooting methods of the System Restore error.
How to Fix System Restore Failed to Extract the File on Windows 10/11
How to fix System Restore failed to extract the file error 0x80070301 on Windows 10/11? Here we summarize 8 effective ways to fix the error. Let’s start trying.
# 1. Use an Alternative to System Restore
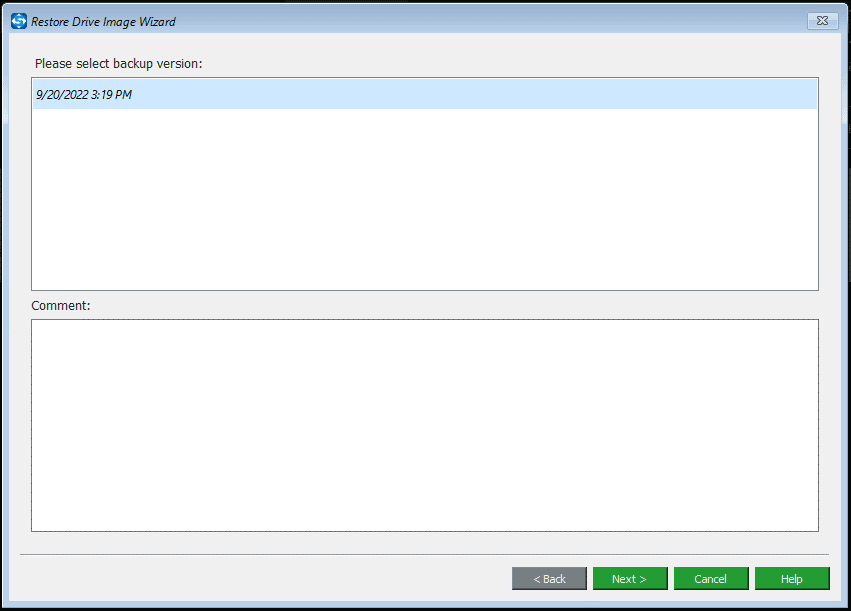
If it’s urgent for you to restore your system, we highly recommend you use an expertized system restore utility – MiniTool ShadowMaker. It can help you easily restore the system to an earlier state from a system backup image. Besides, it’s a powerful disk clone tool that can back up the system, clone hard disks, sync files, and more.
MiniTool ShadowMaker TrialClick to Download100%Clean & Safe
# 2. Run System Restore in Safe Mode
Some users reported the “failed to extract the file System Restore” error can be fixed by running the system into Safe Mode. You may have a try.
Step 1. Click the Start icon at the bottom left corner press the Power icon, and then click the Restart button with the Shift key pressed.
Step 2. Now, your computer will boot into the recovery menu. Once here, click on Troubleshoot > Advanced options.
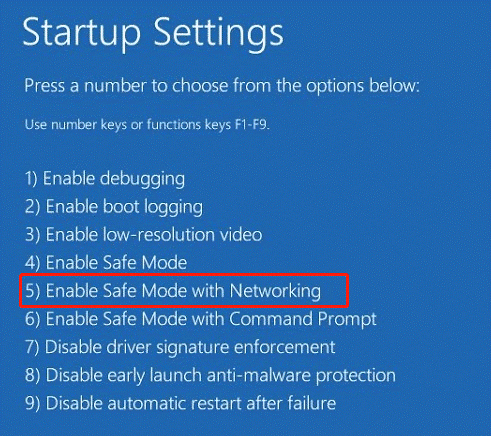
Step 3. In the Advanced options menu, select Startup Settings. Then click on Restart to reboot your computer into the Startup menu.
Step 4. Select F4 or F5 or F6 to enable Safe Mode. Then you can read this guide “How to Perform a System Restore from Command Prompt Windows 10” to system restore.
# 3. Run System Restore from WinRE
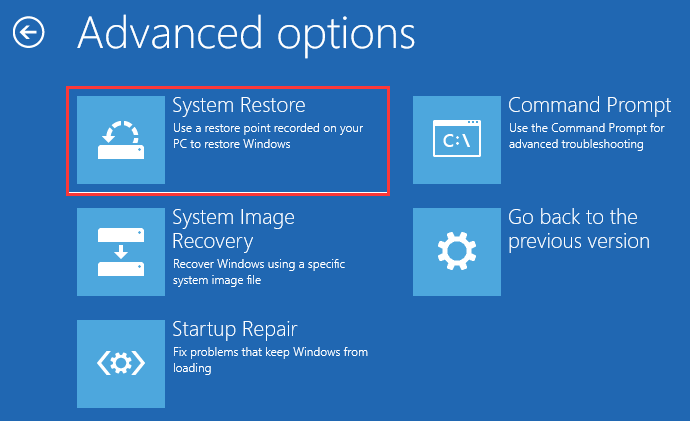
If the “System Restore failed to extract the file from the restore point” error persists in Safe Mode, you can try running System Restore from WinRE. To do this work, follow Step 1 to Step 2 to access the Advanced options menu, select System Restore, and follow the on-screen instructions to complete the system restore.
# 4. Check Your Hard Drive
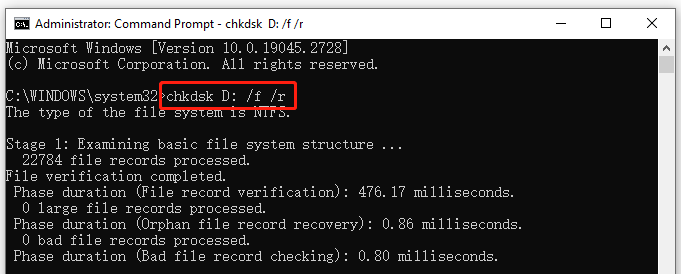
Another possible reason for you can’t do System Restore failed to extract the file is related to a faulty hard drive. So, we recommend you check if there are bad sectors or file system errors on the hard disk. Here’s how:
Step 1. Type cmd in the search bar, and then right-click the Command Prompt app and select Run as administrator from the context menu.
Step 2. In the elevated Command Prompt window, type the following command and hit Enter. Here you need to replace D: with the drive letter that you want to check.
chkdsk D: /f /r
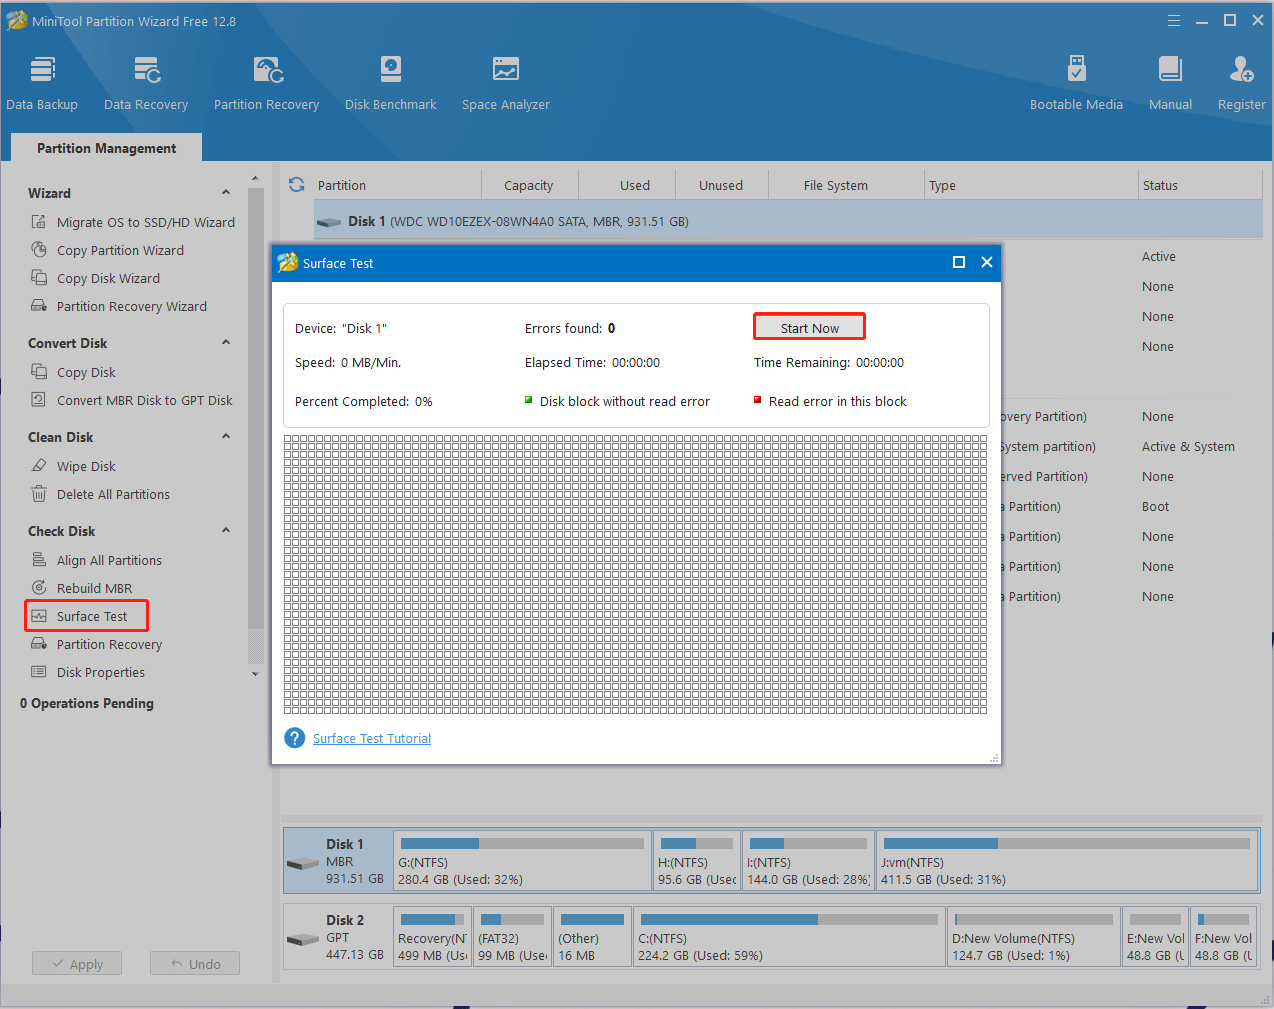
However, this utility can run into various issues, such as “CHKDSK cannot run due to recently installed software”, CHKDSK not working”, “CHKDSK write protected error”, etc. So, we highly recommend you use an alternative – MiniTool Partition Wizard to check hard drive errors. It cannot only check bad sectors but also repair logical errors on the disk. Let’s try.
MiniTool Partition Wizard FreeClick to Download100%Clean & Safe
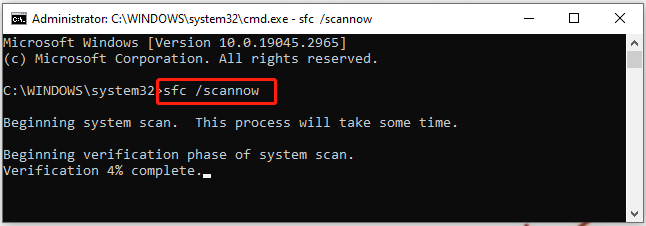
# 5. Run an SFC Scan
Sometimes corrupted system files are also responsible for the “an unspecified error occurred during System Restore” issue. In this case, you can repair them by running an SFC scan.
Step 1. Open the elevated Command Prompt again as we just explained, type the sfc /scannow command in the pop-up window, and hit Enter. Then SFC tool will scan and try to repair the corrupted system files automatically.
Step 2. If the SFC tool fails to work, you can try running the DISM commands. Type the following commands in order and press Enter after each one to repair the system files.
- DISM.exe /Online /Cleanup-image /Scanhealth
- DISM.exe /Online /Cleanup-image /Restorehealth
Once done, restart your computer and check if the System Restore failed to extract the file error 0x80070301 persists.
# 6. Restart the Volume Shadow Copy Service
Volume Shadow Copy is a s service used to create backup copies or snapshots of Windows computer files and drivers. If the service is disabled, you can’t do System Restore failed to extract the file. Here you can follow the guide below to check the service.
Step 1. Press the Win + R keys to open the Run dialog box, and then type services.msc in it and press Enter.
Step 2. Scroll down the list of services to the Volume Shadow Copy service. If it is not running, right-click the service and select Start.

# 7. Create a New System Restore Point
If you still can’t do System Restore failed to extract the file on Windows 10/11, try using another system restore point or create a new system restore point. To know more information, you can refer to this post “How to Create a System Restore Point on Windows 11/10?”.
User Comments :