About Windows 10 End of Life Notification
Microsoft has announced that it will end the support for Windows 10 on October 14, 2025. After that day, Microsoft won’t provide free software updates from Windows Update, technical assistance, or security fixes for Windows 10 anymore.
When the support ending date is close, the message “Your device has reached the end of service. Here’s how you can ensure continued support” will pop up repeatedly. This message indicates that your Windows 10 version is out of service. You’re recommended to upgrade to Windows 11.
Windows 10 end of service notifications results from EOSNotify and OobeUpdater processes. To stop Windows 10 end of service notification, you should disable EOSNotify and OobeUpdater processes. Should you disable Windows 10 end of service notification? It depends on your situation.
The operation of Windows 10 end of life nag screen removal has both pros and cons. If you want to use Windows 10 without distractions, you can disable notifications. If you don’t want to miss important information related to system updates, you shouldn’t stop the notification.
Well, this post collects 3 available methods to stop showing Windows 10 end of support reminder screen.
#1: Stop Windows 10 End of Service Notification via Windows Registry
Windows Registry helps you stop showing Windows 10 end of support reminder screen by creating a new registry entry. Before starting the operation, you’d better back up Registry in case something wrong happens. To further safeguard your computer, you should back up Windows using MiniTool Partition Wizard.
MiniTool Partition Wizard DemoClick to Download100%Clean & Safe
After that, follow the steps below to complete the operation.
Step 1: Open the Run window by pressing Windows and R keys.
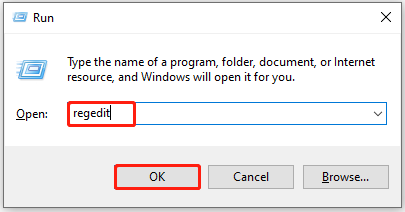
Step 2: Navigate to the destination by following this path.
HKEY_LOCAL_MACHINE\SOFTWARE\Policies\Microsoft\Windows\WindowsUpdate\Notify
Step 3: Right-click the empty space, hover over the New option, and choose DWORD (32-bit) Value on the sub-menu.
Step 4: Locate the created entry, press F2, and input DiscontinueEOS to rename it.
Step 5: Double-click the entry to edit it. Set its value to 1 and click OK to save changes.
Step 6: Close Registry Editor and restart the computer.
#2: Stop Windows 10 End of Service Notification via PowerShell
You can disable Windows 10 end of service notification by running PowerShell scripts. This is easy to operate. You can also have a try!
Step 1: Right-click on the Windows icon and then hit Windows PowerShell (Admin) on the elevated menu.
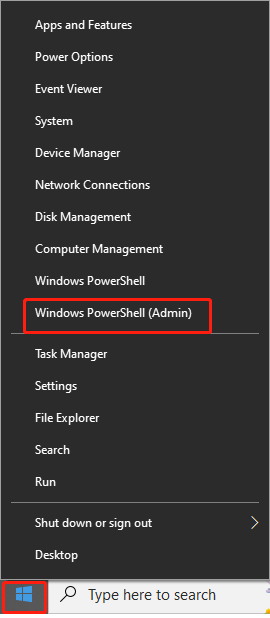
Step 2: In the User Account Control window, click Yes to move on.
Step 3: In Windows PowerShell, run the command below to disable EOSNotify.
Get-ScheduledTask -TaskName “EOSNotify*” | Disable-ScheduledTask
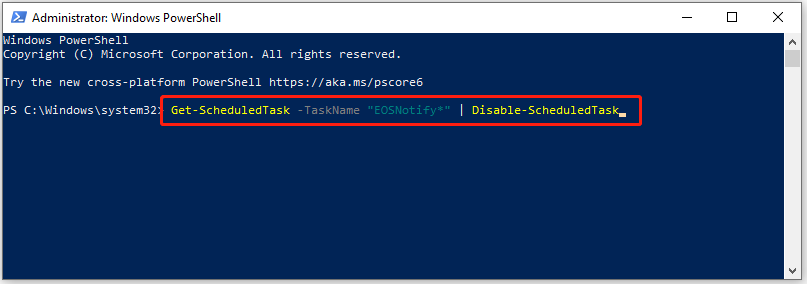
Step 4: Disable GWX (Get Windows 10) and related notification services by running the command: Get-ScheduledTask -TaskName “GWX*” | Disable-ScheduledTask
#3: Stop Windows 10 End of Service Notification via Task Scheduler
One of the Windows 10 end of life nag screen removal methods is to disable scheduled tasks in Task Scheduler.
Step 1: Type task scheduler in the search box and then open it by clicking Open.
Step 2: Double-click Task Scheduler Library and navigate to Microsoft > Windows > Setup.
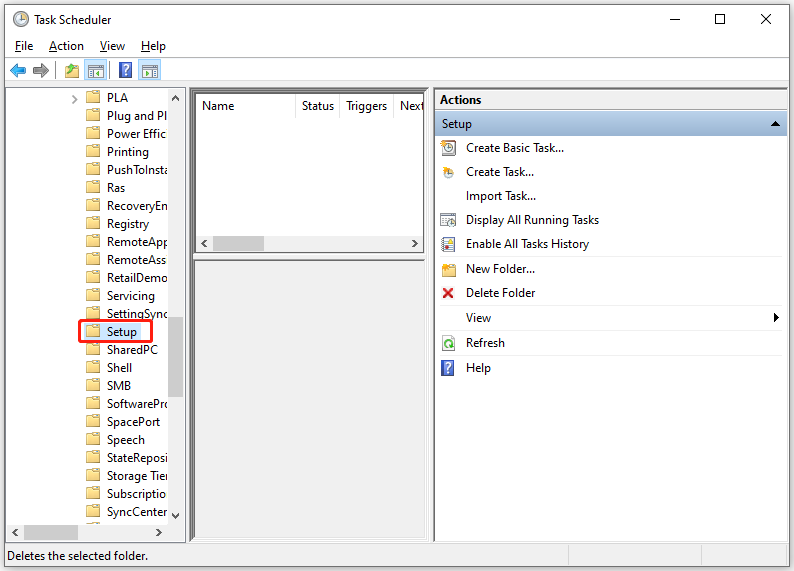
Step 3: Click the Display All Running Tasks option to view all running tasks.
Step 4: Locate and disable tasks below.
- EOSNotify
- EOSNotify2
- Oobeupdater
Step 5: Restart the computer to let changes take effect.
If you want to re-enable the notification, reverse the changes made in Registry Editor, PowerShell, and Task Scheduler.
Pick a Method
Up to now, three available methods to stop Windows 10 end of service notification have been offered to you. It’s time for you to make a choice. Pick a way to disable Windows 10 end of service notification now!

User Comments :