For some reason, you may consider upgrading your system to Windows 10 by using Media Creation Tool from Microsoft, Windows ISO image file, or other Windows 10 installers. Unfortunately, the upgrading process is not always smooth and you may randomly receive an error that says: Setup couldn’t start properly. Please reboot your PC and try running Windows 10 Setup again.
MiniTool Partition Wizard DemoClick to Download100%Clean & Safe
Even after you reboot your computer and do as the above message prompts, the Windows 10 Setup error may still appear. Thankfully, this post collects multiple effective troubleshooting fixes for this error below. To fix this error completely, you can refer to the following content.
Also read:
Fix 1: Run Disk Cleanup and Error Checking
If Windows 10 Setup couldn’t start properly, you can try to fix it with the Disk Cleanup and Error Checking utilities.
Step 1: Press Windows + E to open the File Explorer.
Step 2: Go to This PC. Then right-click the C: drive and select Properties.
Step 3: Under the General tab, click Disk Cleanup. Then in the Disk Cleanup window, click Clean up system files to continue.
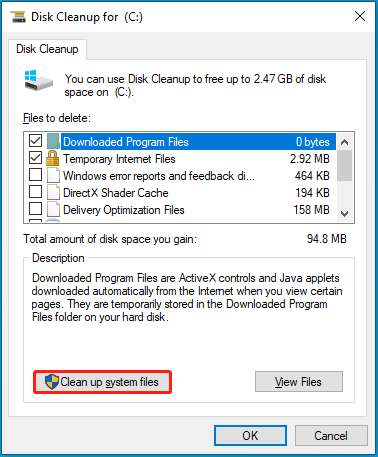
Step 4: Check all the files in the Files to delete part. Then click OK to erase them.
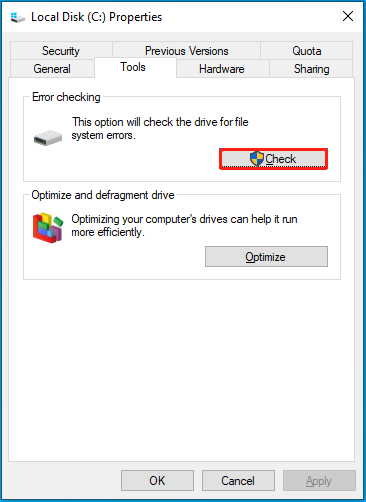
Step 5: Once done, go back to the Properties window of the C: drive and then switch to the Tools tab.
Step 6: Click the Check button and then follow the on-screen instructions to check the drive for file system errors.
MiniTool Partition Wizard FreeClick to Download100%Clean & Safe
Fix 2: Delete the $Windows.~BT and $Windows.~WS Folders
Deleting the $Windows.~BT and $Windows.~WS folders may also help when Setup couldn’t start properly Windows 10. Here’s how to do this.
Step 1: Boot your PC in Safe Mode and then open File Explorer.
Step 2: Select View at the top and then check the Hidden items option.
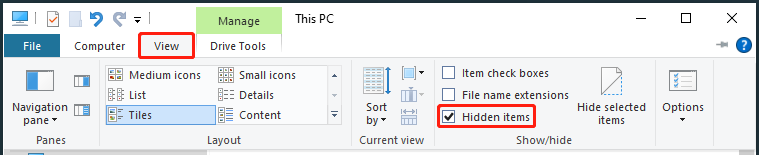
Step 3: After that, open the C: drive and locate the $Windows.~BT and $Windows.~WS folders. Then delete them permanently by pressing Shift + Delete.
Step 4: Restart your computer normally to see if the error disappears.
Fix 3: Run Startup Repair
When Windows 10 Setup couldn’t start properly, another troubleshooting method you can try is to run the Startup Repair tool. To do this, you need to access Advanced Startup Options first and then navigate to Troubleshoot > Advanced options > Startup Repair.
Fix 4: Run the Setup.exe File Directly
If you fail to run the Windows upgrade process and experience the “Setup couldn’t start properly Windows 10” issue, you can try to fix it by running the setup.exe file directly. Simply open File Explorer and go to the C:\ESD directory. Then double-click the setup.exe file inside to run it.
When Windows 10 Setup couldn’t start properly, you can try to fix it with the methods listed in this post. If you have any other great solutions to this issue, please share them with us in our comment part below.
![[5 Proven Fixes] How to Fix Windows BSOD 0x00000016?](https://images.minitool.com/partitionwizard.com/images/uploads/2023/08/bsod-0x00000016-thumbnail.png)
User Comments :