If you can’t access an external hard drive, you should take ownership of the drive by yourself. In this post, Partition Magic provides you with 3 methods to set external hard drive permissions on Windows 10. You can have a try!
Due to the following factors, you may be informed that you don’t have permission to access the external hard drive.
- You don’t have proper permissions set in the security settings in drive properties.
- Not being an owner of a specific folder or drive can cause this issue.
If so, you need to take ownership of external hard drive. In this post, 3 methods to set/change external hard drive permissions are provided to you.
Related articles:
You need permission to perform this action
You don’t have permission to save in this location
Windows won’t boot with external hard drive connected
# 1: Set External Hard Drive Permissions via Properties
You can take ownership of external hard drive by modifying settings in Properties. Here’s the complete guide for you.
Step 1: Right-click on the external hard drive and choose Properties from the context menu.
Step 2: Navigate to the Security tab and click Edit.
Step 3: Then a dialogue box will appear as Permissions for a new volume (E:). Click the Add button and add a new user name. After that, click OK to save changes.
Step 4: Permission section will open. Tap on Full Control and click OK.
# 2: Set External Hard Drive Permissions via Command Prompt
Command Prompt, a built-in utility in Windows, also enables you to set external hard drive permissions on Windows 10. You can follow the steps below to take ownership of external hard drive via Command Prompt.
Step 1: Type cmd in the search box and click Run as administrator under the displayed Command Prompt.
Step 2: In the prompted User Account Control window, click Yes to continue.
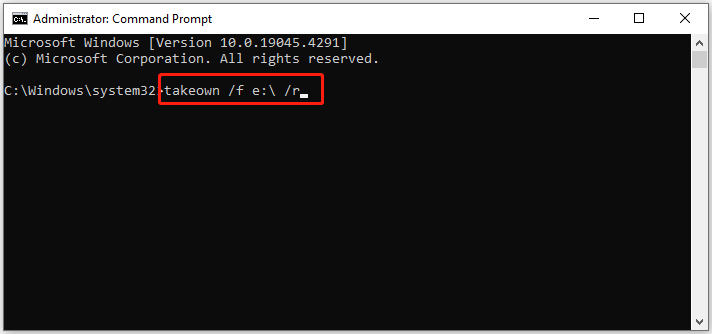
Step 3: In the elevated Command Prompt window, type takeown /f e:\ /r and hit Enter to execute the command.
Step 4: Restart your computer.
# 3: Set External Hard Drive Permissions by Formatting the Drive
The last resort is to format the external hard drive. By doing so, you can obtain complete access. There are several ways to format the drive. For instance, you can format the external hard drive via File Explorer, Diskpart, Disk Management, or third-party partition managers like MiniTool Partition Wizard.
Here, we show you how to format the external hard drive using MiniTool Partition Wizard.
Step 1: Click the button below to download MiniTool Partition Wizard, and then run the setup file and follow the on-screen instructions to install it.
MiniTool Partition Wizard FreeClick to Download100%Clean & Safe
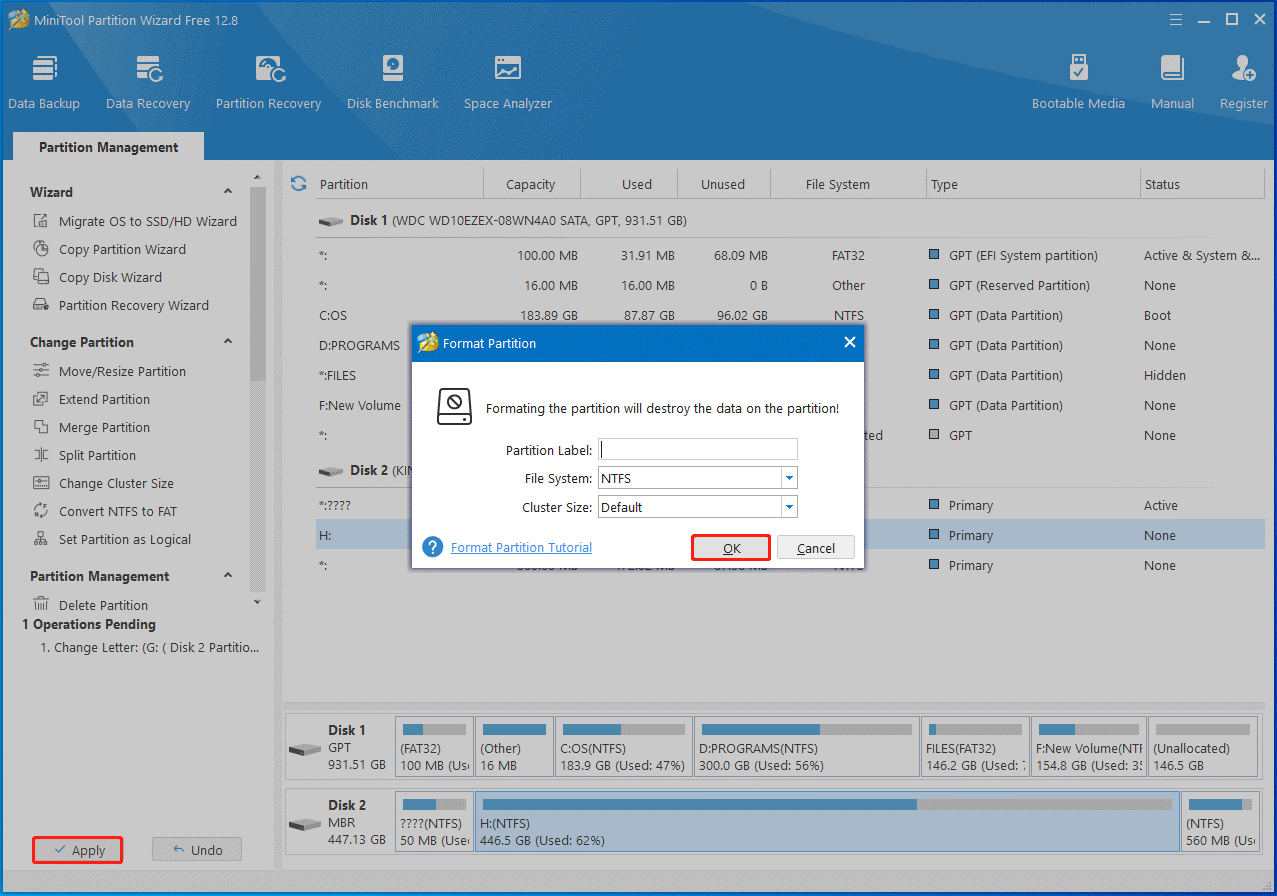
Step 2: Right-click on the connected external hard drive and click the Format option in the context menu.
Step 3: In the prompted window, configure parameters like partition label, file system, and cluster size based on your needs. Then click OK to save changes.
Step 4: Tap on the Apply button to execute the pending operation.
Conclusion
This post offers you 3 easy ways to set external hard drive permissions on Windows 10/11. You can change external hard drive permissions using one of these methods.

User Comments :