Sanitize or Secure Erase SSD? If you are curious about the differences between Secure Erase vs Sanitize, this post is worth reading. Here, Partition Magic tells the intuitive answer and shows a tutorial on how each of the options works.
Sanitize vs Secure Erase
In some situations, it’s necessary to wipe the disk to keep your data safe. However, you may see Sanitize and Secure Erase at the same time on your SSD’s default management tool. So, what is Sanitize? What is Secure Erase? In this section, you can get full instructions about them.
What Is Sanitize?
Sanitize is a feature that can permanently destroy all user data on the SSD, including the mapping table and all blocks that have been written to on the selected SSD. It takes a long time to complete the whole process.
What Is Secure Erase?
Secure Erase is a feature that can permanently destroy all user data on the selected SSD. It will only delete the mapping table on the selected SSD, but it does not erase all blocks that have been written to. So, it needs less time than the Sanitize feature.
Differences Between SSD Sanitize vs Secure Erase
From the definition of the Sanitize and Secure Erase, you know that both of them can permanently erase all data on the drive and reset SSD to factory settings. The main differences are:
- Sanitize can delete both the mapping table and all blocks on the selected while Secure Erase can only delete the mapping table.
- Performing Sanitize needs more time than Secure Erase.
- Not all SSDs support Sanitize while almost every SSD supports Secure Erase.
How to Perform Sanitize or Secure Erase SSD?
How to perform Sanitize or Secure Erase SSD? After knowing the differences between them, you may want to how to perform them. In the below, you can get a full guide on this. Here I take the SanDisk SSD Dashboard as an example:
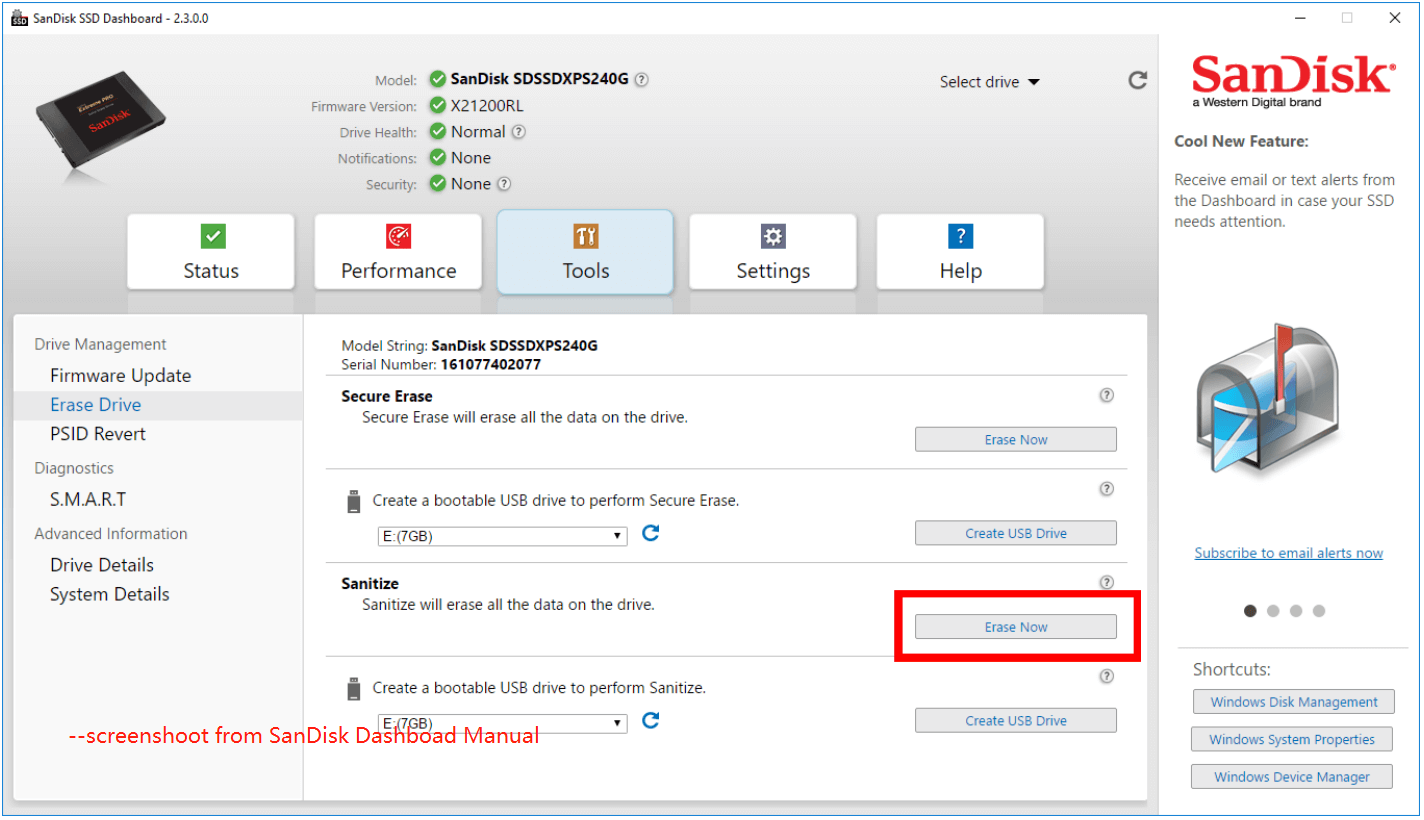
A. Sanitize SSD
- Launch the SanDisk SSD Dashboard on your computer.
- Click Select drive from the right top corner to open a drop-down menu.
- Select the SSD that you want to wipe all data permanently from the menu.
- Go to the Tools tab.
- Click the Erase Now button next to Sanitize to delete all user data and leave the drive in an unformatted state.

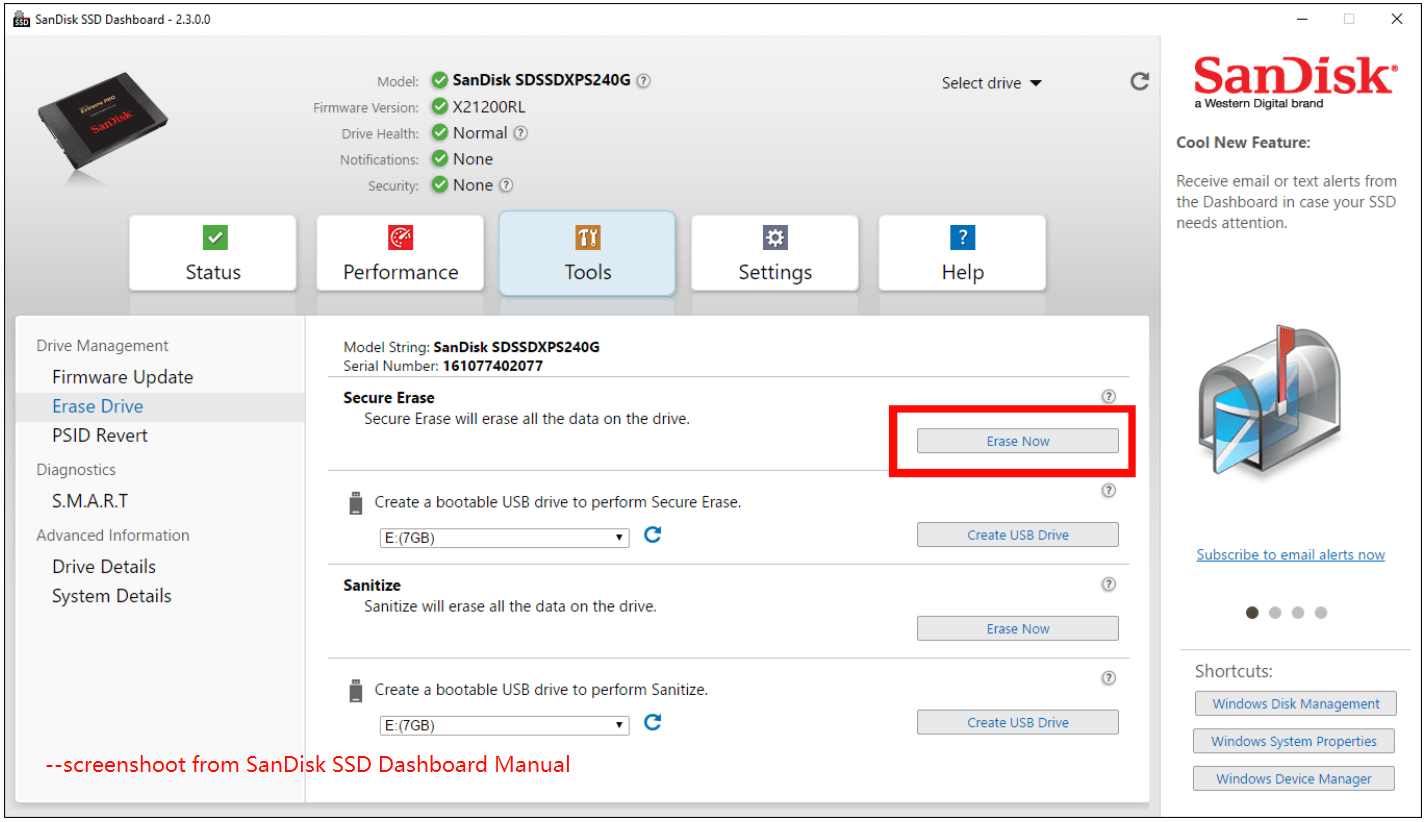
B. Secure Erase
- Launch the SanDisk SSD Dashboard on your PC.
- Click the Select drive drop-down menu to select the SSD on which all user data will be permanently deleted.
- Go to the Tools tab.
- Click Erase Now next to Secure Erase.

Which One Should You Choose?
If you’re short on time and the SSD doesn’t contain important data, go for the Secure Erase option to save time. However, if you have more time and want to ensure all data is completely wiped, choose Sanitize. Sanitize erases the mapping table and all blocks on the target disk, providing a safer way to keep your data secure.
Bonus Tip: Use MiniTool Partition Wizard to Wipe Disk with Ease
As the above shows, different brands of SSD drives have different software to manage them. So, to make it easier, I recommend MiniTool Partition Wizard to you. It is a professional and reliable disk partition manager that is suitable for all SSD/HDD brands.
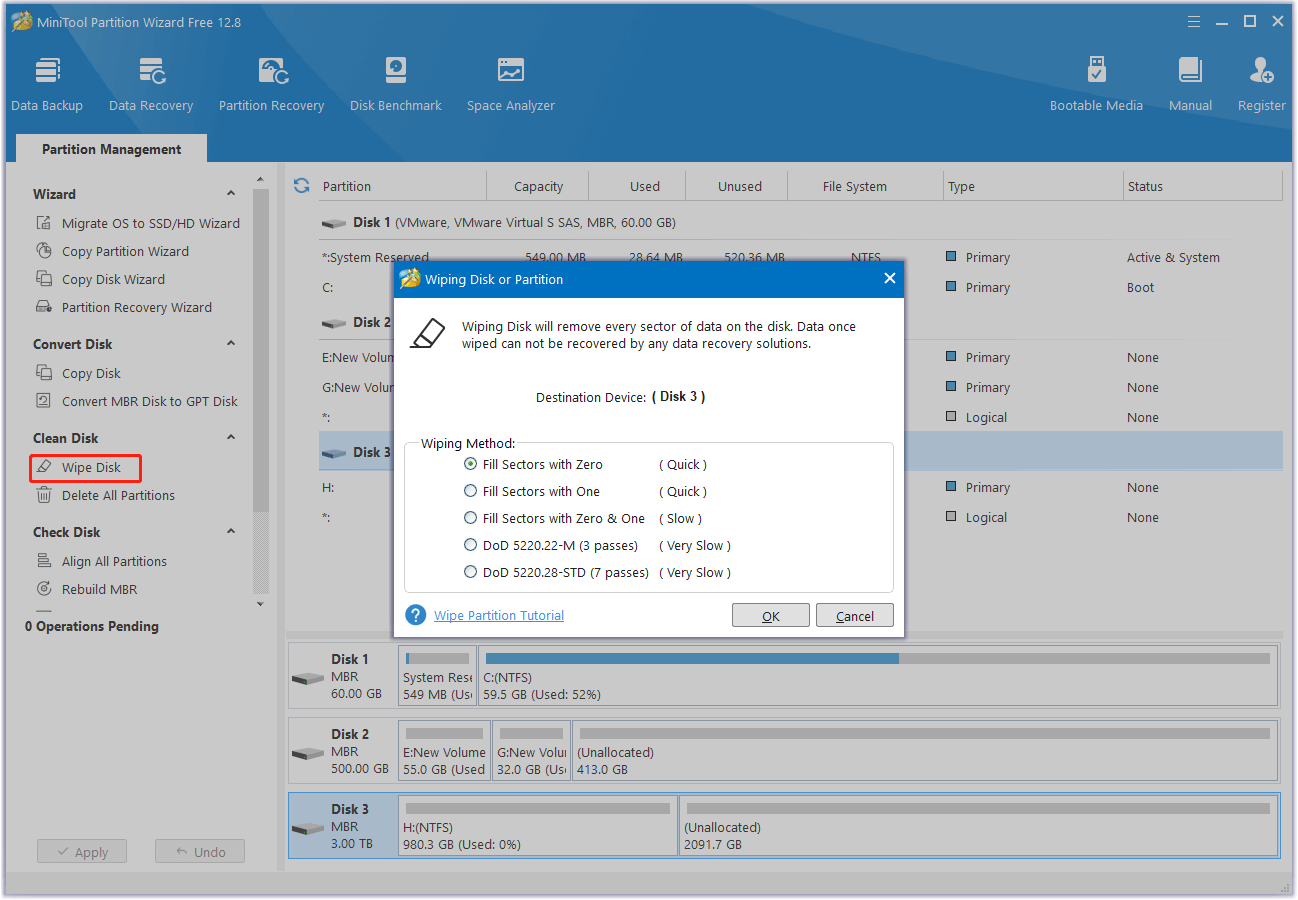
It provides the Wipe Disk feature to destroy all information in selected disks safely and permanently. Besides, this multifunctional software can partition hard drives, check disk errors, clone hard drives, move/resize partitions, convert MBR to GPT, rebuild MBR, do hard drive data recovery and SSD data recovery, etc.
Here’s how to use MiniTool Partition Wizard’s Wipe Disk feature:
MiniTool Partition Wizard FreeClick to Download100%Clean & Safe
- Download and install MiniTool Partition Wizard on your computer.
- Launch it into its main interface.
- Choose the target SSD from the disk map.
- Select the Wipe Disk feature from the left panel.
- Choose a way under the Wiping Method section.
- Then click OK to move on.
- After that, click Apply and Yes to execute the pending changes.

In Conclusion
This post introduces what Secure Erase and Sanitize are and the differences between them. Also, it shows you how to perform Sanitize or Secure Erase SSD. After reading this post, you may already know all the things you want to know.

User Comments :