What Causes the SanDisk Extreme Portable SSD Not Detected
The SanDisk extreme portable SSD not detected Windows 10 issue can appear due to various factors. Some possible reasons are:
- Faulty or loose USB cable or port
- Outdated or incompatible driver
- Disk initialization or partitioning issues
- Corrupted or incompatible file system
- Missing drive letter
- Incorrect BIOS settings
- …
How to fix the SanDisk extreme portable SSD not detected Windows 10? You can try the following solutions.
Way 1. Check the USB Cable and Port
The first thing you can do is to check your USB cable and port. Make sure that the cable is not damaged or loose and that the port is clean and functional. You can try connecting your SSD using another USB cable/port to see if it works. If the PC not detecting SSD problem persists, move on to the next solution.
Way 2. Update the Device Driver
Sometimes, the SanDisk SSD not detected issue can be caused by outdated or incompatible drivers. You can try updating the driver with the following steps:
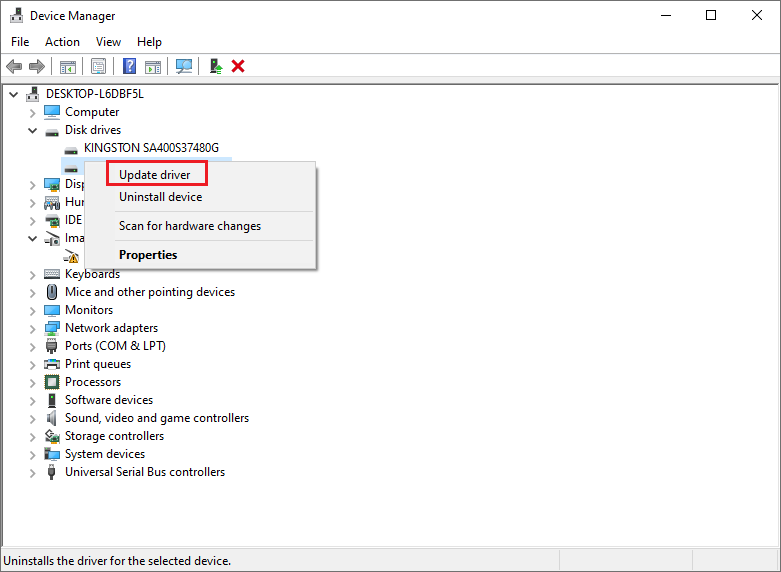
Step 1. Right-click the Windows icon and select Device Manager.
Step 2. In the pop-up window, expand the Disk drives category and locate your SanDisk Extreme Portable SSD.
Step 3. Then right-click it and select Update driver. Choose Search automatically for drivers and follow the on-screen instructions to update drivers.

Step 4. Once done, reboot your computer and check if the SanDisk extreme portable SSD not working issue is resolved.
Way 3. Initialize the SSD
If your SanDisk Extreme Portable SSD is new or has been formatted recently, it may not be initialized, which means it does not have a valid partition table and cannot be used by your computer. You can try initializing the SSD with this guide.
Way 4. Change the Drive Letter
The SanDisk SSD not detected issue may occur if your SanDisk Extreme Portable SSD does not have a drive letter assigned to it or conflicts with another drive letter. In this case, you can change the drive letter using MiniTool Partition Wizard, which is a professional and powerful partition manager that can help you change the drive letter, recover data, check the partition for errors, etc.
Here is how to change the drive letter using this partition manager:
Step 1. Download and install MiniTool Partition Wizard, then launch it to enter its main interface.
MiniTool Partition Wizard FreeClick to Download100%Clean & Safe
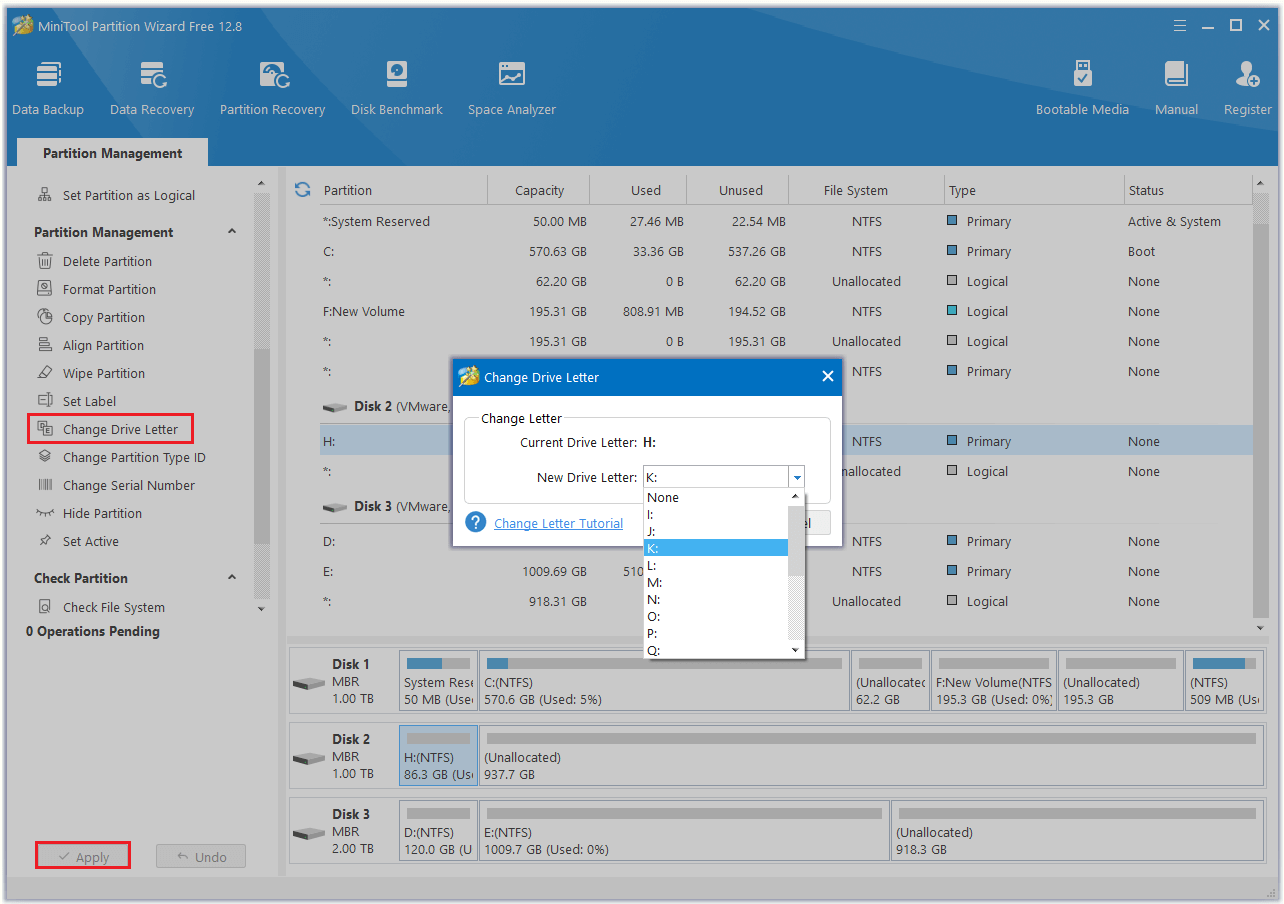
Step 2. Then highlight the partition on your SanDisk SSD and click Change Drive Letter from the left panel.
Step 3. In the next window, choose a new drive letter and click OK.
Step 4. Once done, click the Apply button to apply the changes.

Way 5. Check BIOS Settings
To get rid of the PC not detecting SSD issue, you can check your BIOS settings to see if your SanDisk SSD is enabled and detected by your motherboard. You can follow this post to enter BIOS.
Way 6. Format the SSD
If none of the above solutions work, you can try formatting the SSD to fix the SanDisk extreme portable SSD not working issue. You can follow this post: 3 Different Ways to Free Format SSD with No Harm to SSD.
Way 7. Recover Data
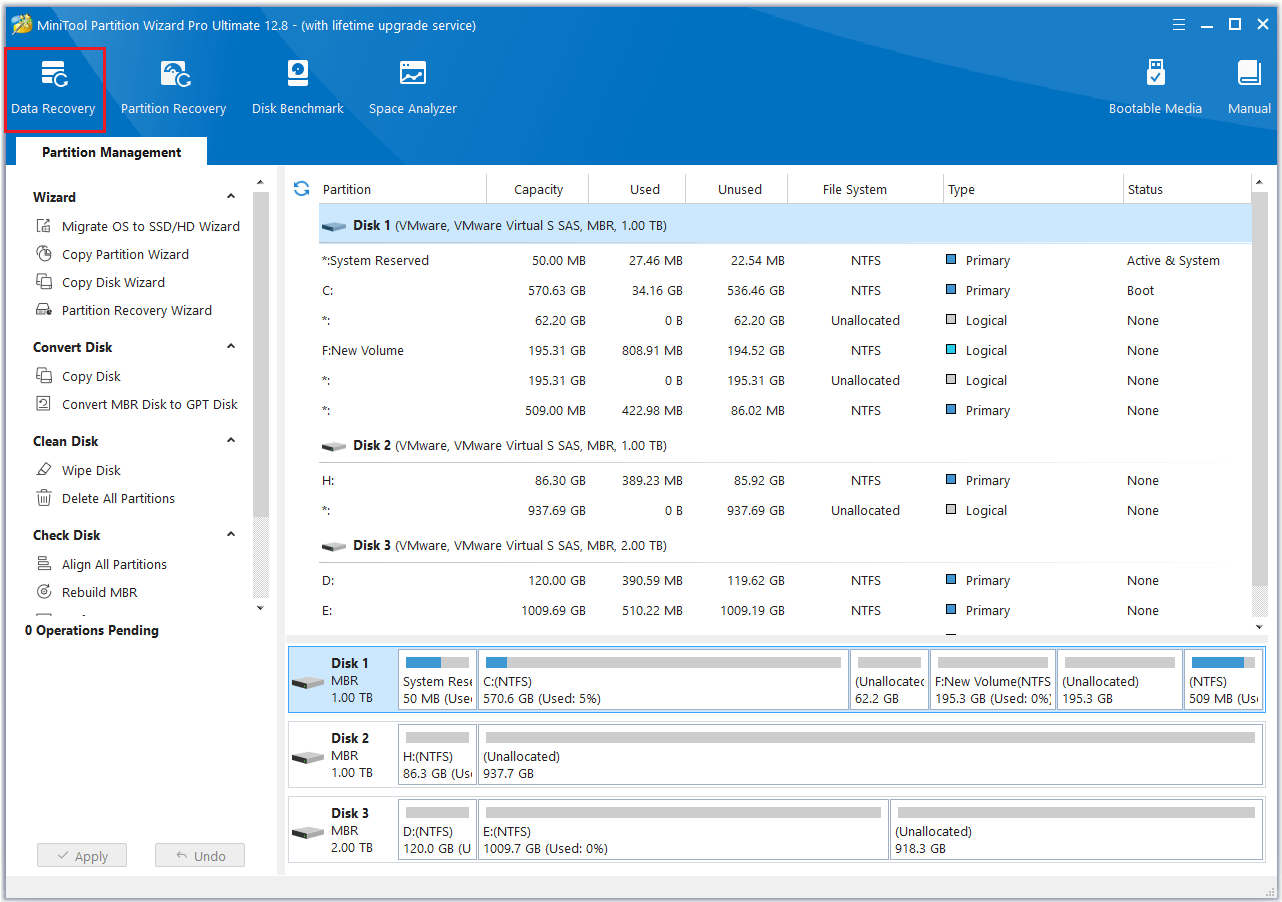
If you find some important data lost or you cannot access your data on SanDisk SSD, you may need to recover your data from the SSD using professional data recovery software – MiniTool Partition Wizard. It can help you recover deleted/lost data from damaged, formatted, and inaccessible drives. You can refer to this post to perform SanDisk data recovery.
MiniTool Partition Wizard DemoClick to Download100%Clean & Safe

Conclusion
Now, this post comes to an end. We hope that you can solve your issue successfully. Do you have any suggestions or other nice fixes for SanDisk extreme portable SSD not detected Windows 10? You can feel free to share them with us in the following comment part.

User Comments :