No AC3 Codec in Windows 11 24H2
Available to all users on October 1, 2024, Windows 11 24H2 is the third and current major update to Windows 11. It introduces the first Windows 11 based Long-Term Servicing Channel (LTSC) editions and subscriptions variants of IoT Enterprise editions.
Like other updates, Windows 11 24H2 makes improvements, adds new features, and contain bug patches. One of the adjustments is that Microsoft have removed the Dolby Digital (AC-3) codec. If you clean install Windows 11 24H2 or buy a PC with this system preinstalled without the codes, you need to manually restore Dolby Digital support in Windows 11 24H2.
How to restore DTS audio codec in Windows 11 24H2? This post will reveal the instructions.
Further reading:
Microsoft has forced Windows 11 24H2 update on all eligible PCs since January 16, 2025. Whether you like it or not, your computer will be updated to this version as long as the device supports it. However, users complain that various issues occur after installing the update.
Here are some frequently encountered issues related to Windows 11 24H2.
- High CPU usage after Windows 11 24H2 update
- Second monitor not working after 24H2 update
- File Explorer not working after Windows 11 24H2 update
- HP scanner not working after Windows 11 24H2 update
- Windows 11 24H2 causing Brother scanning driver install to fail
- PC lags after updating to Windows 11 24H2
- Etc.
When you encounter data loss after Windows 11 24H2 update, get the data back using MiniTool Partition Wizard. This data recovery software helps you recover lost data due to various reasons. For instance, it enables you to recover data from a formatted hard drive, recover data from RAW drive, recover data from a hard drive crash, etc.
MiniTool Partition Wizard DemoClick to Download100%Clean & Safe
Restore Dolby Digital Support in Windows 11 24H2
Here are the steps to restore DTS audio codec in Windows 11 24H2. If there’s no AC3 codec in Windows 11 24H2, follow these steps to get it back.
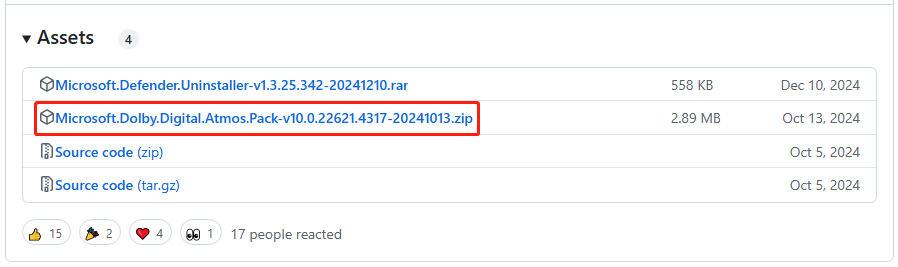
Step 1: Download Microsoft.Dolby.Digital.Atmos.Pack from GitHub.
Step 2: Right-click on the downloaded zip folder, choose Extract all, and click Extract.
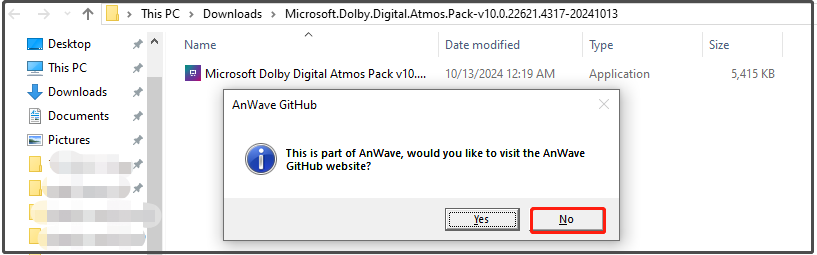
Step 3: Double-click on the .exe file to run it. During the process, you will receive a notification window, asking you whether to visit the AnWave GitHub website. As you come from there, you can click No.
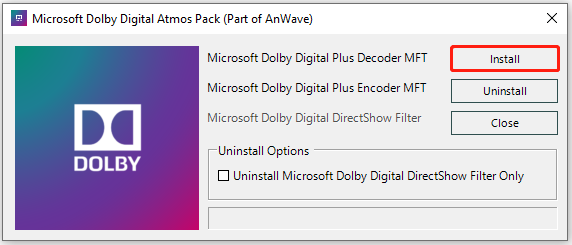
Step 4: Click the Install button behind Microsoft Dolby Digital Plus Decoder MFT.
Step 5: After the installation ends, restart the computer and enjoy AC-3 content again.
Windows 11 No Longer Has Dolby Digital 5.1 Surround Sound
Fix 1: Ensure that 5.1 Surround Sound Is Audio Output Device
You should check audio settings before trying other methods. In other words, you should ensure that the audio output device is set to 5.1 surround sound. The following steps show you how to do that.
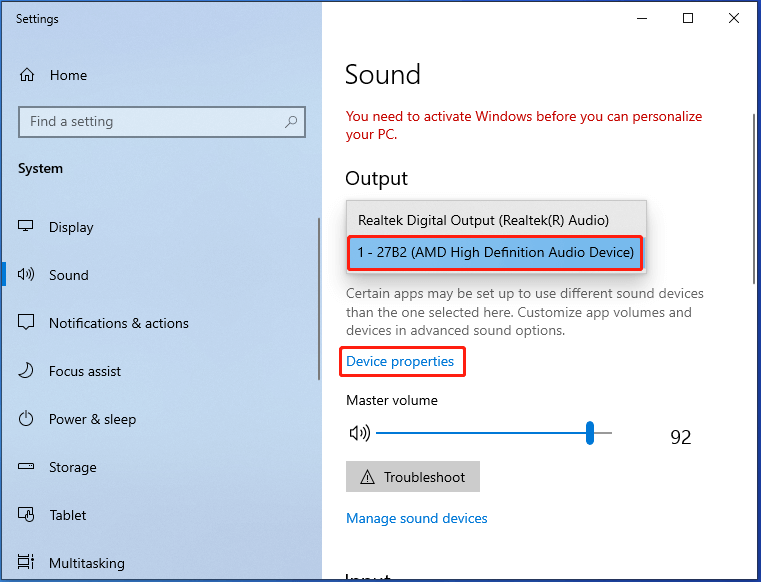
Step 1: Right-click the volume icon on the taskbar and choose Sound Settings.
Step 2: Choose your audio device under the Output section and then click Device properties.
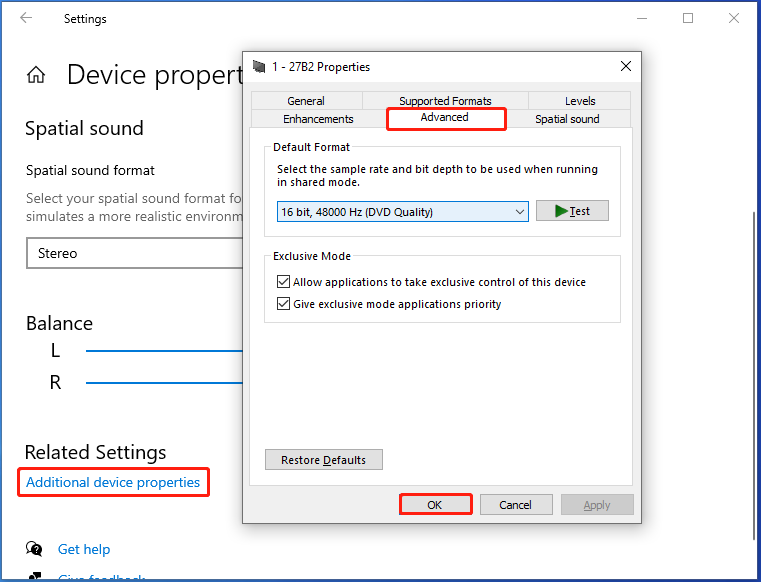
Step 3: Tap on Additional device properties under Related Settings.
Step 4: Navigate to the Advanced tab and select 5.1 Surround Sound. Then click OK to save changes.

Fix 2: Reinstall the Receiver
Try reinstalling the receiver if Windows 11 no longer has Dolby Digital 5.1 surround sound. It has been proven useful. To do that, follow these steps.
- Right-click on the Windows icon and then click Device Manager from the prompted menu.
- Find your receiver, right-click on the receiver, and choose Uninstall device.
- Confirm the uninstallation.
- Once done, download the receiver from the official website and then install it. Then check if the issue is fixed.
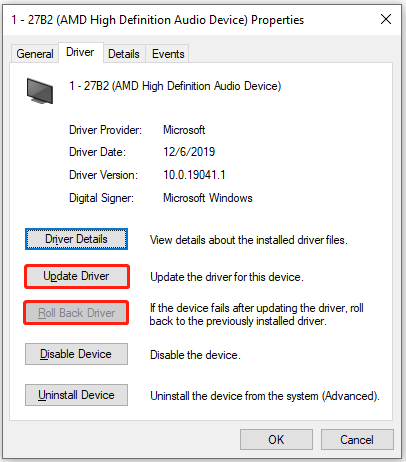
Fix 3: Update or Roll Back Audio Driver
When Windows 11 no longer has Dolby Digital 5.1 surround sound, consider updating or rolling back audio drivers.
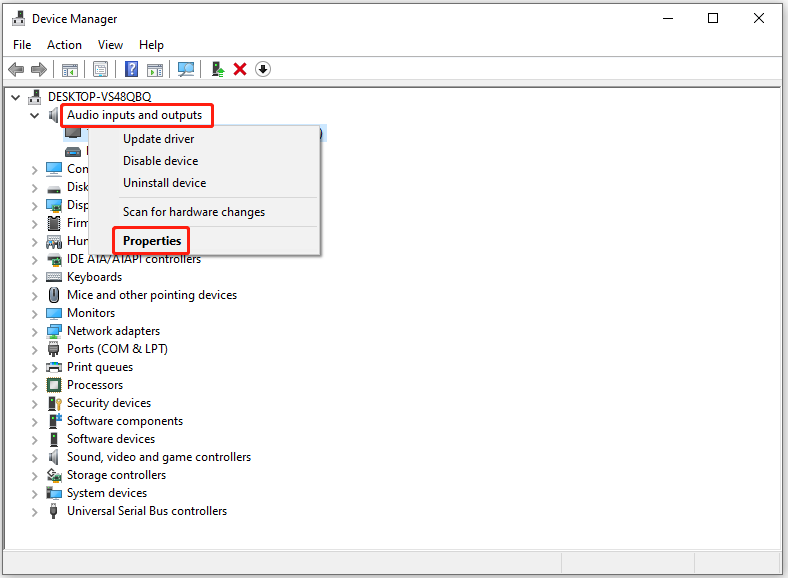
Step 1: Open Device Manager on your computer.
Step 2: Expand Audio inputs and outputs, right-click on the audio driver, and hit Properties.
Step 3: According to your needs, click Update Driver or Roll Back Driver. Then follow the prompted instructions to complete the operation.
Fix 4: Reset Audio Settings
The last resort is to reset audio settings. If the above fixes fail, you can try this method.
Step 1: Open Settings and click System > Sound.
Step 2: In the Advanced sound options section, click App volume and device preferences.
Step 3: Click on the Reset button. After a while, audio settings will be reset to default settings.
Bottom Line
This post shows you how to restore Dolby Digital support in Windows 11 24H2 and what to do if Windows 11 no longer has Dolby Digital 5.1 surround sound. You can refer to this post if you encounter either of the situation.
About The Author

Position: Columnist
Having writing articles about computer tech for a long time, I am rather experienced especially on the aspect of computer optimization, PC enhancement, as well as tech terms explanation. The habit of looking through tech forums makes me a great computer issues collector. And then, many articles related to these issues are released, which benefit plenty of users. Professional, effective, and innovative are always the pursuit of an editing worker.
User Comments :