Can I Replace a DVD Drive with an HDD or SSD?
In the ever-evolving world of computer hardware, users are always looking for ways to upgrade and optimize their systems. A common question is whether it is possible to replace a DVD drive with a hard disk drive (HDD) or a solid-state drive (SSD).
The answer is yes. You can usually replace a DVD drive with an HDD or SSD in a laptop, using a tray to secure the new drive in the DVD drive bay. This allows you to add additional storage space or improve performance.
Why Replace a DVD Drive with an HDD or SSD?
Here are some reasons to replace a DVD drive with an HDD or SSD.
- Expand storage: One of the main motivations for replacing a DVD drive with an HDD or SSD is to gain more storage space. The storage capacity of a DVD is relatively limited, typically around 4.7GB for a single-layer disc and around 8.5GB for a dual-layer disc. In contrast, an HDD or SSD can provide terabytes of storage space
- Improve performance: SSDs, in particular, offer significant performance advantages over DVD drives. DVD drives are mechanical devices that read data from discs and have relatively slow data transfer speeds. In contrast, SSDs use flash memory to store data and can read and write data several times faster.
- Change usage patterns: With the rise of digital media and cloud storage, the need for physical DVD drives has decreased for many users.
How to Replace a DVD Drive with an HDD or SSD?
The first step in replacing a DVD drive with an HDD or SSD is to ensure compatibility. Most laptops use SATA connectors for DVD drives and 2.5-inch SSDs/HDDs, so they can be easily interchanged.
To replace a DVD drive with an HDD or SSD, things you’ll need to prepare:
- A drive caddy (You’ll need a tray to hold the HDD or SSD in the DVD drive bay.)
- A screwdriver
- The replacement HDD or SSD
Now, follow this step-by-step guide to replace your laptop’s DVD drive with a 2.5-inch SSD or HDD.
Step 1. Remove the DVD drive.
Turn off the laptop, remove the battery, flip the laptop over, and remove the bottom cover so you can access the screws that hold the optical drive in place. Then remove the screws and pull out the drive.
Once it’s completely removed, use a screwdriver to gently remove the DVD drive panel. You may also need to remove the locking screw hole on the DVD drive. It’s secured by two small screws that easily fit into the bay and lock into place.
Step 2. Insert the HDD or SSD into the caddy.
Once you’ve unpacked your HDD or SSD, placing the drive into the caddy should be simple. Depending on the retailer, you may receive a screwdriver with the caddy. These screws need to be tightened to secure the HDD or SSD in the tray. When tightening, make sure these screws are flush with the tray, otherwise, it won’t slide into your laptop.
Step 3: Insert the caddy into the laptop.
Next, locate the panel you removed earlier. Another standardized aspect of laptops is the panel attachment on the DVD drive.
Since the eject button must be in a specific location for universality, the clips for the panel attachment are in the same location. Simply install the panel, pushing the tabs into the slots.
Invert the laptop again, slide the HDD or SSD into the CD drive slot and secure the tray in place with the retaining screws. Your laptop has a new storage device that works with whatever operating system you install.
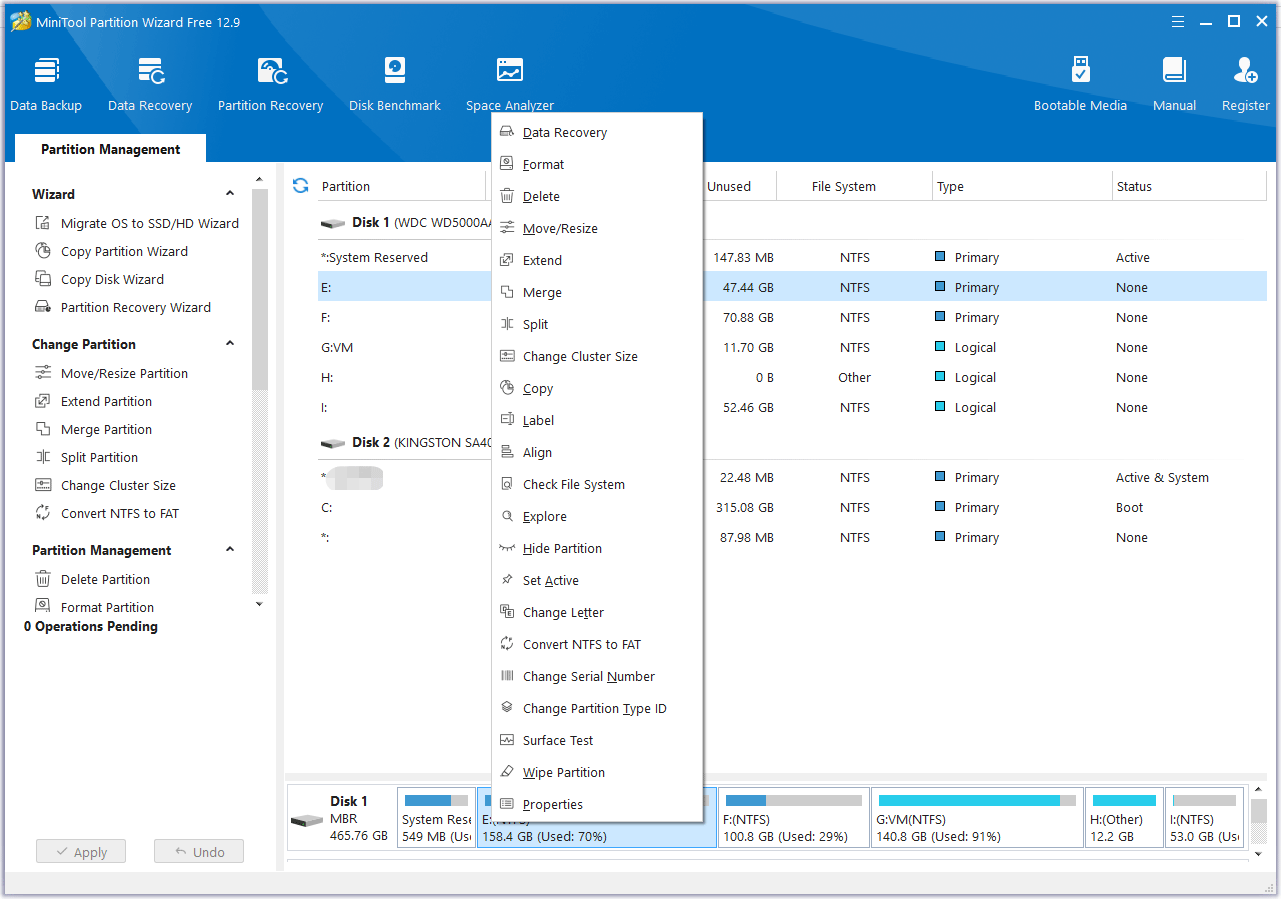
Once the installation is complete, you may need to initialize the drive in your computer’s operating system. This involves formatting and partitioning the drive, which can usually be done with the MiniTool Partition Wizard.
This professional partition manager can help you better manage your drive. For example, it can format/extend/resize/wipe partitions, clone a hard drive, convert partitions between NTFS and FAT32, and upgrade laptop from HDD to SSD. etc.
MiniTool Partition Wizard FreeClick to Download100%Clean & Safe
Bottom Line
In summary, replacing a DVD drive with an HDD or SSD is a viable and often beneficial upgrade for many computer users. You can follow the guide above to complete it.
About The Author

Position: Columnist
Vega joined MiniTool as an editor after graduation. She enjoys helping people with computer problems, including disk management, data recovery, and more. She is constantly expanding her knowledge in related fields. And she will continue to bring more easy-to-understand professional articles to help people solve various problems on the PC. In her daily life, Vega enjoys hanging out with friends, shopping online and listening to music. She is someone who knows how to enjoy life.
User Comments :