A lot of people don’t know how to remove hidden partition from a USB drive on Windows 10/11. Are you also trying to look for a guide? In this post, MiniTool Partition Wizard will provide 3 simple ways to delete hidden partition on a USB drive.
What Does Hidden Partition Mean
A hidden partition is usually set to protect some important or sensitive files from being accessed by malicious people. The partition is not visible in File Explorer. So, if you want to find a hidden partition, you need to open Disk Management. In most cases, the hidden partitions on Windows are recovery partitions or EFI system partitions, which can’t be deleted.
Sometimes, however, you may need to delete hidden partition from a USB drive so as to make full use of the space. How to remove a hidden partition on USB drive? Let’s keep reading.
How to Remove a Hidden Partition on USB Drive
Here we will show you 3 methods to delete hidden partition on a USB drive. Let’s try them in order or choose one that works best for you.
Way 1. Remove Hidden Partition from USB Drive Using MiniTool Partition Wizard
The first and simplest method to delete a hidden partition on USB drive is to use MiniTool Partition Wizard. It is a professional partition manager that can hide/unhide partitions, delete/format/wipe/move/copy partitions, change cluster size, convert FAT32 to NTFS without data loss, and more. Here’s how to delete a hidden partition on USB drive using the MiniTool software.
MiniTool Partition Wizard FreeClick to Download100%Clean & Safe
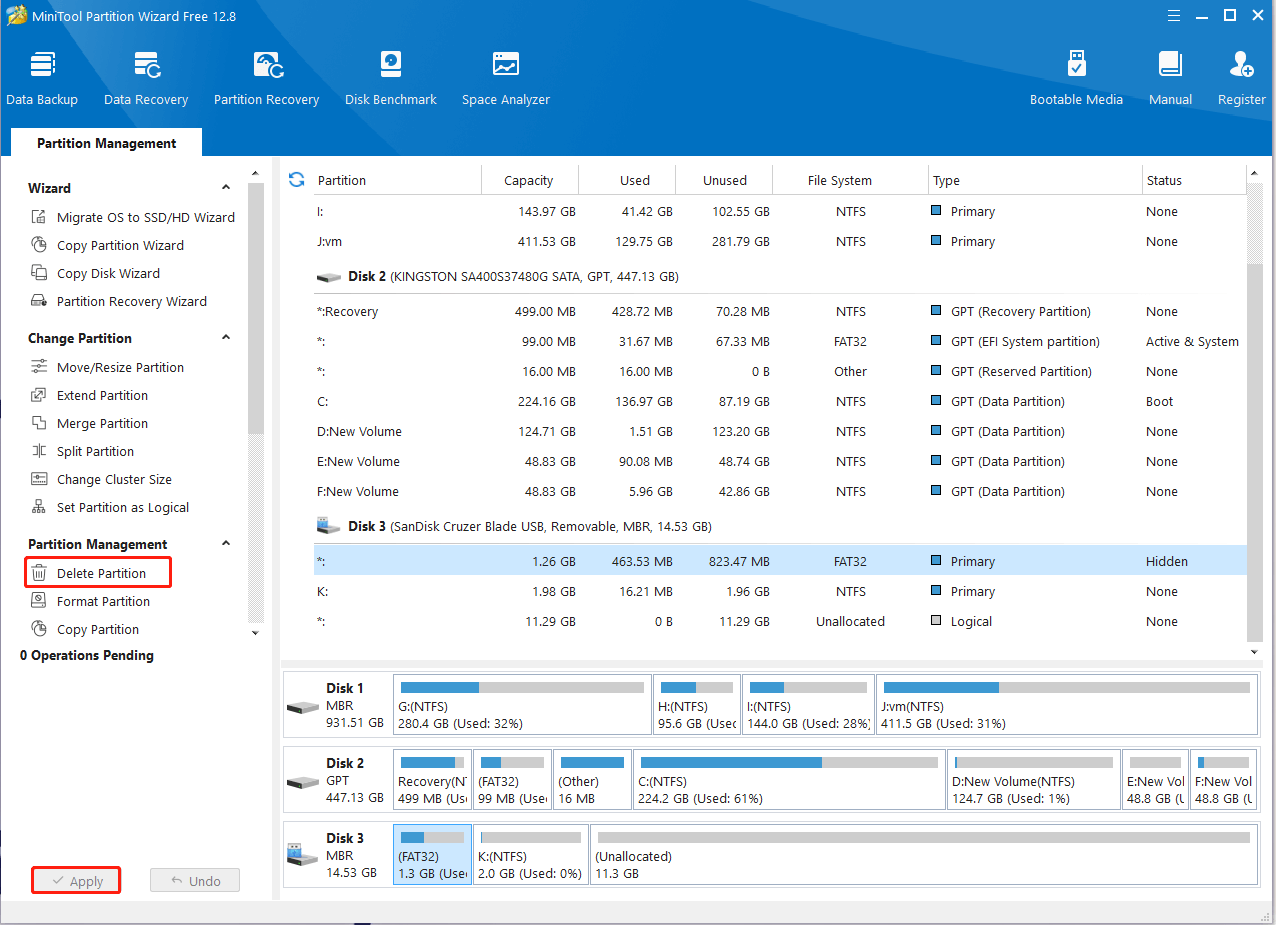
Step 1. Insert the USB drive into the computer properly and launch MiniTool Partition Wizard to enter its main interface.
Step 2. Select the hidden USB partition from the disk map and click on Delete Partition from the left action panel. Also, you can right-click the partition and select Delete from the context menu.
Step 3. Click on Apply to execute the pending operation.
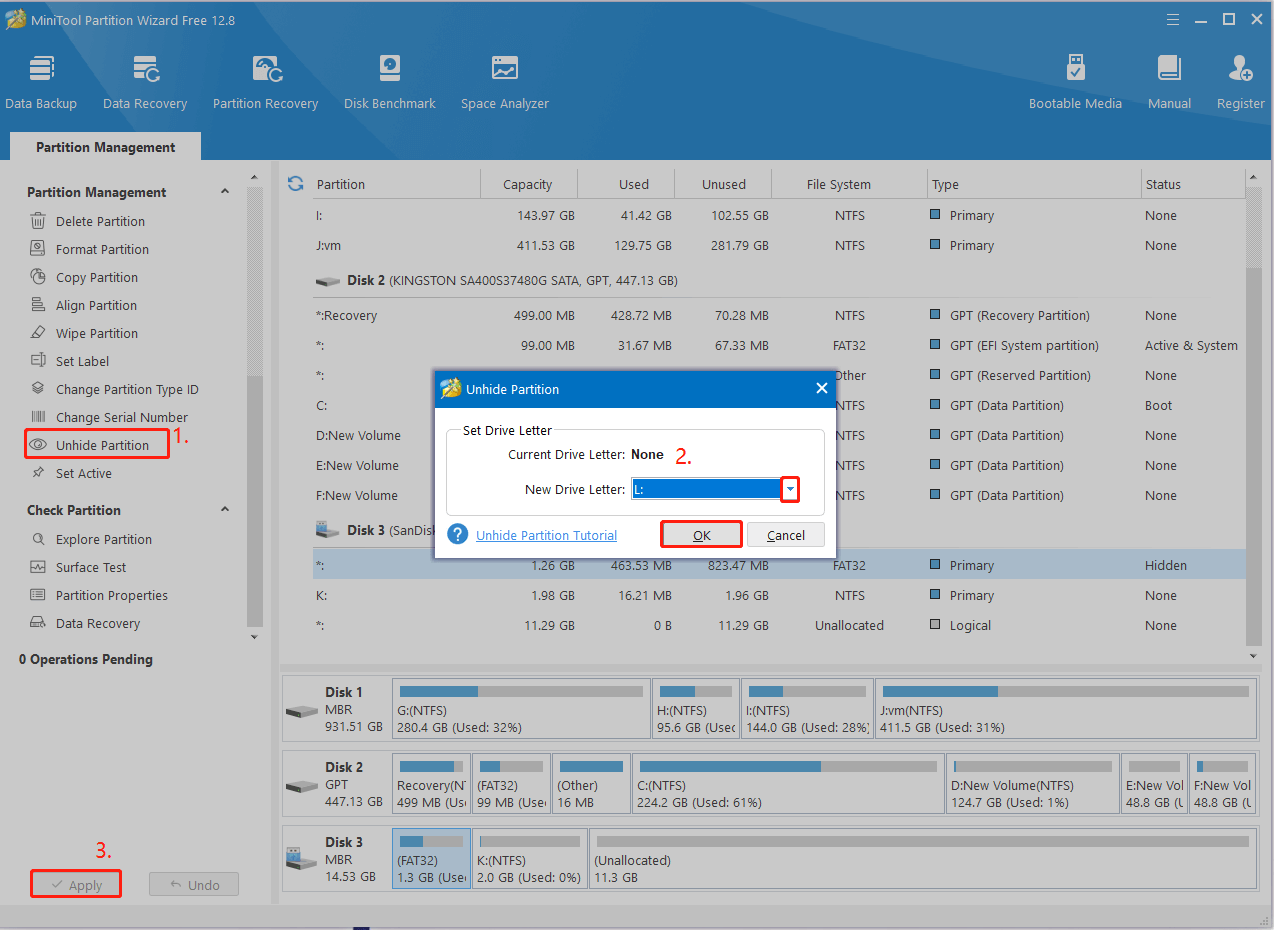
Step 4. If you want to unhide the partition on USB drive, select the partition and click on Unhide Partition from the left action panel. In the pop-up window, set a drive letter for the partition and click on OK > Apply execute the change.
Way 2. Remove Hidden Partition from USB Drive Using DiskPart
DiskPart is a well-known Windows built-in disk partition utility that can create/format/delete partitions using certain command lines. You can use it to remove hidden partition from a USB drive.
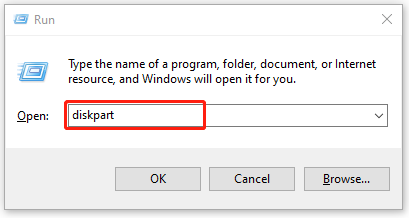
Step 1. Press the Win + R keys to open the Run dialog box, and then type diskpart in it and press Enter. Then click on Yes in the UAC window to open the tool in Command Prompt.
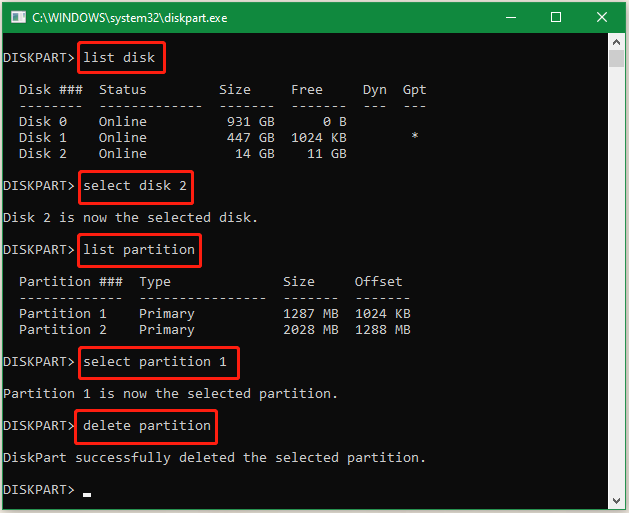
Step 2. Type the following commands in order and hit Enter after each one to remove hidden partition from a USB drive.
- list disk
- select disk x (replace x with the number of the USB drive)
- list partition
- select partition n (replace n with the number of the hidden partition on the USB)
- delete partition
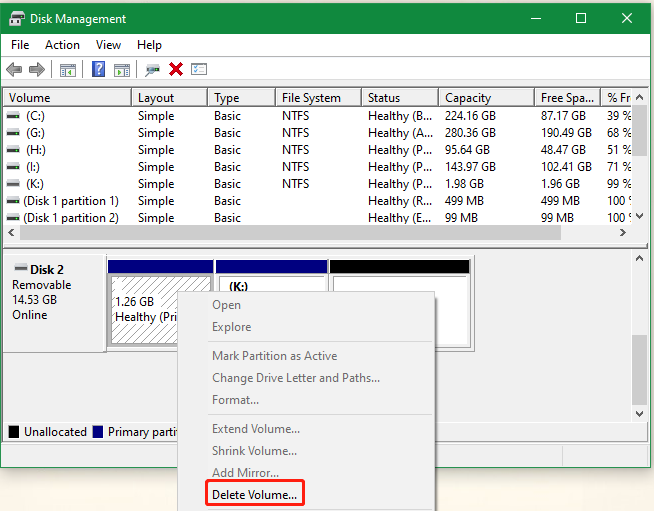
Way 3. Remove Hidden Partition from USB Drive Using Disk Management
Although the hidden partition won’t show up in File Explorer, it is visible in Disk Management. So, you can delete hidden partition from a USB drive using the tool. Here’s how:
Step 1. Press the Win + X keys to open the context menu and select Disk Management.
Step 2. Right-click the hidden partition on the USB drive and select Delete Volume.
Step 3. Click on Yes in the pop-up window to confirm the deletion.
How to delete a hidden partition on USB drive Windows 10/11? The top 3 methods have been illustrated above. If you have any other suggestions for the topic, please leave them in the following comment zone.
About The Author

Position: Columnist
Ariel has been working as a highly professional computer-relevant technology editor at MiniTool for many years. She has a strong passion for researching all knowledge related to the computer's disk, partition, and Windows OS. Up till now, she has finished thousands of articles covering a broad range of topics and helped lots of users fix various problems. She focuses on the fields of disk management, OS backup, and PDF editing and provides her readers with insightful and informative content.
User Comments :