This post shows you how to remove “Edit with Paint” in Windows 11. If you plan to remove it, you can refer to this guide. Partition Magic provides you with detailed steps. Moreover, it also offers the steps to add and restore Windows 11 “Edit with Paint” context menu.
Now, you can edit an image with the Paint app directly from File Explorer or on the desktop by right-clicking on the image and choosing Edit with Paint. Given that fact, you want to remove “Edit with Paint” context menu. How to do that? Well, this post walks you through the process.
MiniTool Partition Wizard FreeClick to Download100%Clean & Safe
How to Remove “Edit with Paint” in Windows 11
You can remove “Edit with Paint” context menu by editing Registry Editor. This is an easy and effective method. The following steps show you how to remove “Edit with Paint” in Windows 11 via Registry Editor.
MiniTool Partition Wizard DemoClick to Download100%Clean & Safe
Step 1: Open the Run dialog window by pressing Windows + R keys.
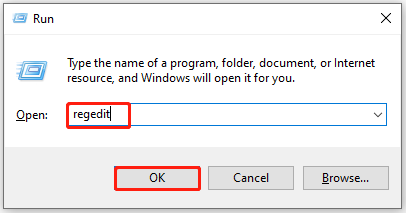
Step 2: Type regedit in the Run window and click OK. If the User Account Control window prompts, click Yes to confirm the operation.
Step 3: In the Registry Editor window, paste the following path in the address bar and hit Enter. This path only removes “Edit with Paint” for the current user.
HKEY_CURRENT_USER\Software\Microsoft\Windows\CurrentVersion\Shell Extensions
Step 4: Check if the Shell Extension key has a Blocked key inside it. If no, click Edit > New > Key and rename it to Blocked. If there’s already one, click it and click Edit > New > String Value.
Step 5: Click on the value, press F2, and rename it to: {2430F218-B743-4FD6-97BF-5C76541B4AE9}
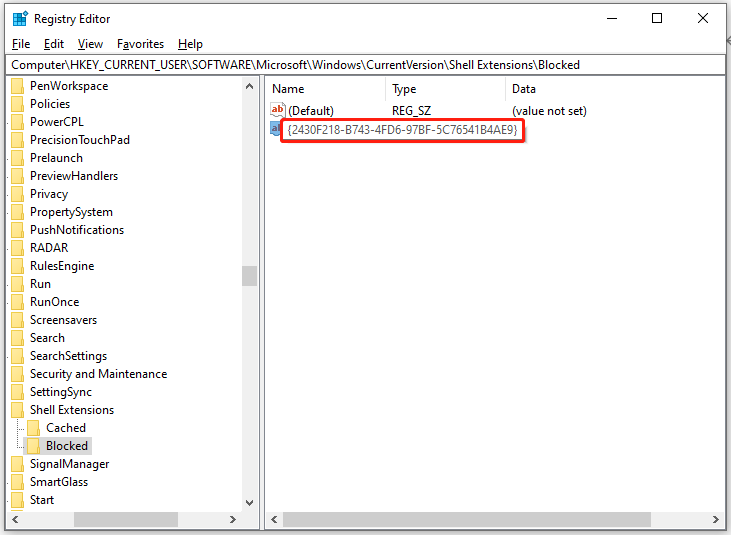
Step 6: Changes will apply immediately. You don’t have to restart the computer or explorer.exe.
How to Add Windows 11 “Edit with Paint” Context Menu
If there’s no Windows 11 “Edit with Paint” context menu, you can manually add it to your computer. To do that, follow these steps.
Step 1: Click here to download the Add_Edit_with_Paint_context_menu_for_current_user.reg file.
Step 2: Save the .reg file to your desktop.
Step 3: Double-click on the .reg file to run it. In the prompted window, click Yes to allow the operation.
Step 4: In the next warning window, click Yes to continue.
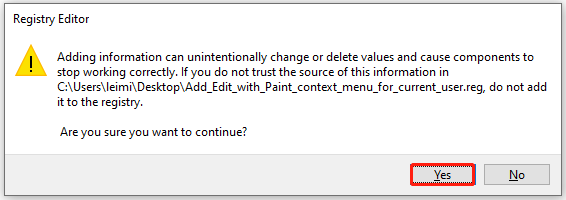
Step 5: After the value is added to Registry, you will receive the following message. Click OK to exit the operation.

How to Restore Windows 11 “Edit with Paint” Context Menu
Since the above method of removing the “Edit with Paint” context menu is not permanent, you can restore it at any time. Here’s how.
Step 1: Open Registry Editor on your computer.
Step 2: According to your needs, navigate to the corresponding location. Paste the path in the address bar and hit Enter.
For the current user: HKEY_CURRENT_USER\Software\Microsoft\Windows\CurrentVersion\Shell Extensions\Blocked
For all users: HKEY_LOCAL_MACHINE\SOFTWARE\Microsoft\Windows\CurrentVersion\Shell Extensions\Blocked
Step 3: Find the {2430F218-B743-4FD6-97BF-5C76541B4AE9} value and delete it.
Alternatively, you can uninstall the app to remove the “Edit with Paint” context menu. This is a fast and convenient method for users who don’t use the Windows 11 stock image editor.
Bottom Line
How to remove “Edit with Paint” in Windows 11? This post has shown the answer to you. Besides, it also offers you steps to add and restore Windows 11 “Edit with Paint” context menu.

User Comments :