PowerShell is an in-built task automation and configuration management program that was created by Microsoft. It can be used to manage plenty of tasks on the PC with different command lines, including unzipping/zipping files, getting disk space, formatting disk, installing Windows updates, etc.
Here, this post focuses on the PowerShell format disk and its alternative. If you wonder how to use PowerShell commands to format disk drives, you can pay attention to the following content.
Use PowerShell Commands to Format Disk Drive
Way 1: Directly Use PowerShell Disk Format Command
Here’s a simple guide on how to use the effective PowerShell disk format command to format the disk straightly.
Step 1: Right-click the Start icon and select Windows PowerShell (Admin).
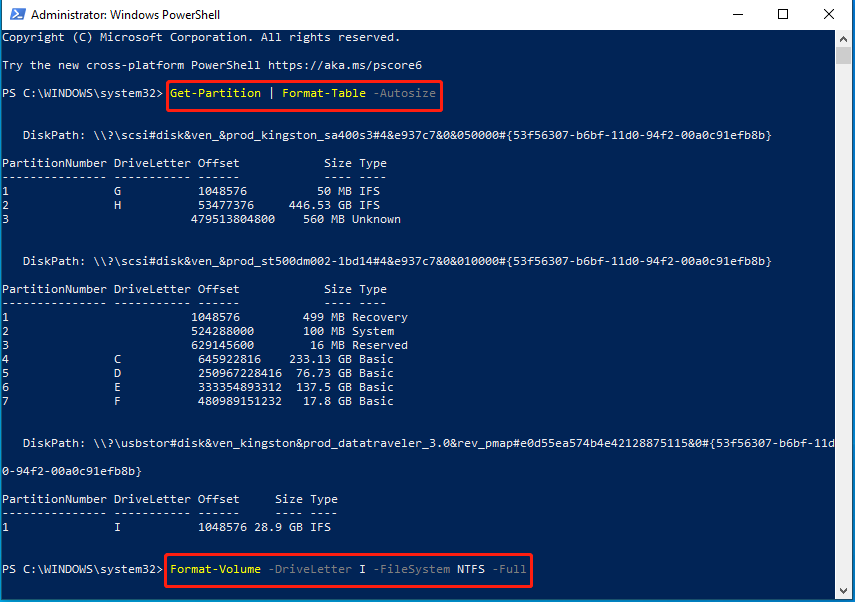
Step 2: In the elevated PowerShell window, type Get-Partition | Format-Table -Autosize to get information about all the partitions on your PC.
Step 3: After that, type Format-Volume -DriveLetter * -FileSystem NTFS -Full to execute the PowerShell format drive. You should replace * with the drive letter of the drive to format. If needed, change NTFS to the file system you prefer.

Way 2: Format Disk by Recreating a New Partition
In some cases, you may consider formatting a disk by initializing it and recreating a new partition. How can PowerShell initialize disk and format? If you have no clue, you can follow the steps below.
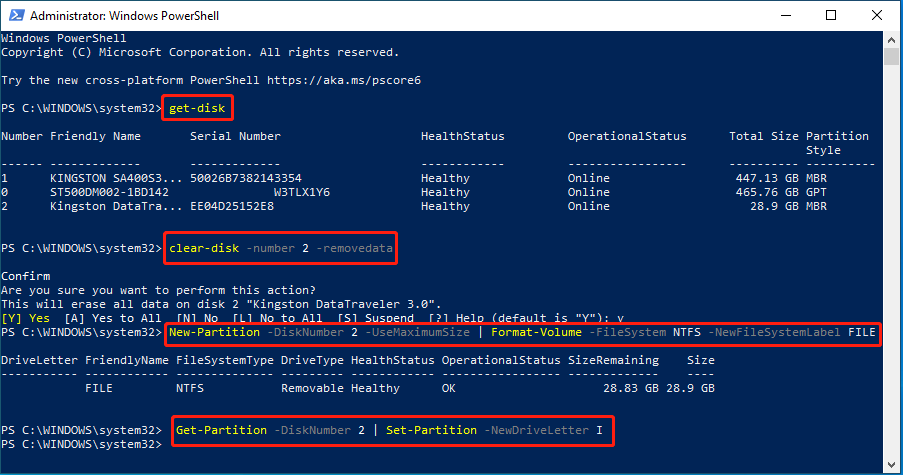
Step 1: Run Windows PowerShell as an administrator. Then type get-disk and press Enter to get a list of your current disks.
Step 2: Execute the clear-disk -number N -removedata command to clear the target disk. Note that N represents the number of your disk.
Step 3: After that, apply PowerShell format disk by creating a new partition with the following command.
New-Partition -DiskNumber N -UseMaximumSize | Format-Volume -FileSystem NTFS -NewFileSystemLabel XX
Step 4: To assign a drive letter to the new partition, type Get-Partition -DiskNumber N | Set-Partition -NewDriveLetter G and press Enter.

That’s all about the PowerShell initialize disk and format process. You can have a try.
An Alternative to PowerShell Format Disk – MiniTool Partition Wizard
As mentioned earlier, you can perform a PowerShell format drive operation by using command lines. Therefore, if you are not familiar with these commands, the process might be a little complex. What’s worse, sometimes you may fail to use PowerShell due to certain issues, such as Powershell has stopped working, PowerShell not opening, and so on.
To simplify the disk format and avoid unexpected issues, we’d like to recommend you use a third-party program to format your disk. As for this, MiniTool Partition Wizard is a great choice. It’s a professional partition manager that enables you to format your disk with a few clicks.
Besides, MiniTool Partition Wizard allows you to perform various disk/partition tasks with its various features. For instance, you can create/resize/delete partitions, copy/wipe disks, migrate OS to SSD/HDD, etc.
You can easily use the format disk PowerShell alternative with the given steps.
Step 1: Download and install MiniTool Partition Wizard on your PC. Then launch it to enter the main interface.
MiniTool Partition Wizard FreeClick to Download100%Clean & Safe
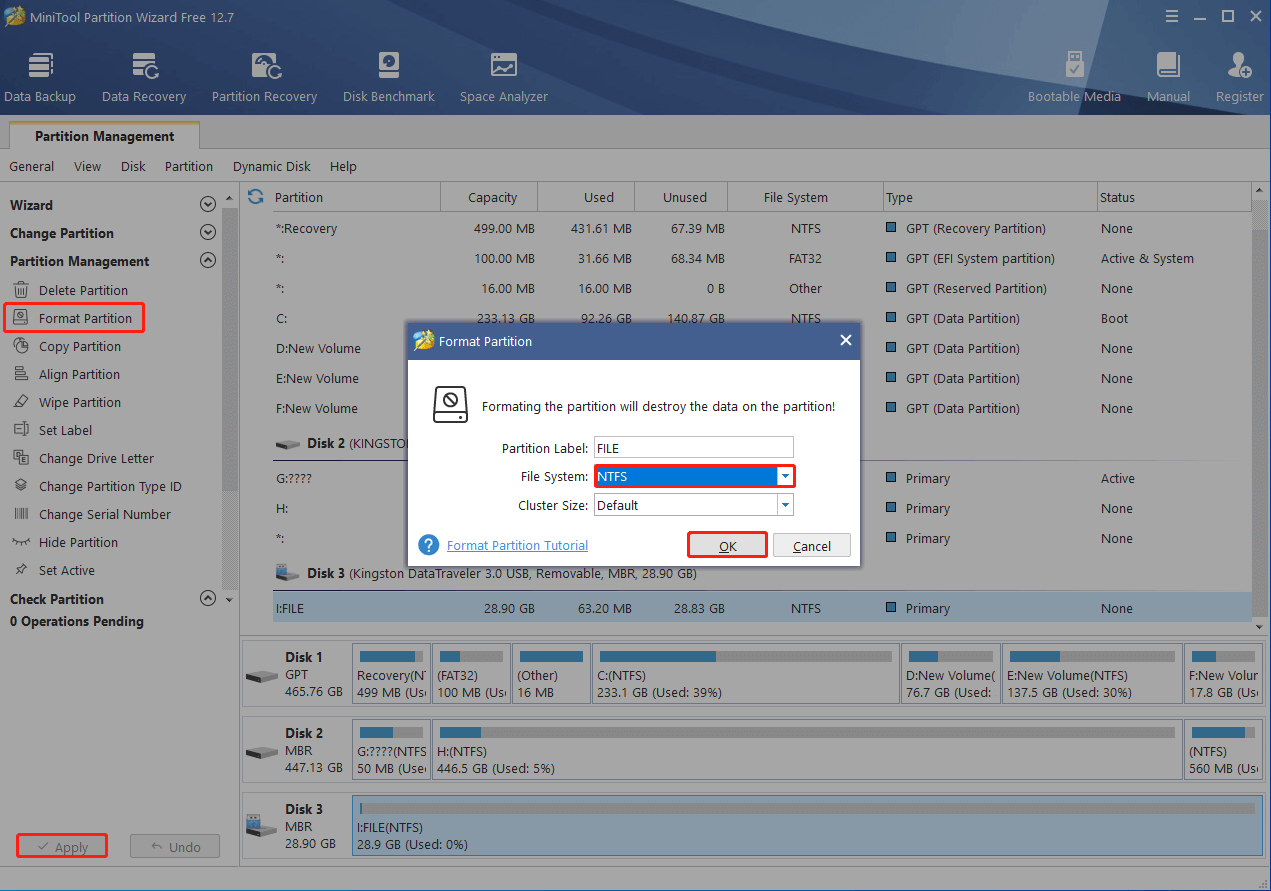
Step 2: Highlight the partition to format and select Format Partition from the left action pane.
Step 3: In the pop-up window, select a preferred file system and click OK.
Step 4: Finally, click Apply to save the pending change.

From above, you can get details about the PowerShell format disk. If you have any problems with this topic, you can leave a message in the comment area below.

User Comments :