PC not booting after replacing CMOS battery? If you encounter problems with booting after replacing CMOS battery on your computer, you don’t need to worry. Here, Partition Magic shows what causes the error and provides several effective methods to solve it.
Some people report that they encounter the “PC not booting after replacing CMOS battery” error. This error bothers them a lot. For example, here is a user report from the answers.microsoft.com forum:
Hi, I have recently replaced the CMOS battery in my Lenovo G580. Unfortunately, it does want to boot up. The fan and hard drive both make a noise, but the screen does not turn on and the camera LED stays on and it stays there... Are there any other solutions? Many Thanks.https://answers.microsoft.com/en-us/windows/forum/all/pc-not-booting-after-replacing-cmos-battery/933b2760-38c6-44f1-a8bf-934f73fcfb8f
Causes of PC Not Booting After Replacing CMOS Battery Error
After searching for this error on the Internet, I found that the “computer won’t boot after replacing CMOS battery” error can mainly be caused by these reasons:
- You did not install the CMOS battery correctly or according to its polarity (+ and -).
- The CMOS battery you installed is damaged or exhausted.
- The BIOS settings have changed or disappeared.
Method 1. Check the Polarity of the CMOS Battery
If you fail to install the CMOS battery correctly with respect to its polarity, you may face problems with booting after replacing CMOS battery. In such a scenario, it is crucial to carefully verify the polarity of the CMOS battery and reinstall it correctly.
If you are still experiencing the same error after correctly installing the CMOS battery, you can try the other solutions below.
Method 2. Test the CMOS Battery Voltage
If the CMOS battery you installed is damaged or exhausted, you can also encounter Windows boot error after CMOS battery replacement. In this situation, you can use a multimeter to test the CMOS battery voltage. If it does not show any voltage, it means that the CMOS battery you installed is dead and you need to purchase a new one.
Method 3. Reseat RAM
If you accidentally dislodged the RAM sticks while replacing the CMOS battery, you may encounter a Windows boot error after CMOS battery replacement. To resolve this issue, you can remove and reinstall the RAM from the RAM modules. After reinstalling, check to see if the error has been resolved.
Method 4. Disconnect and Reconnect the SATA Cable
If you don’t connect the SATA cable properly, you can also encounter the “computer won’t boot after replacing CMOS battery” error. So, you can try disconnecting and reconnecting the SATA cable to fix the error. Meanwhile, you need to make sure that all the cables are connected properly.
Method 5. Change the SATA operation to AHCI
If you previously set your SSD as AHCI, replacing the CMOS battery might reset the BIOS to default and set it as IDE. So, if you cannot boot into Windows but can access the BIOS menu, changing the SATA operation to AHCI may fix the “PC not booting after replacing CMOS battery” error.
Method 6. Get Professional Help
If none of the above methods can help you fix the Windows boot error after CMOS battery replacement, the last thing you can do is get professional help. Contact a professional computer repair technician to get further assistance.
Bonus Tips: How to Recover Lost Files after Fixing the No Boot Issue?
If you lost some of your files after fixing the “PC not booting after replacing CMOS battery” error, you can use MiniTool Partition Wizard to help you get the lost files back. It provides the Data Recovery feature to help you recover lost/deleted files with ease.
Besides, this feature-rich tool can also help you rebuild MBR, check disk errors, partition hard drives, format USB to FAT32, change cluster size, move/resize partitions, extend partitions, convert MBR to GPT, and more.
Here’s how to use MiniTool Partition Wizard to help you recover files:
MiniTool Partition Wizard DemoClick to Download100%Clean & Safe
- Download and install MiniTool Partition Wizard on your computer.
- Click the Data Recovery feature from the top toolbar.
- Move your cursor to the drive that you want to scan and then click Scan.
- Wait for the scanning process to complete.
- Tick the files that you want to recover.
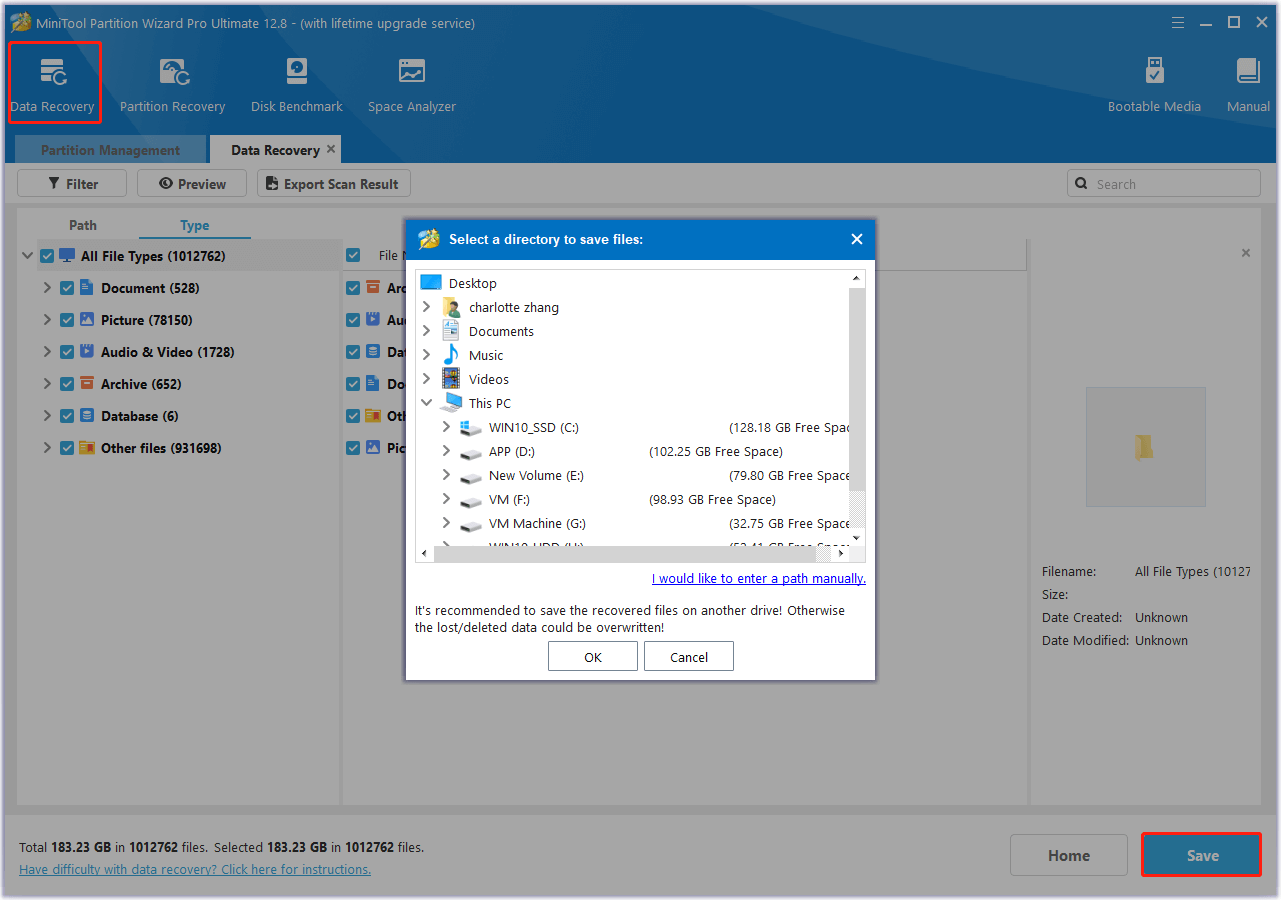
- Click Save and choose a safe location to store the recorded file.

Wrapping Things Up
This post provides some effective solutions to help you fix the “PC no booting after replacing CMOS battery”. If you encounter the same error, you can follow the guide in this post to solve it.

User Comments :