Based on Windows 11 build 22621.3880 (July 2024 Patch Tuesday updates), the last update of the Windows 11 Development Environment virtual machine was released in July 2024. At the beginning of August, Microsoft restored the previously missing virtual machines for VMware.
However, Microsoft’s official Windows 11 virtual machines are no longer available recently. This post includes the following content:
- The specific time when official Windows 11 virtual machines are gone.
- The effects of Windows 11 virtual machines’ unavailability.
- The alternative way to experience other systems without impacting the present system.
Official Windows 11 Virtual Machines Are Unavailable
According to an announcement on the official website, Microsoft’s official Windows 11 virtual machines are no longer available. It only posted a brief statement on its official website: “Due to ongoing technical issues, as of October 23, 2024, downloads are temporarily unavailable.”
To be specific, disk images for Microsoft’s Windows 11 Development Environment virtual machines are unavailable. As of October 23, 2024, you can’t download all variants of these virtual machines, including Hyper-V, VirtualBox, VMware, and Parallels for Mac.
At the same time, all previously downloaded Windows 11 Development Environment virtual machines expired. Then people already running these VMs began encountering activation issues. As Windows Development Environment doesn’t support activation with product keys, expired virtual machines will turn their desktop background black and shut down every hour.
Though Microsoft provides evaluation images of Windows 10 and Windows 11 Enterprise without the extra development tools, they don’t offer the same thorough environment as the now-unavailable virtual machines. Besides, Microsoft doesn’t provide a timeline for when these virtual machines will be available again.
Alternative Way: Set up Dual-Boot/Multi-Boot
As you see, official Windows 11 virtual machines are unavailable. What can you do if you want to test or experience other operating systems without affecting the current system? Setting up dual-boot or multi-boot is a good idea.
If you don’t want to sacrifice the performance of the current system, you’d better create a new partition for the new OS. Create a separate partition with the unallocated space on the hard drive. You can do that with MiniTool Partition Wizard, Disk Management, or Command Prompt.
If there’s no unallocated space, you can shrink partitions to make some space. MiniTool Partition Wizard is a handy tool, which can shrink partitions and move the location of the partition. If there is more than one unallocated space on the hard drive, you can merge unallocated space with this software.
Here’s a full tutorial for you.
Step 1: Download, install, and launch MiniTool Partition Wizard on your computer.
MiniTool Partition Wizard FreeClick to Download100%Clean & Safe
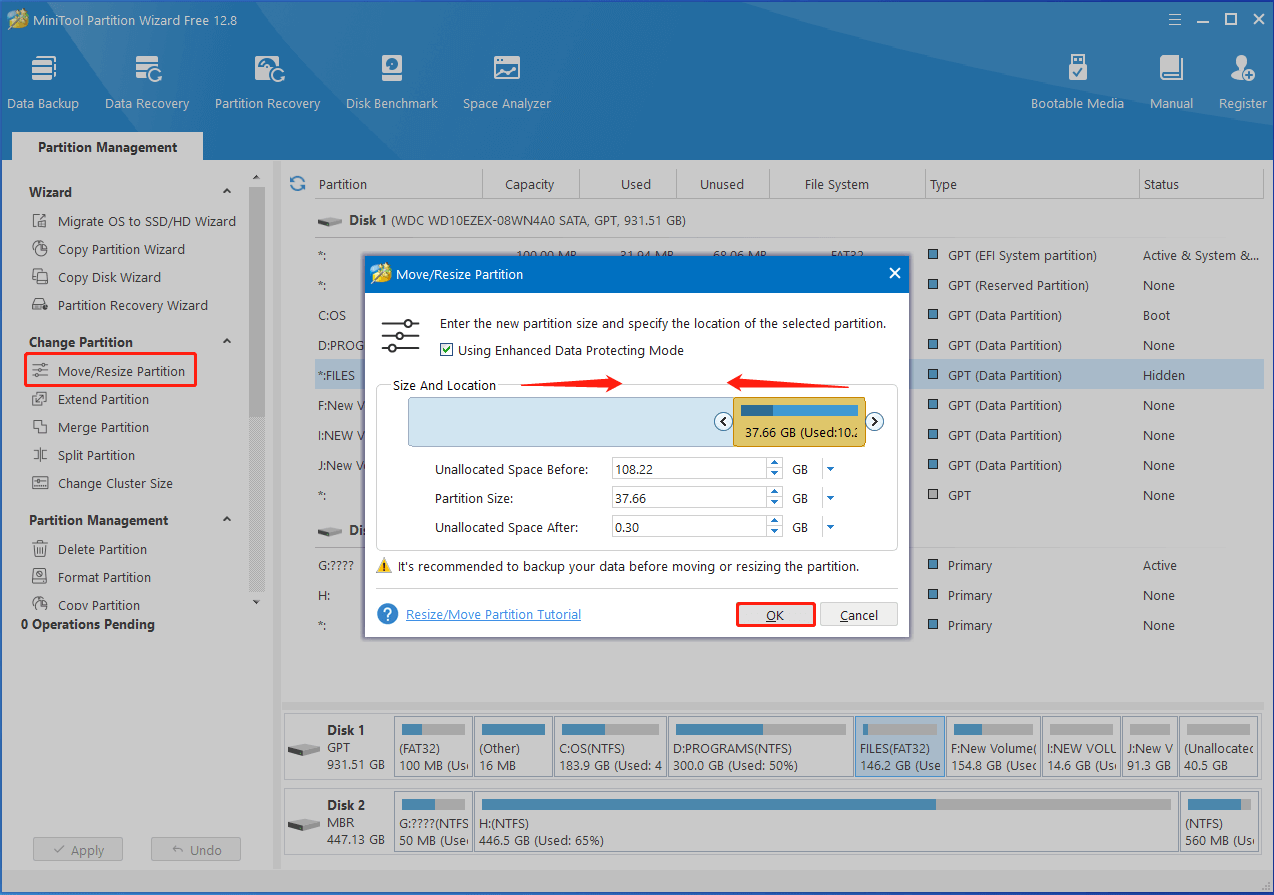
Step 2: Click on the partition with available space and hit Move/Resize Partition in the left panel.
Step 3: In the prompted window, drag the arrow icon at the two ends of the partition to shrink and change the location. Then click OK to save changes. Repeat this operation on other partitions.

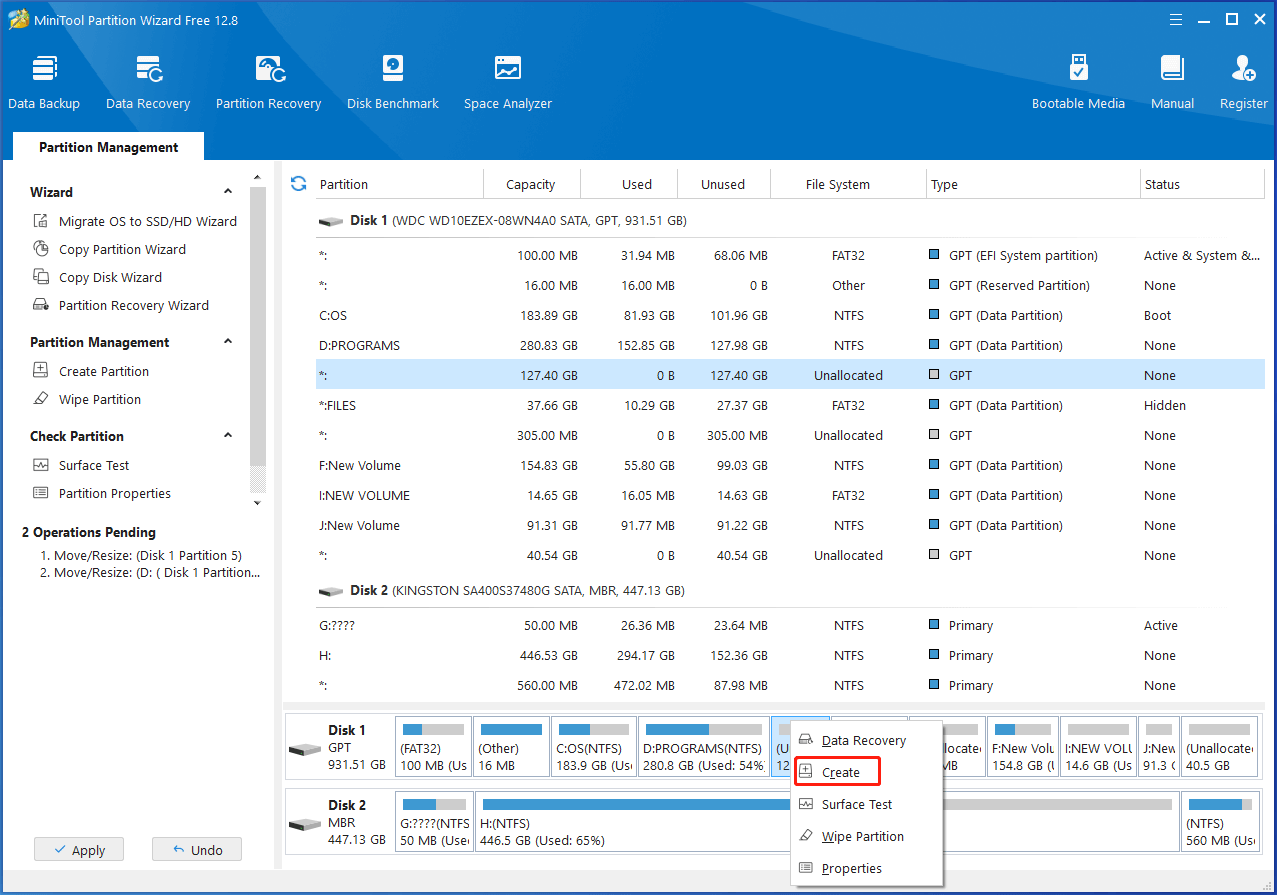
Step 4: Right-click on the created unallocated space and click Create.

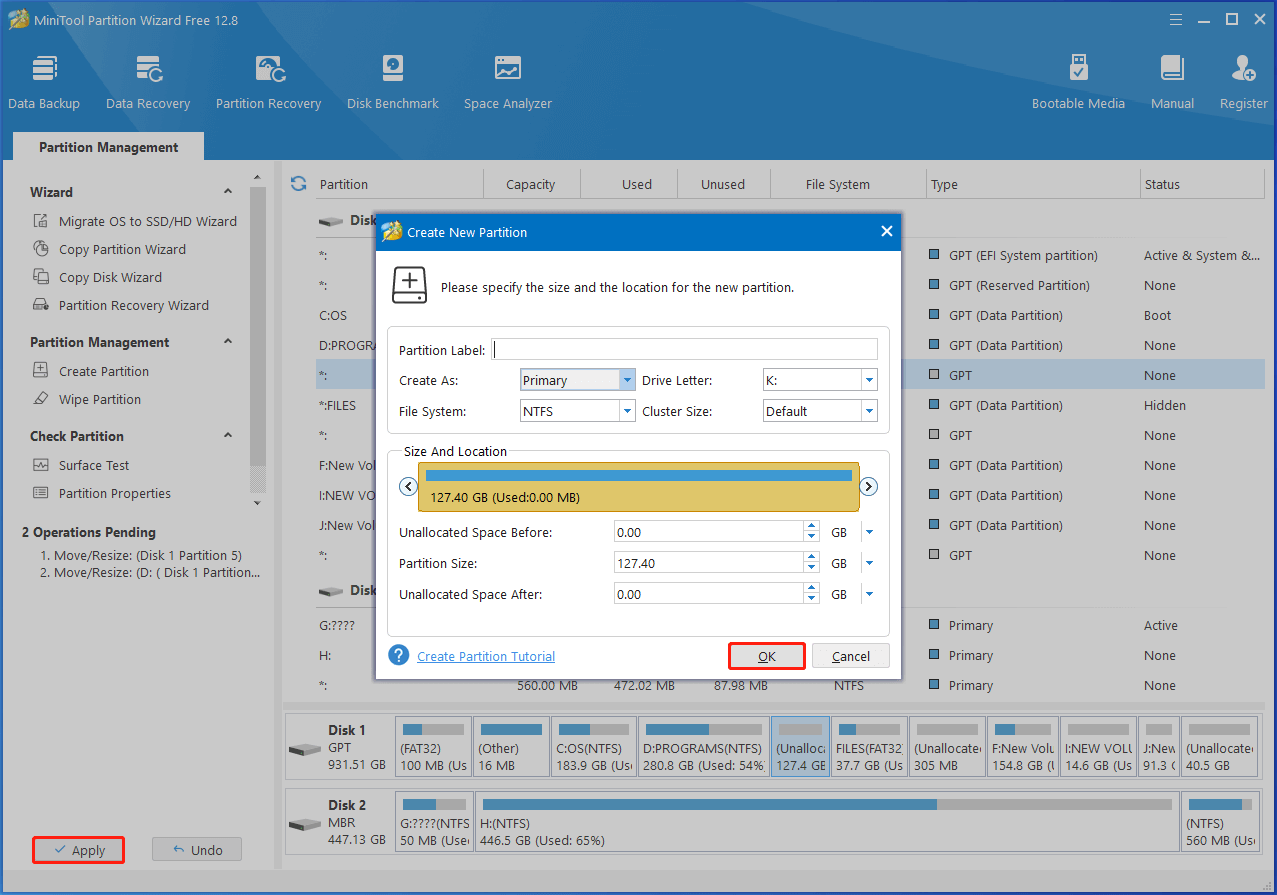
Step 5: Configure settings based on your demands and click OK to save changes. Finally, click Apply to execute the pending operations.

After creating the partition, you can set up dual-boot or multi-boot manually. Here are some popular dual-boot configurations. You can refer to these guides.
- Dual boot Windows 10 and Windows 11
- Dual boot Windows 11 and Linux
- Dual boot Windows 11 and Windows 7
- Dual boot Windows 10 and Ubuntu
- Dual boot Windows 7 and Windows 10
Conclusion
Microsoft’s official Windows 11 virtual machines are no longer available. This post has revealed the specific time and effects of this event. When official Windows 11 virtual machines are gone, you can set up dual-boot or multi-boot to experience other systems without affecting the present system.


User Comments :