Are you seeking fixes for “Ping fails but NSLookup works” issue? Here are 5 available methods. You can have a try.
MiniTool Partition Wizard FreeClick to Download100%Clean & Safe
Way 1: Run Internet-Related Troubleshooters
Run Internet Connections and Network Adapter Troubleshooter when NSLookup works but Ping fails. It has been proven useful by many users. It is worth having a try.
Step 1: Open Settings by holding Windows and I keys simultaneously.
Step 2: Click on Update & Security > Troubleshoot > Additional troubleshooters.
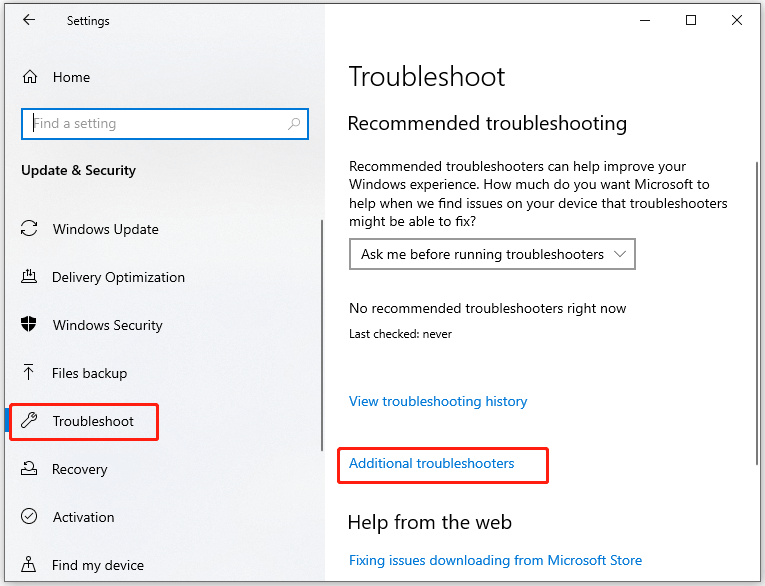
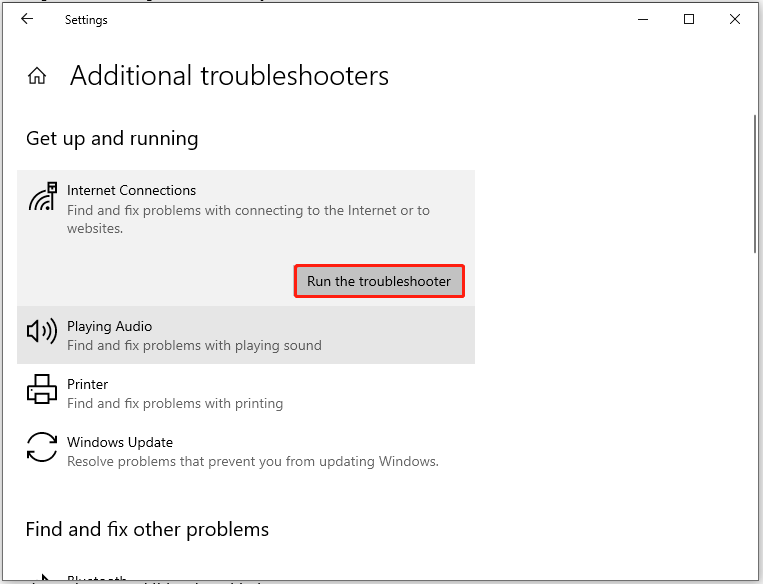
Step 3: Tap on Internet Connections under Get up and running section, and then click the Run the troubleshooter button.
Step 4: Follow the on-screen instructions to complete the process.
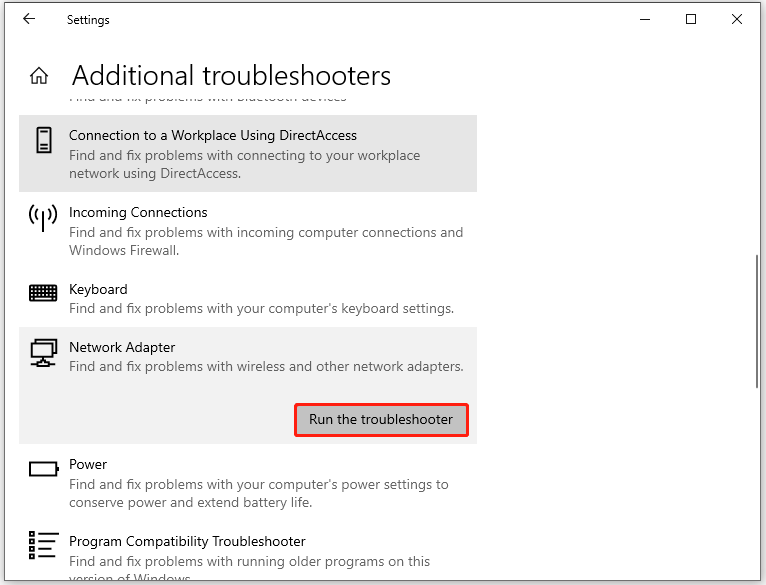
Step 5: Locate the Find and fix other problems section, find & click Network Adapter, and click Run the troubleshooter.
Way 2: Run Commands to Flush DNS/Reset Winsock/TCP/IP
If the DNS still remembers old IP, Ping fails but NSLookup works. In this case, you can flush the DNS, reset Winsock, or reset TCP/IP. You can run commands to do that.
Step 1: Type cmd in the search box and then click Run as administrator under the Command Prompt app.
Step 2: In the prompted User Account Control window, click Yes to move on.
Step 3: In the Command Prompt window, type the following commands and hit Enter after each.
- ipconfig /flushdns
- ipconfig /registerdns
- ipconfig /release
- ipconfig /renew
- NETSH winsock reset catalog
- NETSH int ipv4 reset reset.log
- NETSH int ipv6 reset reset.log
- Exit
Step 4: Now, check if Ping fails but NSLookup works still.
Way 3: Conduct a DNS Lookup Using FQDN
What to do if NSLookup works but Ping doesn’t after Windows 10 upgrade? An effective way is to perform a DNS lookup using FQDN. You can do that by following these steps.
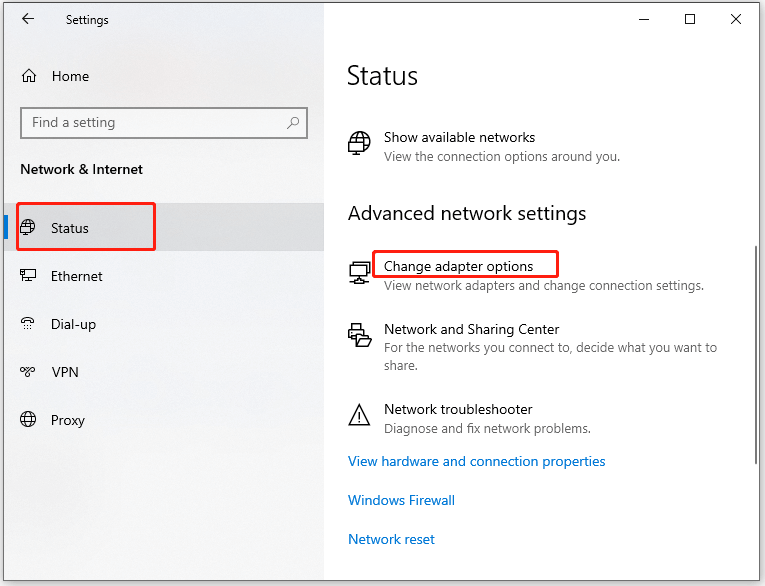
Step 1: Open Settings and head to Network & Internet > Status > Change adapter options.
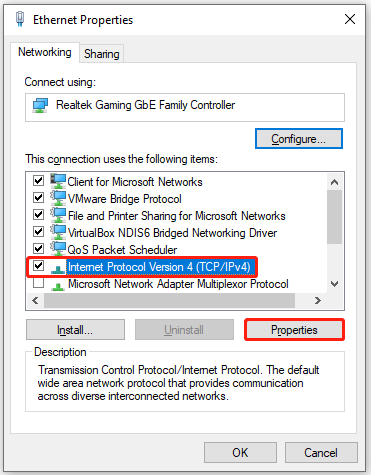
Step 2: In the Network Connections window, right-click on the network and hit Properties.
Step 3: Pick Internet Protocol Version 4 (TCP/IPv4) from the list and then hit the Properties button.
Step 4: Hit the Advanced button to continue. In the next window, switch to the DNS tab, tick the box next to Append these DNS suffixes (in order) option and click Add.
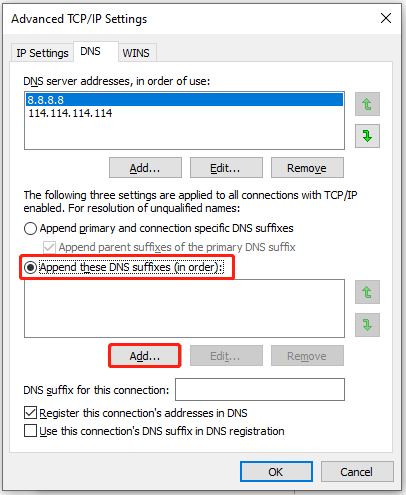
Step 5: In the prompted window, input “.” and click Add. Then it will add a “.” at the end each time you query using PING or tools like that.
Way 4: Reinstall Network Adapter Drivers
Sometimes, NSLookup works but Ping fails due to corrupted network drivers. So, it’s recommended to reinstall network adapter drivers when the issue occurs.
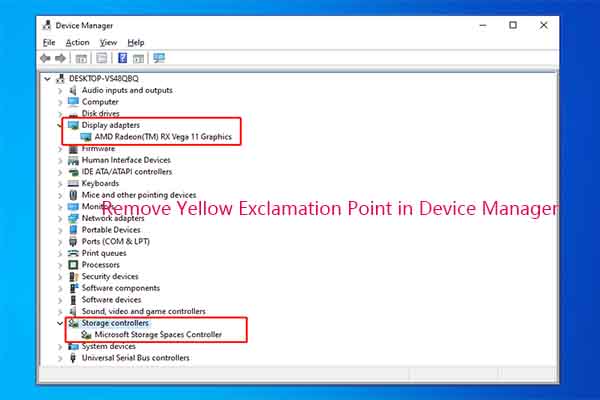
Step 1: Open the Start menu and click Device Manager on the menu.
Step 2: Double-click Network adapters to expand the category.
Step 3: Right-click the driver under Network adapters and choose Uninstall device.
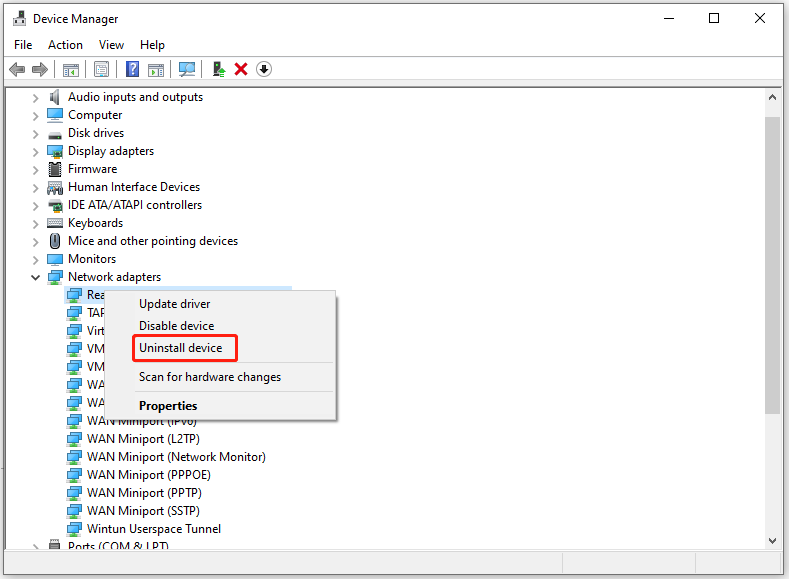
Step 4: In the warning window, click Uninstall to confirm the operation.
Step 5: After the uninstallation process ends, restart the computer. Windows will install the driver automatically after the PC boots again.
Way 5: Use Google Public DNS
Try using Google Public DNS if Ping fails but NSLookup works. It may work for the issue.
Step 1: Follow the steps in Way 3 to open the properties of Internet Protocol Version 4 (TCP/IPv4).
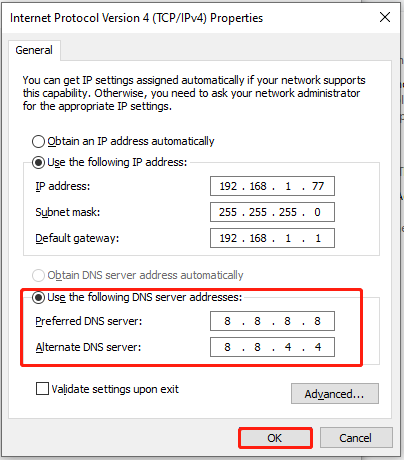
Step 2: Tick the option “Use the following DNS server addresses”.
Step 3: Enter the following value in the corresponding field and then click OK to save changes.
- Preferred DNS server: 8.8.8.8
- Alternate DNS server: 8.8.4.4
Conclusion
This post tells you what to do if NSLookup works but Ping fails. If NSLookup works but Ping doesn’t after Windows 10 upgrade, try the methods offered in this post to fix it.
About The Author

Position: Columnist
Having writing articles about computer tech for a long time, I am rather experienced especially on the aspect of computer optimization, PC enhancement, as well as tech terms explanation. The habit of looking through tech forums makes me a great computer issues collector. And then, many articles related to these issues are released, which benefit plenty of users. Professional, effective, and innovative are always the pursuit of an editing worker.
User Comments :