About No Bootable Partition in Table
A lot of users reported that they ran into the issue of no bootable partition in table. In this case, Windows won’t boot up and a black screen appears reporting a “No bootable partition in table” error message, as the following picture shows:

In addition to HDDs, computers can boot from a variety of devices, including CD/DVD drives and flash drives/USB devices. However, if your computer attempts to boot from a flash drive or disc that does not contain a master boot record, it will display a “No bootable partition in table” error.
There is often no boot partition on the CF card. Therefore, when installing the system from the recovery CD onto a new CF card, the process fails with a “No bootable partition in table” error.
How to Fix No Bootable Partition in Table
As mentioned above, this issue appears because Windows cannot boot from a drive that does not contain a master boot record. So, you should consider changing the boot order in BIOS.
Step 1: Restart your computer. Then press a specific key to go to the main interface of BIOS.
Step 2: Then under the Boot tab, modify the boot order to set the correct drive as the first boot device.
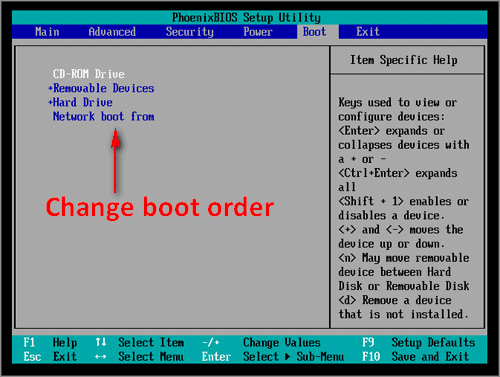
Step 3: Select Exit to save your changes and exit the Boot Sequence. Exit the BIOS SETUP window with the statement Exit saving Changes.
Recover Data When Stuck in No Bootable Partition in Table
If you want to know how to recover important data when your computer gets stuck with the “No bootable partition in table” error, you can make use of third-party data recovery software.
MiniTool Partition Wizard is a great choice. It is a professional and reliable data recovery tool that enables you to recover lost data from an unbootable computer effectively.
MiniTool Partition Wizard DemoClick to Download100%Clean & Safe
Step 1: Create a USB bootable media using its Bootable Media feature, and then use the USB bootable media to boot your computer.
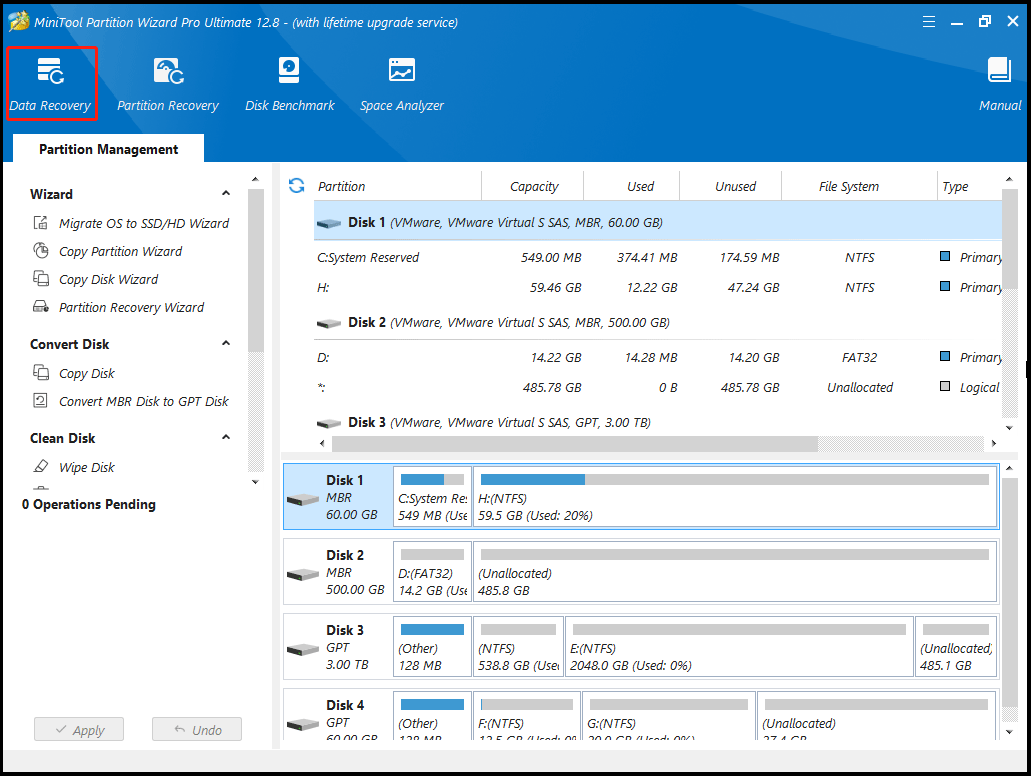
Step 2: In the main interface of MiniTool Partition Wizard, click on Data Recovery from the top toolbar.
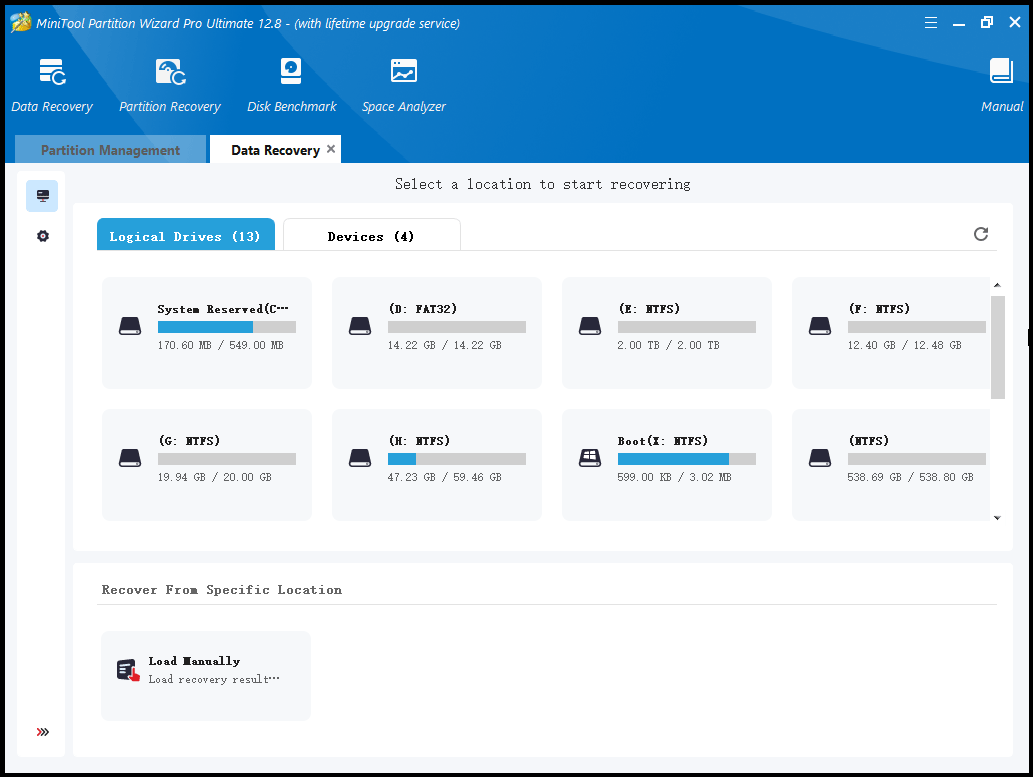
Step 3: Click on the Scan button under the partition you need to recover the data.
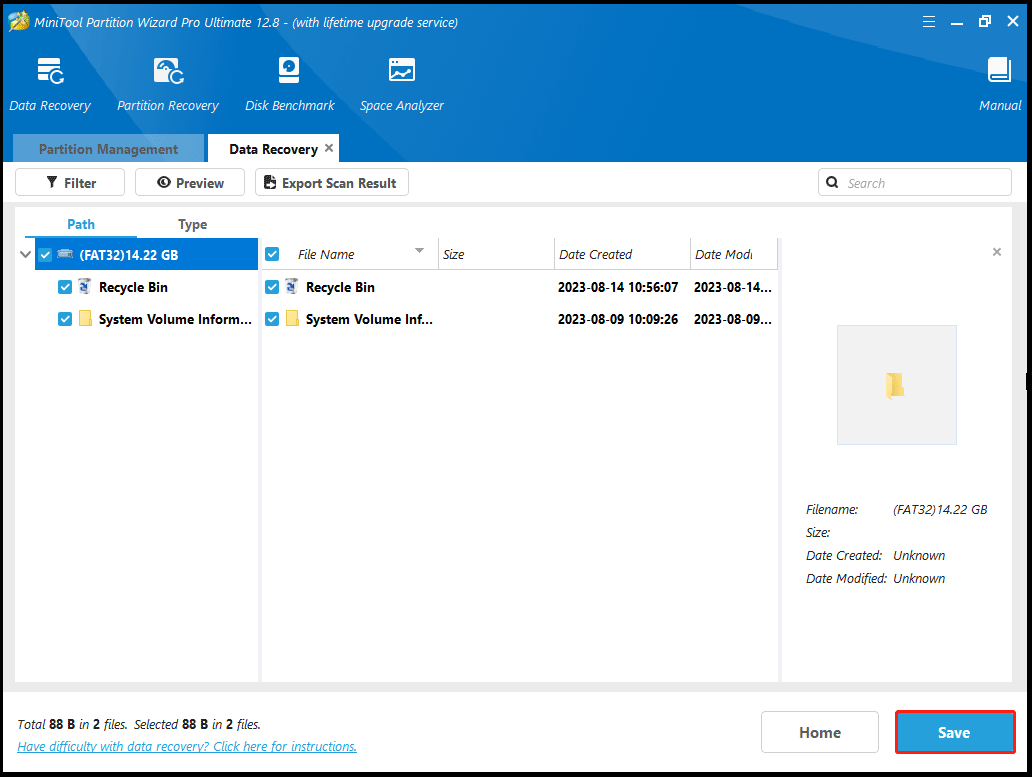
Step 4: Then wait for the scan to complete. Once the scan is complete, check all items that you need to recover and click on Save.
Step 5: Then select a directory to save the selected files and click on OK. You’d better save the recovered files to another drive. Otherwise, the lost/deleted data could be overwritten.
Bottom Line
When faced with the “No bootable partition in table Windows 10” problem, you can try to fix it with the above methods. Hope this article can help you solve this issue. If you run into some problems during the fixing process, you can leave them in the following comment zone.


User Comments :