New Partitions Appear After Windows Update
Many users who have installed Windows 10 April Update on their computers have noticed that new partitions appear in File Explorer and Disk Management. These partitions are typically between 400 MB and 1 GB in size and contain important information used by the Windows Recovery Environment (WinRE) or the device manufacturer.
If you are also bothered by this “new partitions appear after Windows 10 update” problem, you can read this post to learn why this happens and how you can fix it.
How to Solve New Partitions Appear After Windows Update
To solve the “new partitions appear after Windows update” issue, you can try to hide them again by removing the partition’s assigned drive letter.
Way 1. Use Command Prompt
You can try to remove the drive letter by using Command Prompt, which is a command line interface for the Windows operating system. Follow the detailed steps below.
Step 1: Press the Windows + R keys to open the Run box. Then type cmd in the box and press the Ctrl + Shift + Enter keys to run Command Prompt as administrator.
Step 2: In the Command Prompt window, type the following command, where drive letter is the drive letter you want to remove: mountvol driveLetter /d. For example, if the drive letter you want to remove is F, you would enter the following:
mountvol F: /d
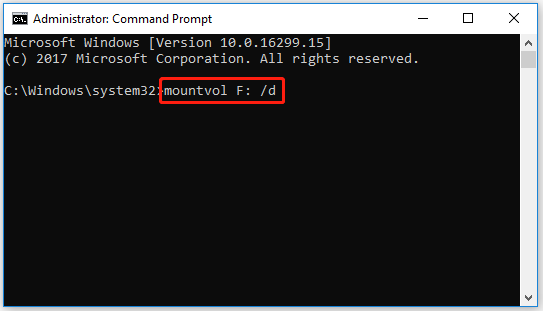
Step 3: After typing the command, press Enter.
The drive letter will no longer appear in File Explorer and Disk Management. You may close the command prompt window.
Way 2. Use MiniTool Partition Wizard
If you encounter the Command Prompt not working issue, you can use the professional partition manager – MiniTool Partition Wizard to remove the drive letter. As a multifunctional tool, MiniTool Partition Wizard can help you manage disks and partitions safely and conveniently.
MiniTool Partition Wizard has many useful features. It can migrate OS, clone hard drive, recover partitions, recover data from hard drives, etc.
MiniTool Partition Wizard FreeClick to Download100%Clean & Safe
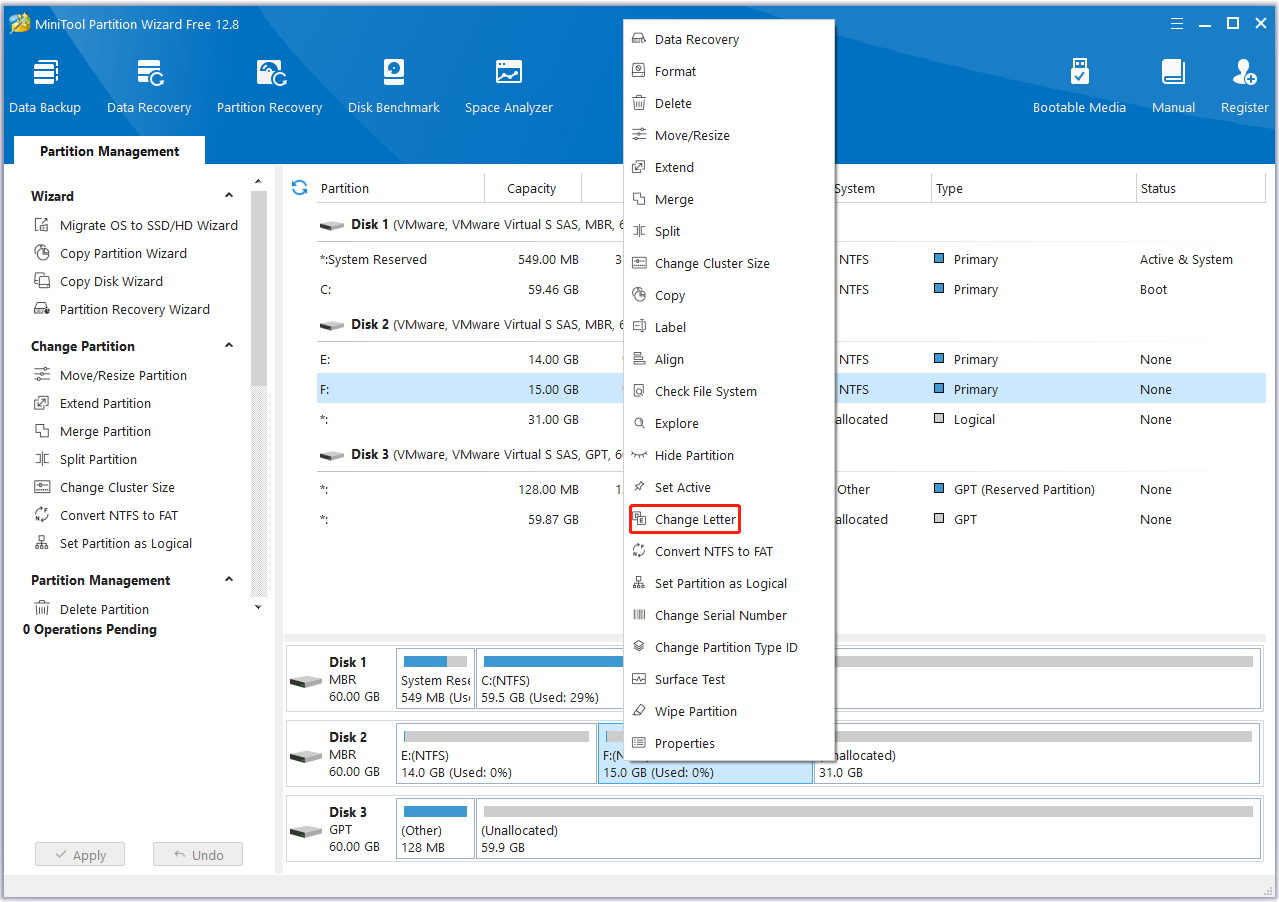
Step 1: Download MiniTool Partition Wizard, install and launch it to get its main interface. Then choose the partition of which you want to remove its letter, then right-click it and select the Change Letter function.
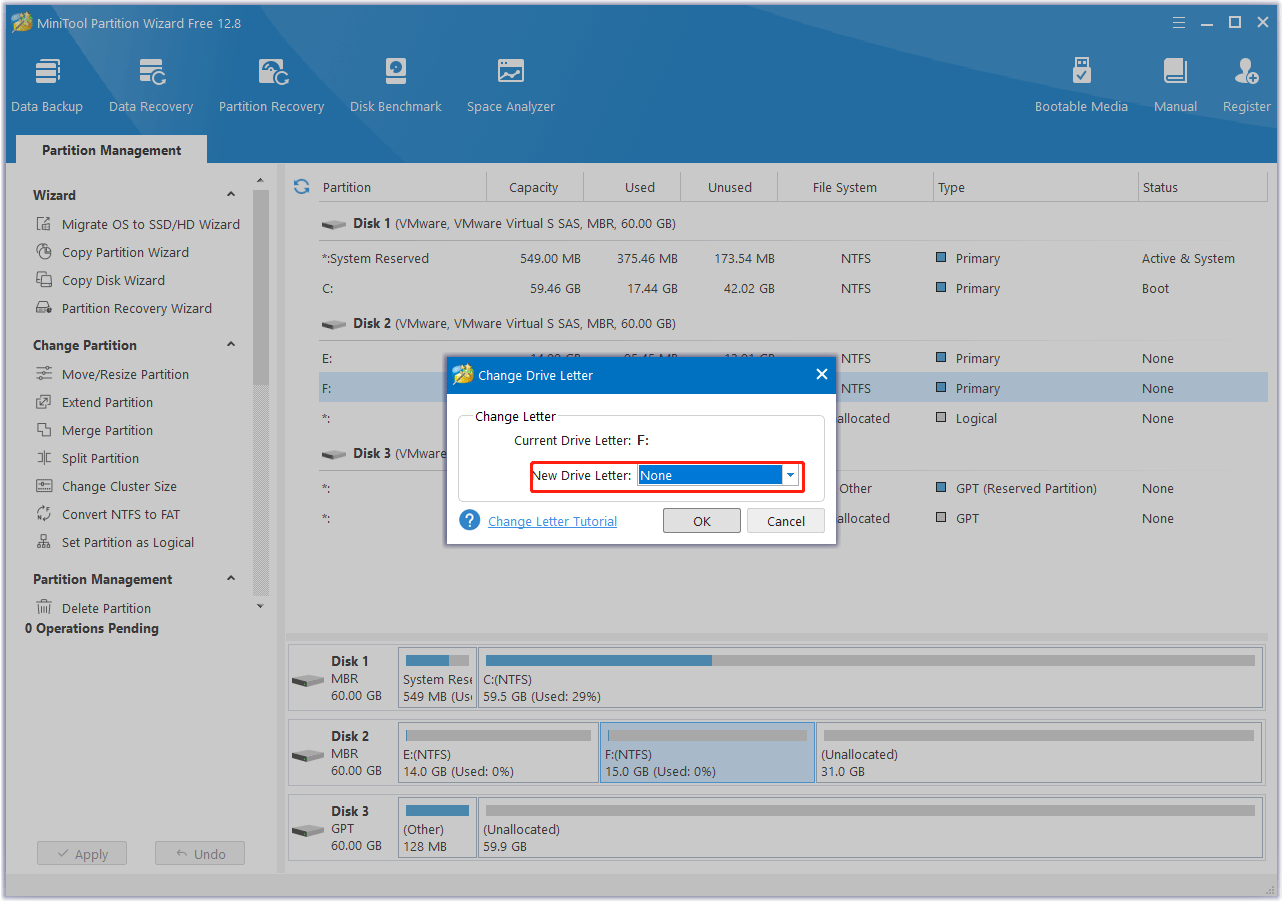
Step 2: In the pop-up window, select None as New Drive Letter. Then click on OK.
Step 3: Click on the Apply button to apply the changes.
Bottom Line
When faced with the “new partitions appear after Windows update” issue, you can try the two methods above. If you have any other suggestions, you can share them with us in the following comment zone.

User Comments :