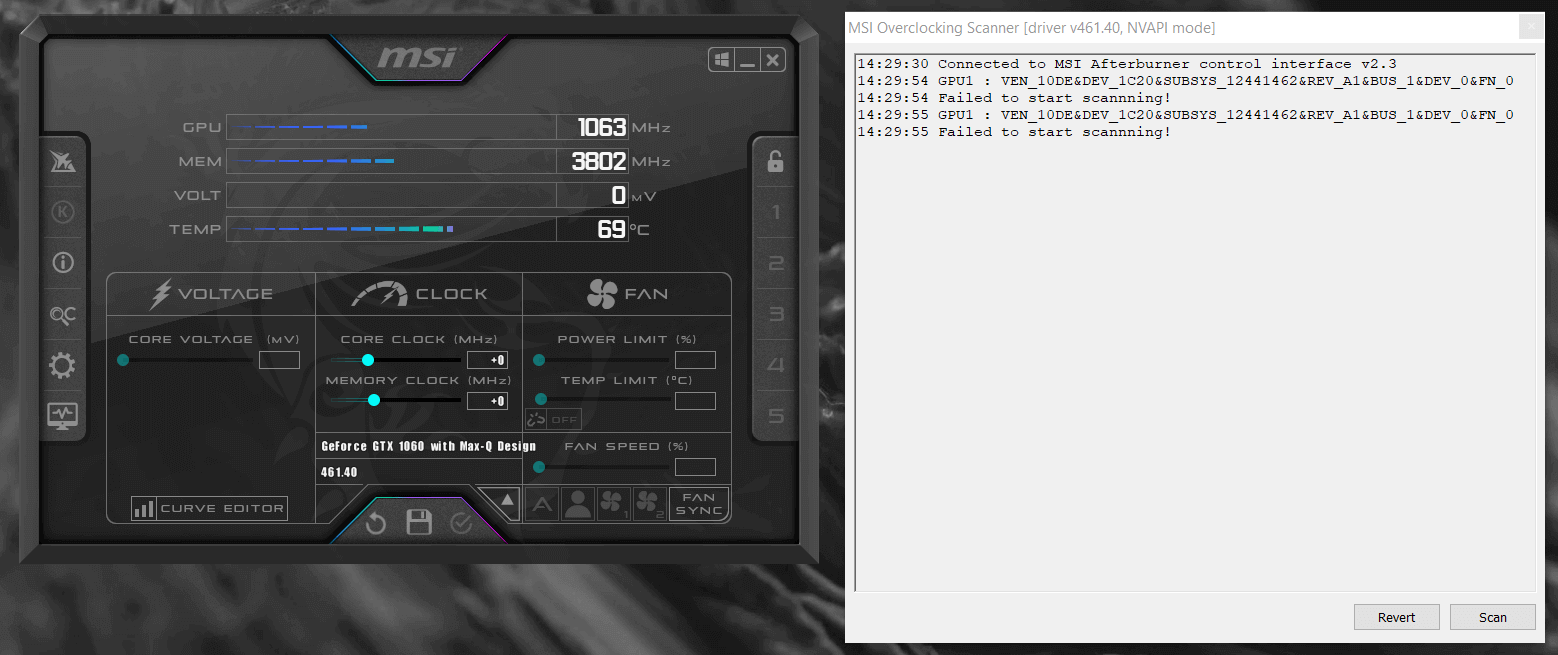
If you encountered the MSI Afterburner Failed to start scanning error on your PC, you come to the right place. This post from MiniTool Partition Wizard shows the causes of the MSI Afterburner Failed to start scanning error and how to fix it.
Some people reported that they encountered the MSI Afterburner Failed to start scanning error when they tried using the MSI Afterburner OC Scanner to overclock the graphic card. They complained about this error in various forums. Here is an example from the Nvidia forum:
Hello, I have a GTX 1050 Ti (don't bother upgrading since it runs cyberpunk fine) …But when I do an OC scan, It says failed to start for some reason and I have CUDA enabled on my GPU. Here is what it said… 14:04:51 Failed to start scannning!https://www.nvidia.com/en-us/geforce/forums/gaming-pcs/8/447958/msi-afterburner-oc-scan-failed-to-start/

Reasons of the MSI Afterburner Failed to Start Scanning Error
After investigating extensive user reports and posts, I found that the MSI Afterburner error can be caused by various reasons. Here are some of the reasons:
- Incorrect Graphics card settings
- Software conflicts
- Incorrect or outdated driver
- Application bugs in MSI Afterburner
- A third-party program conflicts with the OC scan
How to Fix the MSI Afterburner Failed to Start Scanning Error?
How to fix the MSI Afterburner failed to start scanning error? Here I summarize 8 effective solutions to help you get rid of this error. You can try them one by one until you fix the error successfully.
Solution 1. Enable Developer Mode in NVIDIA Control Panel
The first way you can try to fix the MSI Afterburner failed to start scanning error is by enabling Developer Mode in NVIDIA Control Panel. Here’s how to do it:
- Press the Win + S keys simultaneously to open the Search window.
- Type “NIVIDIA Control Panel”, and click NIVIDIA Control Panel under Best Match.
- Go to the Desktop tab and then select Enabled Developer Settings from the menu.
- Once done, check if the error has been resolved.
Solution 2. Enable GPU Performance Counters
If you are unable to fix the error after enabling Developer Mode in the NVIDIA Control Panel, you can try enabling GPU performance Counters to fix the MSI Afterburner failed to start scanning error. Here’s the way:
- Do the first three steps of Solution 1 to Enable Developer Settings.
- Under the task section, locate the Developer listing and select Manage GPU Performance Counters.
- Select Allow Access to the GPU performance counters for all users and restart the system for the changes to take effect.
Solution 3. Unlock Voltage Control in the MSI Application
Voltage control can provide the software with more access to GPU settings. So, you can also try unlocking Voltage Control in the MSI application to fix the error. Here’s the way:
- Open the MSI Afterburner application.
- Select the MSI settings option from the left.
- Enable Unlock Voltage Control and Unlock Voltage Monitoring.
- Click Apply to save the changes.
Solution 4. Update the Graphics Card Driver
Outdated or incorrect graphics card drivers can also cause the MSI Afterburner failed to start scanning errors. In this case, you can try updating the graphics card driver to fix the error. To do that, you can refer to this post: How to Update Graphics Card Drivers (NVIDIA/AMD/Intel)?
Solution 5. Uninstall and Reinstalling MSI Afterburner
If you suspect there are some application bugs in MSI Afterburner, you can try uninstalling and reinstalling MSI Afterburner to fix the error. Here are the detailed steps:
- Press the Win + I key simultaneously to open the Settings window.
- Navigate to Apps > Apps & features.
- Search “MSI” in the search box.
- Then select MSI Afterburner from the search result.
- Next, click Uninstall and follow the on-screen instructions to complete the process.
- After that, restart your PC, download this app from its official website, and then check if the error still persists.
Solution 6. Enable Automatic Tuning
If you have installed the latest NVIDIA Game Ready drivers and the latest version of GeForce Experience, you can try enabling Automatic Tuning to fix the MSI Afterburner failed to start scanning error. If you decide to try this way, please do as follows:
- Open the Search window, type “GeForce Experience”, and then click GeForce Experience under Best Match.
- Click the gear icon to open the Settings menu, and enable “IN-GAME OVERPLAY”.
- After that, press Alt+ Z to bring up the GeForce Experience overlay.
- Next, select Performance and then toggle on the switch of Enable automatic tuning.
- Once done, restart your PC and check if the error is fixed.
Solution 7. Use Legacy OC Scanner
Sometimes, the version of the OC scanner used in MSI Afterburner may result in the MSI Afterburner failed to start scanning error. So, if you are using the new OC scanner on an old card, you can try reverting to the legacy OC scanner to fix the error. To do that, you can do the following steps:
- Turn off the MSI Afterburner on your PC.
- Press Win + E to open the File Explorer window.
- Go to this location to find the installation folder of MSI Afterburner: C:\Program Files (x86)\MSI Afterburner.
- Locate MSIAfterburner.cfg file and open it.
- Inside the config folder, search for the LegacyOCScanner option.
- Change the value from 0 to 1.
- Save all the changes and launch MSI Afterburner.
- Check if the issue has been resolved.
Solution 8. Clean Boot Windows
In some situations, the programs or software running in the background may conflict with MSI Afterburner. So, you can try uninstalling or disabling the culprit to fix You can refer to these posts:
How to Clean Boot Windows 10 and Why You Need to Do So?
How To Perform A Clean Boot On Your Windows 11 PC
Bottom Line
This is the end of the post. It provides 8 effective solutions for the MSI Afterburner Failed to start scanning error. You can try these solutions one by one until the issue gets fixed.
In addition, MiniTool Partition Wizard can help you migrate OS to SSD without reinstalling OS, convert MBR to GPT, format USB to FAT32, partition hard drive, and more. If you have this need, you can download it from the official website.
MiniTool Partition Wizard FreeClick to Download100%Clean & Safe


User Comments :