MSConfig only shows 1 processor if you disable other cores on the processor by accident. How to fix the “MSConfig only shows 1 processor Windows 10/11” issue? Here are 5 methods for you. Try them now!
MiniTool Partition Wizard DemoClick to Download100%Clean & Safe
Fix 1: Check If All Cores Are Recognized and Used
When MSConfig only shows 1 processor, the first thing you should do is to check if all the cores are being recognized and used by your computer. You can verify that via the Resource Monitor of Task Manager.
Step 1: Right-click on the Windows icon to open the Start menu and then click Task Manager to continue.
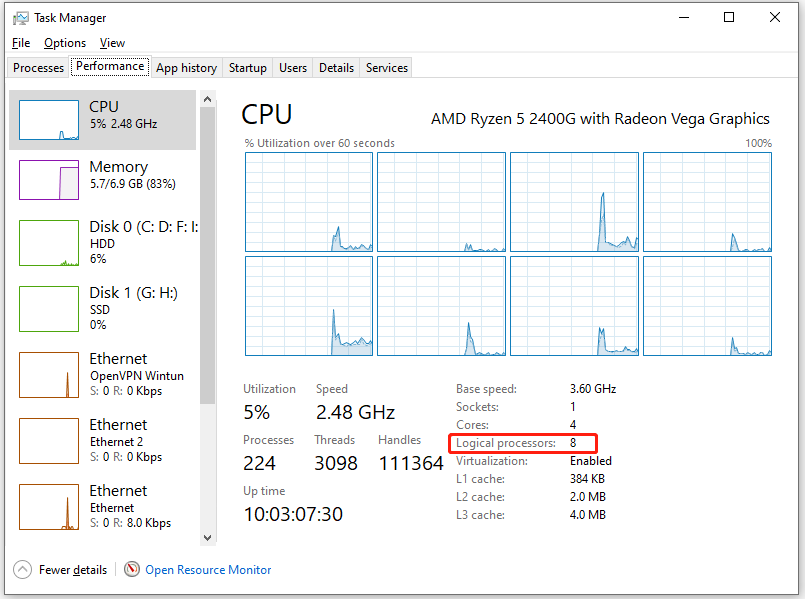
Step 2: In the Task Manager window, tap on the Performance tab.
Step 3: Locate at the bottom of the window and view the number of cores and logical processors.
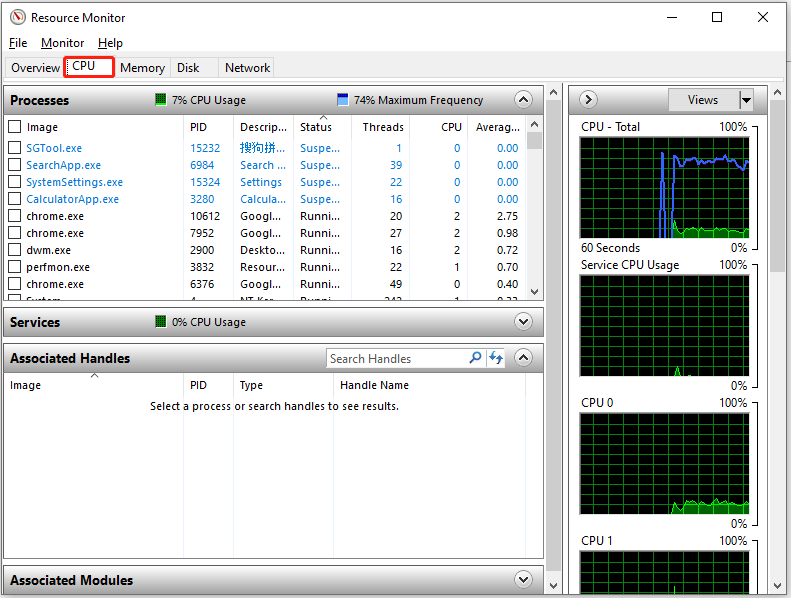
Step 4: Then click the Open Resource Monitor link at the bottom of the window.
Step 5: Navigate to the CPU tab in the Resource Monitor to check the status of each logical processor on the right pane.
Fix 2: Uncheck the Number of Processors in MSConfig
Enable Windows to use the maximum number of cores available by unchecking the number of processors box in MSConfig with the steps below.
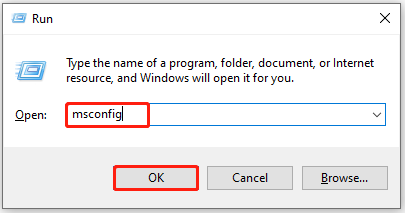
Step 1: Hold the Windows and R keys to open the Run window.
Step 2: Type msconfig in the Run window and click OK.
Step 3: In the System Configuration window, click on the Boot tab and hit Advanced options.
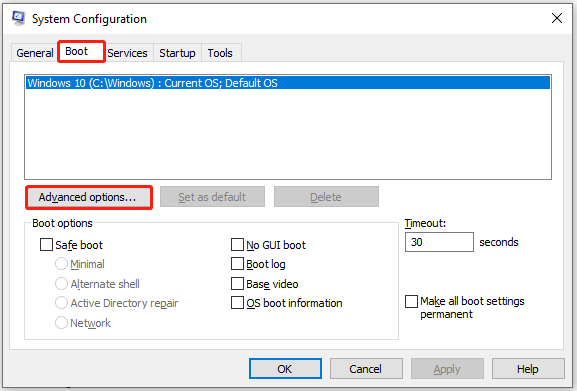
Step 4: Uncheck the Number of processors box and click OK to save changes.
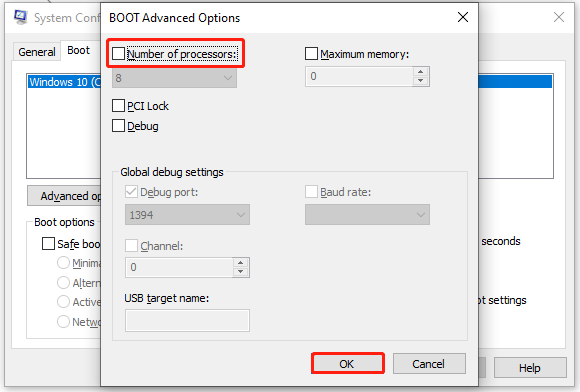
Step 5: After returning to the System Configuration window, click Apply to execute the operation.
Step 6: Restart the computer and check if MSConfig only shows 1 processor Windows 11/10.
Fix 3: Ensure the Cores Are Not Disabled in BIOS
You should also ensure that the cores are not disabled in BIOS when MSConfig only shows 1 processor Windows 10/11.
Step 1: Restart your computer and keep pressing the BIOS key (F2, F12, Del, Esc, etc.) while the PC starts to enter the BIOS setup.
Step 2: Navigate to the CPU configuration or similar settings and ensure that all the CPU cores are enabled.
Step 3: Press F10 and Enter to save changes and exit BIOS.
Step 4: After your computer restarts, check if MSConfig only shows 1 processor still.

Fix 4: Enable Turbo Mode and EIST in BIOS
Enabling Turbo Mode and EIST in BIOS ensures optimal performance by allowing the CPU to utilize its cores and operate at higher speeds when required. Here are the steps for doing that.
Step 1: Restart your computer to enter BIOS.
Step 2: Locate the CPU settings, and then enable Turbo Mode and Enhanced Intel SpeedStep Technology (EIST).
Step 3: Press F10 > Enter key to save changes and exit BIOS.
Fix 5: Reset the Boot Configuration
The last resort is to reset the boot configuration. This operation can remove any boot configuration option that limits the number of processors, ensuring that Windows uses all available cores.
Step 1: Type cmd in the search box and then click Run as administrator under the displayed Command Prompt program.
Step 2: In the prompted User Account Control window, click Yes to allow the operation.
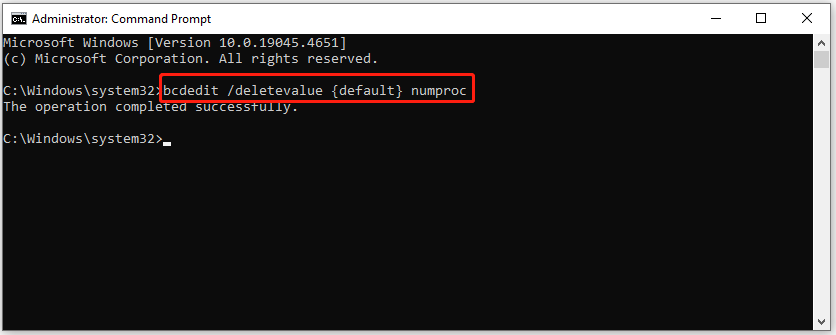
Step 3: In the Command Prompt app, type the command below and press the Enter key to execute the command.
bcdedit /deletevalue {default} numproc
Step 4: Restart your computer and check if the issue is solved.
Conclusion
What to do if MSConfig only shows 1 processor? In this post, top 5 troubleshooting methods have been shown to you. According to your situation, select one from them to fix the issue.
User Comments :