MSConfig maximum memory causes BSOD? A lot of users reported that they encountered a BSOD after changing maximum memory on MSConfig. If you are also trying to fix this issue, this post from Partition Magic is worth reading. It offers 5 ways to solve these issues.
Some users have reported that they encountered a BSOD on startup after changing maximum RAM on MSConfig. This problem will prevent your computer from working properly. It is very annoying.
No matter for what reason, you need to solve this BSOD. Let’s dive in.
Recover Data from Your PC
What if you find your data is lost after a BSOD? Don’t worry. You can use a professional and reliable data recovery tool – MiniTool Partition Wizard to recover lost data.
MiniTool Partition Wizard is also a comprehensive partition manager that allows you to partition/resize/clone a hard drive, format USB to FAT32/NTFS/exFAT, convert MBR to GPT and vice versa, migrate OS to SSD/HDD, and more.
MiniTool Partition Wizard DemoClick to Download100%Clean & Safe
Now, let’s learn how to recover data with MiniTool Partition Wizard.
- In the main interface, click Data Recovery.
- Move the cursor to a target partition and click Scan.
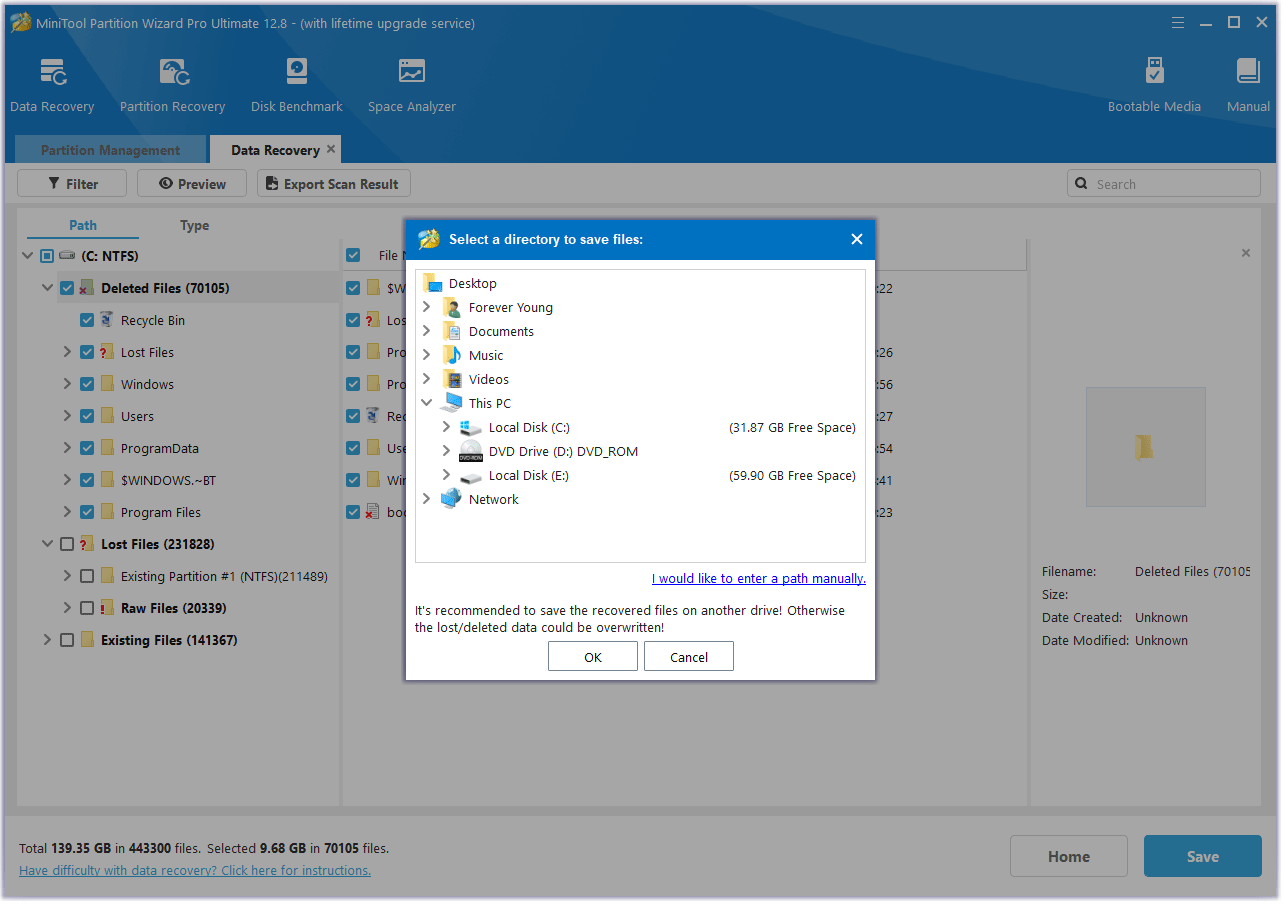
- After completing the scan, check all the needed files and click on Save.
- Choose a directory to store the selected files and click OK.
Next, you can try the given methods below.
Fix 1. Cold Restart PC
When you have set the maximum memory too low in MSConfig, the easiest fix is to hold the power button for 30 seconds, then disconnect the PC from the power source for 30 minutes and finally plug it back in. If this doesn’t work, you can also remove the CMOS battery.
Fix 2. Uncheck the Maximum Memory Checkbox
You can try to fix this by unchecking the “Maximum Memory” checkbox. This solution only works if the PC is slow but still usable, i.e. you can access the desktop and load applications. Here is the guide:
- Press the Win + R key to open the Run dialog box.
- Type msconfig in the Run box and press Enter.
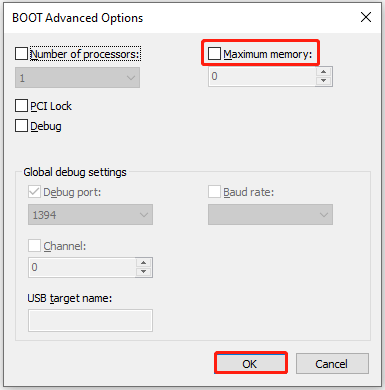
- Switch to the Boot tab, and click on Advanced options.
- Now, uncheck the Maximum memory box and click on OK to save the changes.
After that, reboot your PC and check if it runs normally.
Fix 3. Delete Changes to Maximum Memory
To solve the “MSConfig maximum memory causes BSOD” issue, you can try to delete changes to maximum memory via recovery mode.
Step 1: Boot your computer into WinRE. To do that, press and hold the Power button till the screen turns off. Repeat this operation three times and then the words “Preparing Automatic Repair” will appear under the Windows logo. When you are prompted to enter WinRE, choose Advanced Options.
Step 2: Then go to Troubleshoot > Advanced options > Command Prompt.
Step 3: In the Command Prompt window, type the following commands in order and press Enter after each:
- bcdedit /deletevalue {current} removememory
- bcdedit /deletevalue {current} truncatememory
- bcdedit /deletevalue {default} removememory
- bcdedit /deletevalue {default} truncatememory
Once done, restart your PC and check if the issue appears.
Fix 4. Perform a System Restore
System Restore allows you to return your system to a previous state, effectively undoing recent changes that may have triggered a BSOD after changing maximum memory on MSConfig.
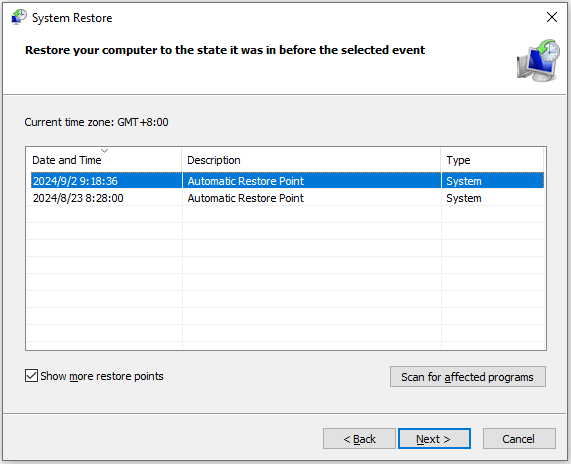
- Type rstrui in the Run dialog box and press Enter to open System Restore. To proceed, click Next.
- In the next screen, check the box next to Show more restore points, and then select a suitable restore point and click Next to go on.
- Finally, click on Finish to initiate the restore procedure.
Fix 5. Reinstall Windows
In case you still have this issue, we advise you to reinstall Windows. We all know that reinstallation will delete all the data on your PC. So, you should do a Windows backup. Here, we highly recommend you clone your hard disk with MiniTool Partition Wizard.
MiniTool Partition Wizard DemoClick to Download100%Clean & Safe
Bottom Line
What should you do if MSConfig maximum memory causes BSOD? Don’t worry. This post offers 5 ways for you. Hope you can successfully solve it.

User Comments :