Although the operating system automatically manages services, there may be times when you need to manually control one or more services to troubleshoot a problem with an application or Windows feature. How to manage system services in Windows 11? To find out the answer, this post from Partition Magic will provide you with a tutorial.
How to Manage System Services Through Services
The easiest way to stop, start, disable, or enable a service in Windows 11 is to use the “Services” app available.
1. Stop a Service
Step 1: Search for services in the Search box and press Enter to open it.
Step 2: Then, you will see the Services window. Click Services (Local) and you can see all the Windows 11 services on your PC. You can select one item to view its description and also see the Description, Status, Startup Type, and Log On As on the window.
Step 3: Double-click the service you want to stop.
Step 4: Select the Stop button and click OK.
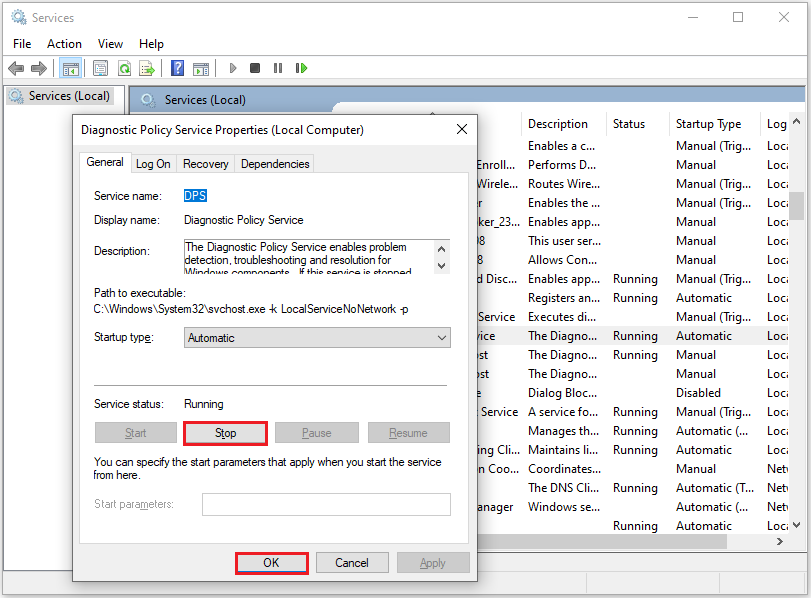
Once you complete the steps, the system will terminate the service.
2. Start a Service
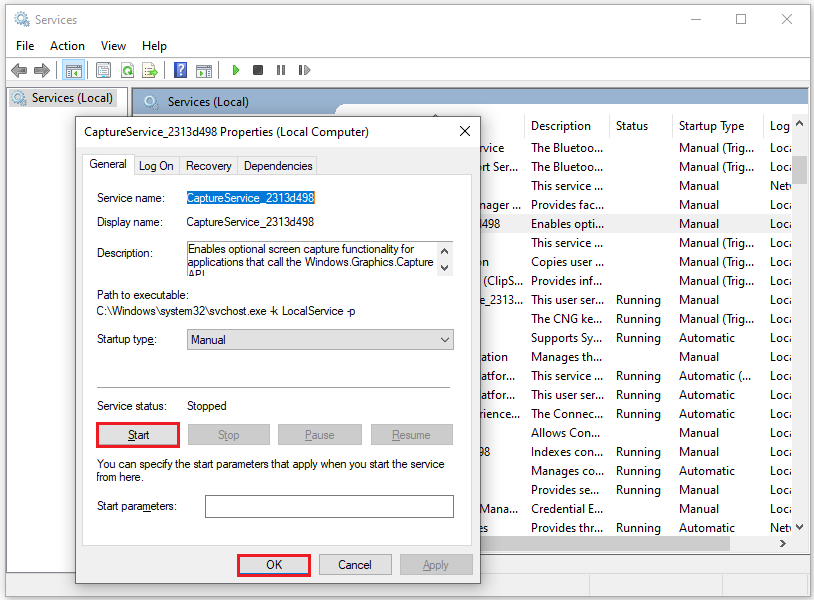
Step 1: In the Services window, double-click the service you want to start.
Step 2: Click Start and click the OK button.
3. Disable a Service
Step 1: You can refer to the steps in the above method to go to the Services (Local) interface.
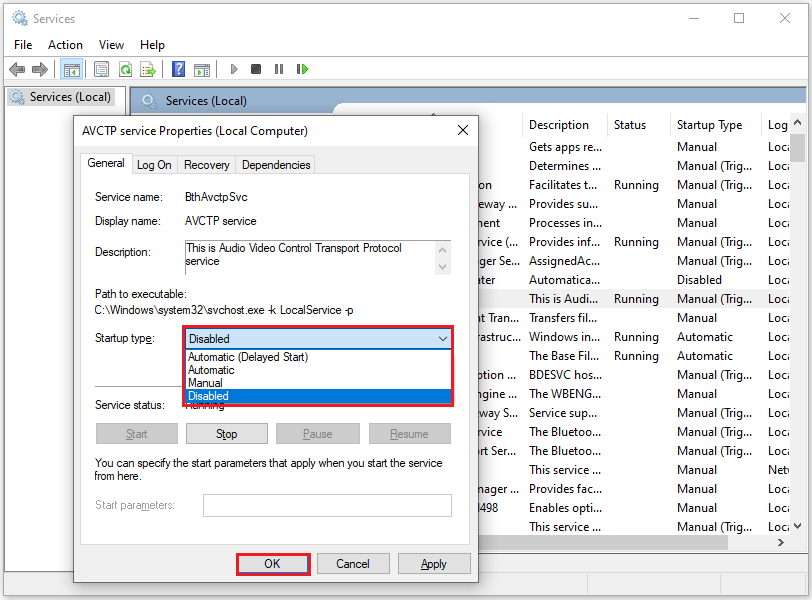
Step 2: Double-click the service you want to disable.
Step 3: Select the Disabled option from the Startup type setting. Click the OK button.
4. Enable a Service
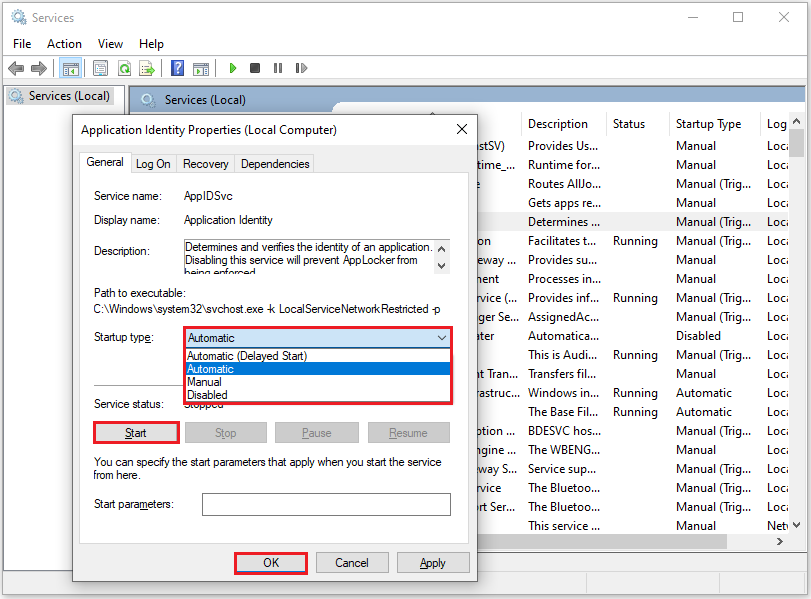
Step 1: Double-click the service to enable.
Step 2: Select how to start the service from the Startup Type setting, then select Start. Finally, click OK.
- Automatic: Starts the service automatically during start.
- Automatic (Delayed Start): Starts the service automatically but after the system loads.
- Manual: Allows you to start the service manually or through another service that the user tries to start.
How to Manage System Services Through Task Manager
In fact, the Task Manager includes a Services tab that also allows you to manage services. To do that, you can follow the steps below.
Step 1: Type Task Manager in the Search box and click it to open. In addition, you can press the Ctrl + Shift + Esc keyboard shortcut to open.
Step 2: Click the Services tab from the top.
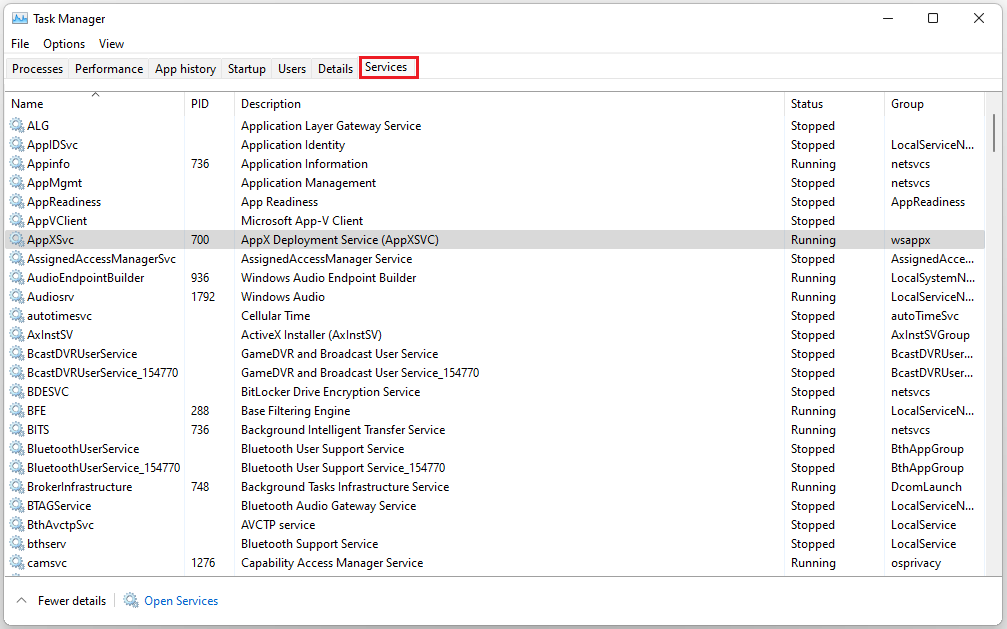
Step 3: Right-click the service and select the action:
- Start
- Stop
- Restart
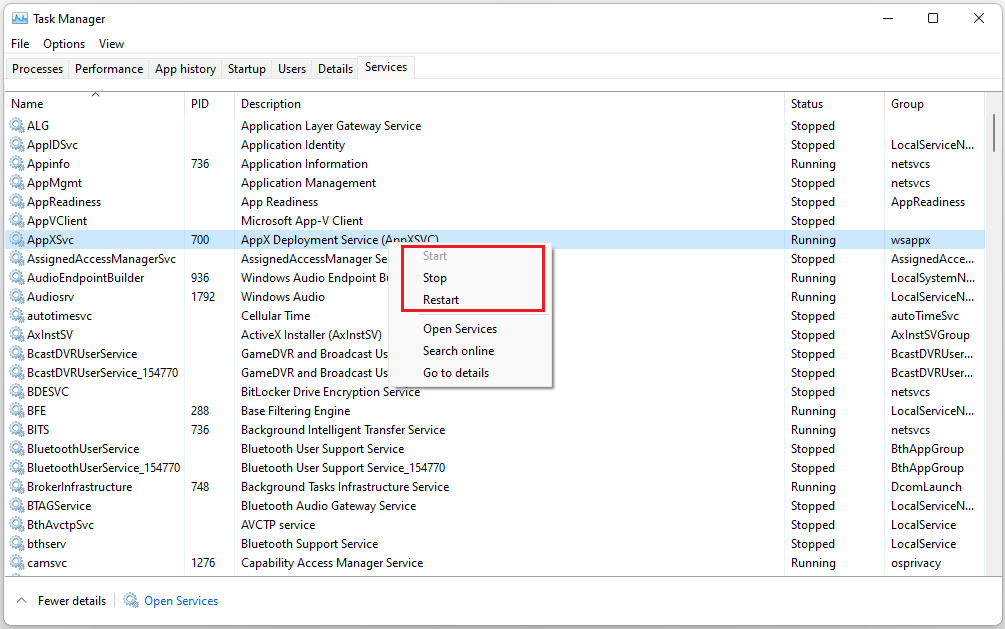
After you complete the steps, the service will have the option to start, stop, or restart, depending on your selection.
How to Manage System Services Through Command Prompt
You can also use Command Prompt to stop, disable, enable, or start services on your computer. To stop/start a service, you can follow the steps below.
1. Stop a Service
Step 1: Type the Command Prompt from the Search box, right-click the top result, and select the Run as administrator option.
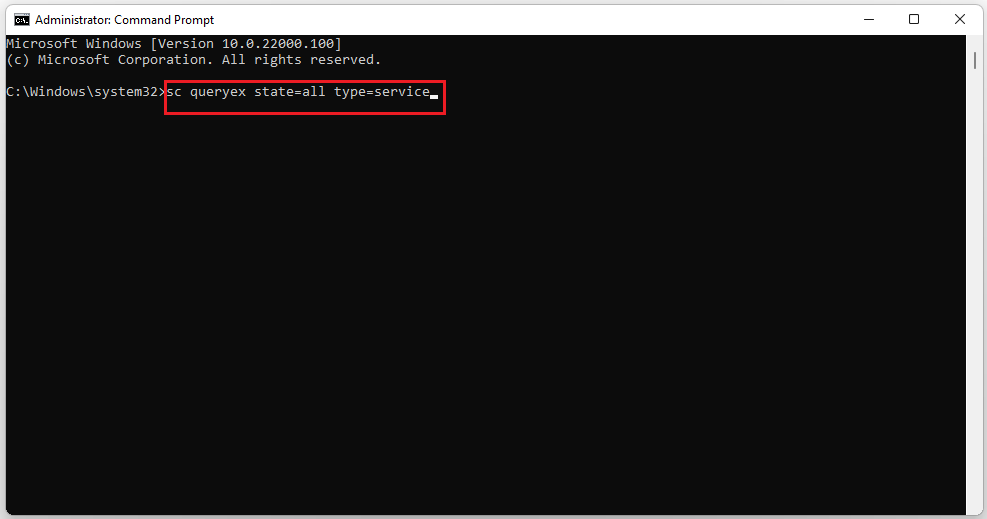
Step 2: Type the command sc queryex state=all type=service to view the available services and press Enter.
Step 3: Type the command net stop “SERVICE-NAME” to stop one service with Command Prompt and press Enter. In the command, replace “SERVICE-NAME” with the name of the service.
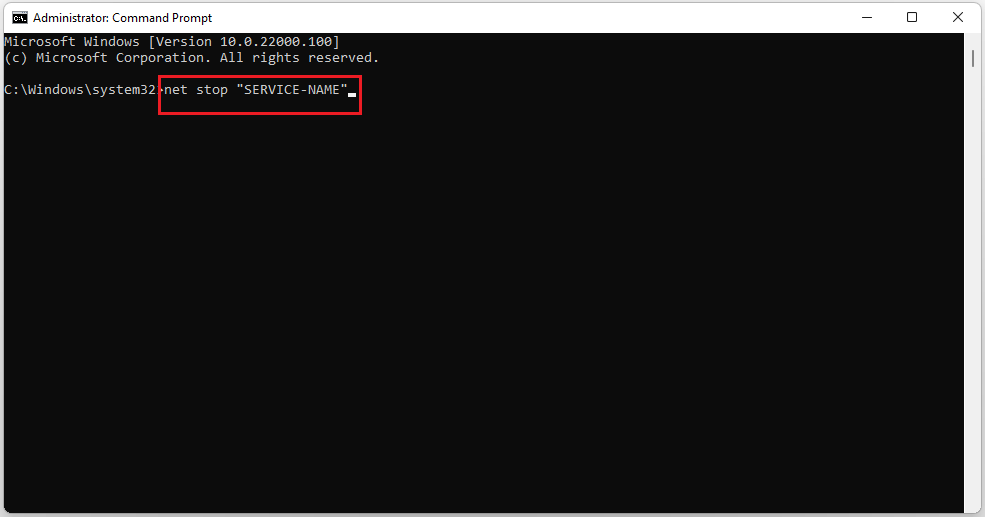
After you complete the steps, the Command Prompt command will stop the service.
2. Start a Service
Step 1: Search for Command Prompt, right-click the top result, and select the Run as administrator option.
Step 2: Type the command sc queryex state=all type=service and press Enter to view the available services.
Step 3: Type net start “SERVICE-NAME”, and press Enter. In the command, replace “SERVICE-NAME” with the name of the service.
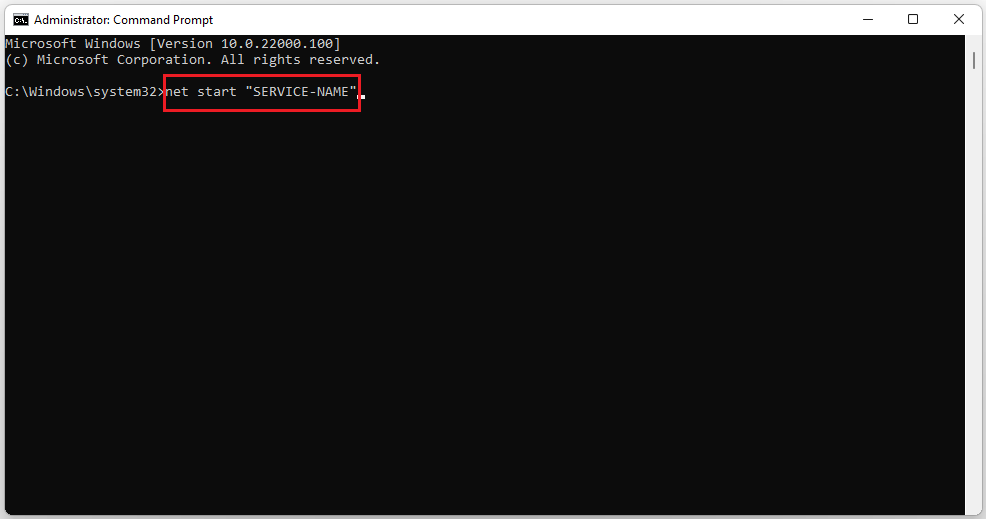
After you complete the steps, the command will start the service.
To disable/enable a service, type the following commands in Command Prompt:
- Disable a service: Type sc config “SERVICE-NAME” start=disabled, and press Enter.
- Enable a service: Type sc config “SERVICE-NAME” start=auto, and press Enter.
Bottom Line
This article shows you how to manage system services in Windows 11 through Services, Task Manager, and Command Prompt. After reading this article you can choose the method you like. Hope this article is helpful to you.
If you want to manage your hard drive better, you can try MiniTool Partition Wizard. It can help you clone the system, manage disks better, and recover data. If you have this need, you can download it from the official website.
MiniTool Partition Wizard FreeClick to Download100%Clean & Safe

User Comments :