A lot of users complain about the "KB5027231 failed to install" issue. What causes the "Windows 11 KB5027231 failed to install" issue? How to fix it? Now, let’s explore the answers together with the MiniTool Partition Wizard.
KB5027231 is a specific update for Windows 11 on June 16, 2023. This update addresses security issues for the Windows operating system. However, many users report that they have encountered the “Windows 11 KB5027231 failed to install” issue.
Are you also encountering the same error? If so, just keep reading.
How to Fix the “KB5027231 Failed to Install” Issue?
How to fix the “KB5027231 failed to install” issue? Before trying the following ways, you can restart your PC to clear temporary glitches and fix some basic errors. Then check if the issue has been resolved. If not, try the following methods.
1. Run Windows Update Troubleshooter
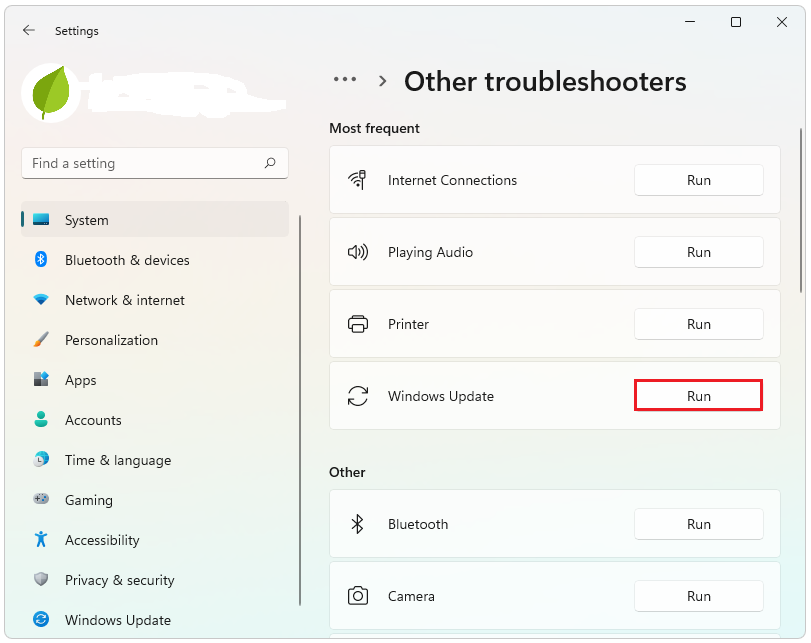
Windows Update Troubleshooter is a built-in tool in Windows OS that can fix many update-related errors. So, you can try using it to troubleshoot the “KB5027231 failed to install” issue:
- Open the Settings window.
- Scroll down to select Troubleshoot.
- Then, click Other troubleshooters.
- Next, find Windows Update and click Run.
- Follow the on-screen instructions to complete the troubleshooting process.
2. Uninstall Third-Party Antivirus Apps
Third-party antivirus apps may prevent Windows updates sometimes. So, if you have installed third-party antivirus apps on your PC and encounter the Windows 11 KB5027231 stuck error, you can try uninstalling third-party antivirus apps to fix this error.
If this doesn’t work, you can also try uninstalling the other third-party apps on your PC to check if the error is caused by software incompatibility.
3. Make Sure Your System Drive Has Enough Space
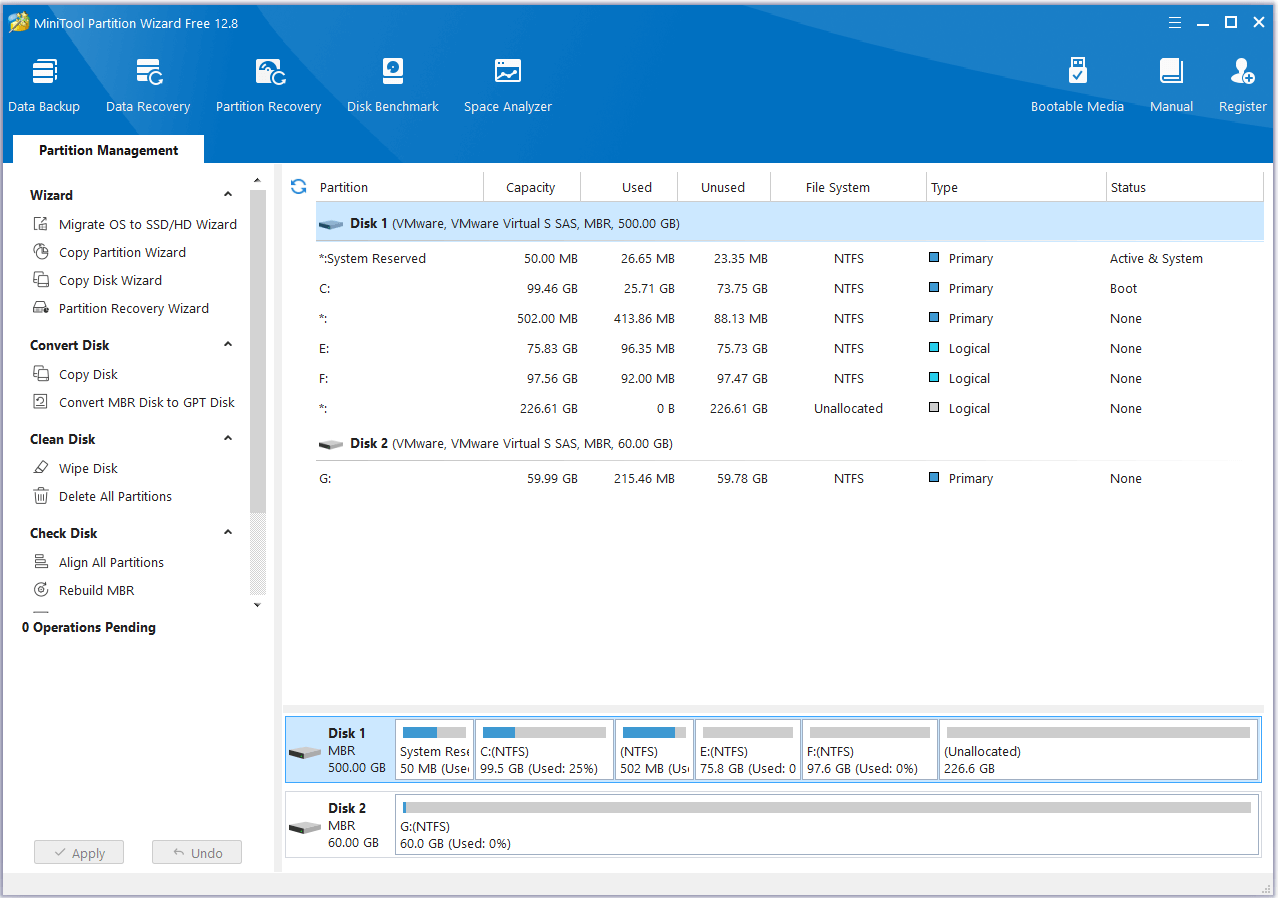
Insufficient disk space is the most common reason for the “Windows 11 KB5027231 failed to install” issue. So, you need to delete unwanted files or extend the system drive to get more free space. To do that, I recommend MiniTool Partition Wizard to you.
Its Space Analyzer and Extend Partition features are what you need. To use it, you just need to install and launch it on your PC. Then select Space Analyzer or Extend Partition and make the changes according to your needs.
MiniTool Partition Wizard FreeClick to Download100%Clean & Safe
4. Run SFC and DISM
Corrupted system files can also cause the “KB5027231 failed to install” issue. In this case, you can run SFC and DISM to fix them. To run SFC, you can refer to these steps:
- Run the Command Prompt as administrator.
- Type “sfc /scannow” and press Enter.
- After the process is completed, restart your computer to check if the error is fixed.
After running SFC, if the “KB5027231 failed to install” issue is still on, you need to run a DISM scan. Here’s how to do that:
Step 1. Run the Command Prompt as administrator again.
Step 2. Type these commands one by one. (Don’t forget to press Enter after each command.)
- DISM.exe /Online /Cleanup-image /Scanhealth
- DISM.exe /Online /Cleanup-image /Checkhealth
- DISM.exe /Online /Cleanup-image /Restorehealth
Step 3. Once done, restart your computer to check if the Windows 11 KB5027231 stuck error is fixed.
5. Check the Related Services
Windows services play an important role in the Windows operating system. If there is something wrong with your services, you may encounter the “KB5027231 failed to install” issue. To check for this, you can do the following steps:
- Click the Search box on the taskbar, type “services” and then press Enter.
- In the Services window, find Cryptographic Services in the list. Then, double-click it.
- Select Automatic from the drop-down menu of Startup type.
- Next, click Start under Service status.
- After that, click Apply and OK.
- Take the same actions for Background Intelligent Transfer Service and Windows Update.
- Once done, try to update again and check if the Windows 11 KB5027231 stuck error is fixed.
6. Install Windows Update Manually
Some people who encounter the same error report that they fix the “KB5027231 failed to install” issue successfully via installing Windows Update manually. You can also have a try. Here are the detailed steps:
- Open your browser, and then navigate to Microsoft Updates Catalog.
- Type “KB5027231” in the search box and press Enter.
- Find the file that matches your device’s System type.
- Then, click Download.
- Click the links in the pop-up window to start downloading the installation package.
- Double-click the execute file and follow the on-screen instructions to complete the installation process.

7. Reset Windows Update Components
If there is something wrong with the Windows Update components, you can also encounter the “Windows 11 KB5027231 failed to install” issue. In this case, you can try resetting Windows Update components to fix the problem.
If you don’t know how to reset Windows Update Components, you can follow the guide in this post: How to Reset Windows Update Components in Windows 11/10?
8. Try Advanced Ways
If none of the above solutions can help you fix the “Windows 11 KB5027231 failed to install” issue, you can try some advanced ways, like:
Bottom Line
We hope that the 8 ways listed in this post can help you solve the “KB5026372 failed to install” issue in your Windows 11 computer.
About The Author

Position: Columnist
Charlotte is a columnist who loves to help others solve errors in computer use. She is good at data recovery and disk & partition management, which includes copying partitions, formatting partitions, etc. Her articles are simple and easy to understand, so even people who know little about computers can understand. In her spare time, she likes reading books, listening to music, playing badminton, etc.
User Comments :