For some reason, you want to join Windows 11 to domain. Then you can take a look at this post in which Partition Magic offers you a full guide to Windows 11 domain join. It summarizes the reasons, requirements, and instructions for adding computer to domain.
Why Need to Join Windows 11 to Domain
You may want to join Windows 11 to domain if you are managing multiple devices running Windows 11 system. A domain can help you manage and protect computers from a single server or several servers. To be specific, after adding computer to domain, you can use a single user account to log into multiple devices and access different server resources on any PC.
To let Active Directory Federation Services (AD FS) run, each computer that functions as a federation server must join a domain. Federation server proxies can be joined to a domain, but it is not mandatory. Besides, if the Web server is hosting claims-aware applications only, you don’t have to join a Web server to a domain.
MiniTool Partition Wizard FreeClick to Download100%Clean & Safe
Requirements to Add Computer to Domain
You should make sure that your computer meets the following requirements before you perform Windows 11 domain join operations.
- Ensure that your Windows 10/11 is either Pro, Education, or Enterprise Edition. Only these three editions can be joined to a domain. The Active Directory domain is not supported in Home Editions.
- Your computer needs to be connected to a local network and can access one AD domain controller at least.
- Ensure that your computer can resolve the domain name and access the domain controller: ping domain IP
How to Join Windows 11 to Domain
In this part, three available ways to join Windows 11 to domain are provided. You can pick one to let Windows 11 join domain.
Way 1: Use Settings
How to let Windows 11 join domain? Settings is a built-in app on the Windows computer that enables you to add computer to domain. Here’s the step-by-step guide for you.
Step 1: Open the Settings app on your computer.
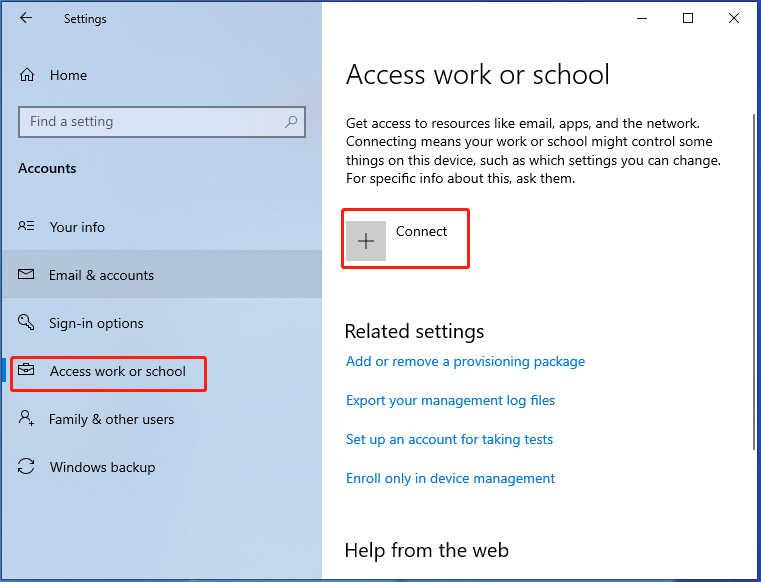
Step 2: Click on Accounts > Access work or school > Connect.
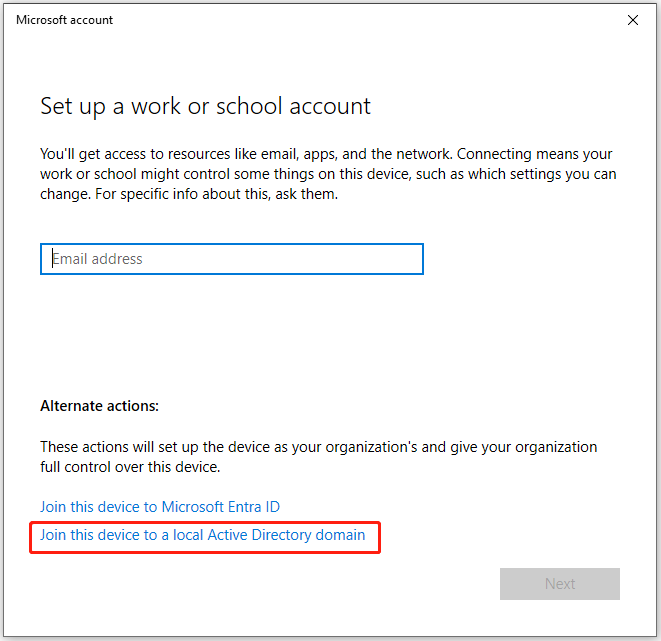
Step 3: Hit the Join this device to a local Active Directory domain option.
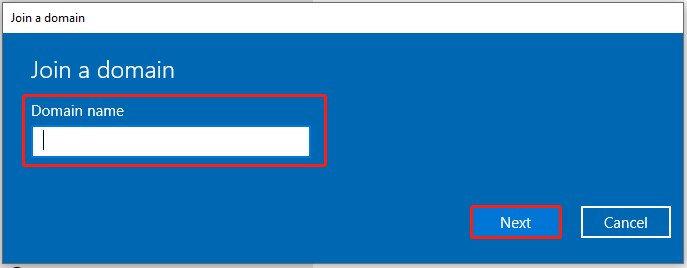
Step 4: Enter the domain name and click Next to continue.
Step 5: If you see an extra dialog to Add an account, follow the on-screen instructions to complete the operation. You can also click Skip to ignore the requirement.
Step 6: After the computer restarts, log in with the domain user with the DOMAIN\username or the User Principle Name.
Step 7: Navigate to Settings > Accounts > Access work or school and verify that domains appear.
Way 2: Use Command Prompt
Command Prompt also lets Windows 11 join domain. Simply run some command lines to add computer to domain. Here’s the complete guide for you.
Step 1: Type cmd in the search box and click Run as administrator under the searched Command Prompt.
Step 2: In the elevated User Account Control window, click Yes to continue.
Step 3: In the Command Prompt window, type the following command and hit Enter.
netdom join %computername% /domain:yourADdomain /UserD:username /PasswordD:specifypassword
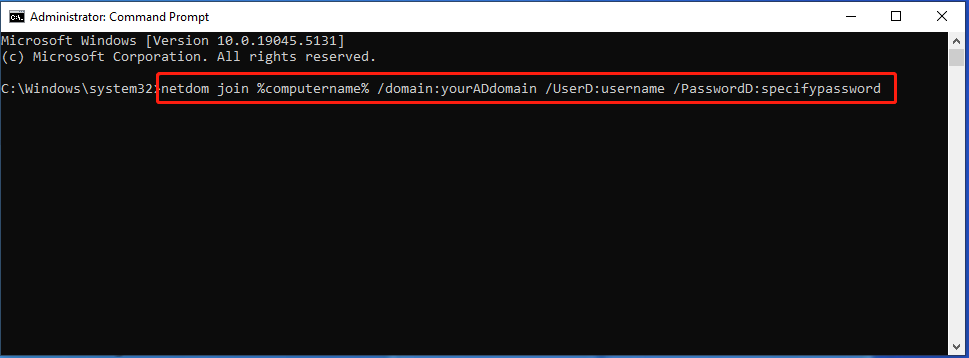
Step 4: Restart the computer
Way 3: Use PowerShell
PowerShell allows you to finish the Windows 11 domain join task too. Like Command Prompt, it enables you to join Windows 11 to domain by running a few command lines.
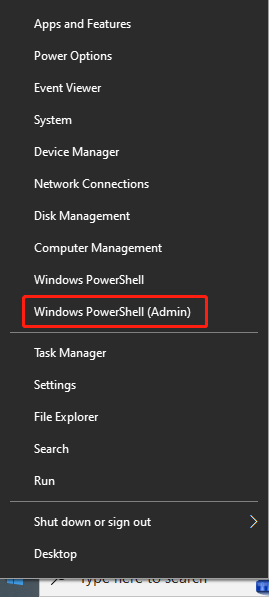
Step 1: Right-click on the Windows icon and click Windows PowerShell (Admin) from the Start menu.
Step 2: In the User Account Control window, click Yes to move on.
Step 3: In the PowerShell window, type the command below and press Enter.
Add-Computer -DomainName “Domain Name” -Credential “Domain Username”

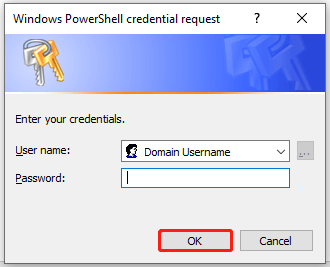
Step 4: In the prompted window, enter your domain user password and click OK.
Step 5: Restart the computer to finish the Windows 11 domain join process.
Bottom Line
Are you going to join Windows 11 to domain? If so, this post is what you need. It collects the requirements and methods for adding computer to domain.


User Comments :