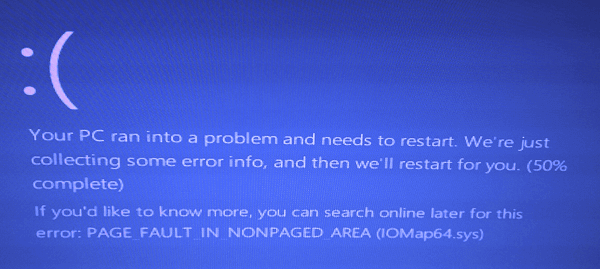
If you are annoyed about the IOMap64.sys BSOD error, you come to the right place. In this post, MiniTool Partition Wizard shows the possible causes of the IOMap64.sys BSOD error and provides some effective methods to fix it.
What Triggers the IOMap64.sys BSOD in Windows?

According to user reports, the IOMap64.sys BSOD error is often caused by driver issues or problems with the Asus GameFirst technology. Here are some of the most common reasons that may trigger this error.
- Outdated or incompatible drivers
- Hardware issues
- Outdated Windows
- Memory issues
- Corrupted ASUS software
- Corrupted system files
- ASUS AI Suite
- Paging file size issue
Method 1. Remove External Peripherals
If outdated or incompatible external peripherals are connected to your PC, you may easily encounter the IOMap64.sys BSOD error. In this case, you can try removing these external peripherals to fix the IOMap64.sys BSOD.
Method 2. Update or Reinstall GPU drivers
As mentioned, outdated or incompatible drivers can also cause the IOMap64.sys BSOD error. You can try updating or reinstalling it to check if it is the culprit. Here’s the guide:
- How to Update Graphics Card Drivers (NVIDIA/AMD/Intel)?
- How to Reinstall the Graphics Driver on Windows 10?
Method 3. Update Windows
Outdated Windows can cause various errors, including the IOMap64.sys BSOD error. In this situation, you can try updating Windows to fix this error. To do that, you just need to open the Settings window, navigate to Update & Security > Update Windows, and click Check for updates. If updates are available, you can choose to install them.
Method 4. Uninstall ASUS AI Suite
In some cases, the ASUS AI Suite can also cause the IOMap64.sys BSOD error. If you also have this software, you can try uninstalling it to fix the IOMap64.sys BSOD. Here’s the way:
- Press the Windows and R keys simultaneously to open the Run window.
- Type “control” in the box and press Enter.
- Click Uninstall a program under the Programs tab.
- Find ASUS AI Suite in the list and right-click on it.
- Then select Uninstall.
- After that, restart the PC and check if the error is fixed.
Method 5. Run the Memory Diagnostics Tool
Memory issues may also cause the IOMap64.sys BSOD error. So, if you suspect the IOMap64.sys BSOD error on your PC is caused by memory issues, you can try running the Windows Memory Diagnostics tool to fix it. To do that, you can refer to this post: 4 Ways to Open Windows Memory Diagnostic to Check Memory.
Method 6. Change the Paging File Size
Sometimes, the paging file size can also cause the IOMap64.sys BSOD error. In this situation, you can try changing the paging file size to fix the IOMap64.sys BSOD error. Here’s the guide:
- Open the Run window.
- Type “sysdm.cpl” and press Enter.
- Go to the Advanced tab and click Settings under the Performance section.
- Click the Advanced tab at the top and click the Change button.
- Then uncheck the Automatically manage paging file size for all drives box.
- Check the Custom size option.
- Next, set the Initial and Maximum size and click the OK button.
Method 7. Run SFC and DISM
If you believe that IOMap64.sys BSOD error on your PC is a result of corrupt system files, you can attempt to resolve it by running SFC and DISM scans to identify and repair the corrupted files. If you don’t know how to run SFC and DISM, you can refer to the following posts:
- The Detailed Information about System File Checker Windows 10
- How To Use The DISM Restore Health Command To Repair Windows
Alternatively, you can also check the hard drive for errors using MiniTool Partition Wizard. It is capable of detecting bad sectors and file system errors on the hard drive. To find bad sectors, run the Surface Test feature. As for file system errors, you need to use the Check File System feature to detect and repair them.
MiniTool Partition Wizard FreeClick to Download100%Clean & Safe
Bottom Line
How to IOMap64.sys BSOD error on Windows? We have summarized 7 feasible ways in this post. If you have any better solutions, please share them with us in the following comment area.

User Comments :