You may want to install 2.5-inch SSD to the PC so that Windows can boot up or shut down faster, programs can load faster, and the PC can respond more quickly. This post from Partition Magic will give you a detailed guide to 2.5-inch SSD installation.
Why Do You Need to Upgrade Your PC with a 2.5-Inch SSD?
As to types of hard drives, SSD and HDD are two common types. An HDD is a traditional hard drive that can offer large storage capacity but relatively slow boot time and low PC performance. An SSD offers faster boot time, quicker application launch, and overall snappier system responsiveness.
Upgrading your computer with a 2.5-inch Solid State Drive is one of the most effective ways to improve its performance.
How to Install 2.5-Inch SSD
Here are the detailed steps on how to install 2.5-inch SSD in PC:
Step 1: Gather Necessary Tools and Materials
Before you start to install 2.5-inch SSD, make sure you have the following tools and materials:
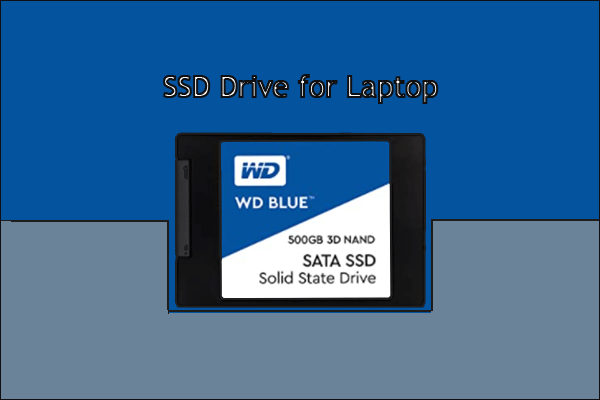
- A 2.5-inch SSD
- A screwdriver (usually Phillips-head)
- SATA cable (if not already installed in your computer)
- Mounting brackets or adapter (if your case does not support 2.5-inch drives)
- Static wrist strap (optional but recommended to prevent static damage)
Step 2: Back Up Your Data
It’s crucial to back up your data before proceeding with the installation. Use an external hard drive or a cloud service to save all your important files. This step ensures you don’t lose any data during the 2.5-inch SSD installation process.
Step 3: Prepare Your Computer
- Shut Down and Unplug: Turn off your computer and disconnect all cables, including the power cord, to ensure safety. Only remove the battery if you’re installing a 2.5-inch SSD into a laptop.
- Open the Case: Use the screwdriver to remove the screws holding the side panel of your computer case. Carefully slide or lift off the panel to expose the internal components.
Step 4: Locate the Drive Bay and Mount the SSD
Find an available 2.5-inch drive bay in your computer case. If your case only has 3.5-inch drive bays, you will need a 2.5-inch to 3.5-inch adapter bracket to mount the SSD securely.
Attach the SSD to the bracket, and if necessary, secure the SSD to the adapter bracket using the screws provided with the bracket. Install 2.5-inch SSDs (or SSDs with bracket) into the drive bays and secure them with the screws. Make sure it is firmly in place.
Step 5: Connect the SSD
- Attach the SATA Cable: Connect one end of the SATA cable to the SSD. The SATA connector is L-shaped, so it will only fit one way.
- Connect the Power Cable: Locate an available SATA power cable from your power supply and connect it to the SSD.
- Connect to the Motherboard: Plug the other end of the SATA cable into an available SATA port on your motherboard. Refer to your motherboard manual if you need help locating the SATA ports.

Step 6: Close the Case and Reconnect Cables
- Reattach the Side Panel: Once the SSD is securely installed and connected, replace the side panel of your computer case and screw it back into place.
- Reconnect All Cables: Plug in all the cables you disconnected earlier, including the power cord, monitor, keyboard, mouse, and any other peripherals.
Step 7: Initialize and Format the SSD
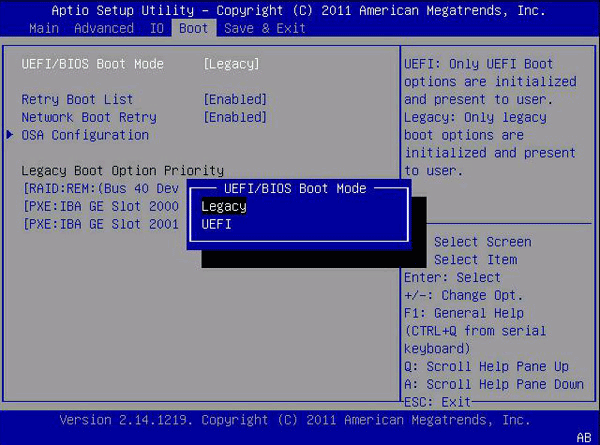
- Power On Your Computer: Turn on your computer and enter the BIOS/UEFI setup by pressing the designated key (usually Del, F2, or Esc) during startup.
- Check SSD Detection: Ensure that the BIOS/UEFI recognizes the new SSD. Save and exit the BIOS/UEFI.
- Initialize the SSD: Open Disk Management (right-click the Start button and select Disk Management). You should see the new SSD listed as unallocated space. Right-click on it and select Initialize Disk, then follow the prompts.
Step 8: Install the Operating System (If Necessary)
If you are using the SSD as your primary drive, you will need to install your operating system on it. Follow the installation instructions for your specific OS. If the SSD is an additional drive, you can skip this step and start using it for storage or applications.
Here, if you want to migrate system from an internal hard drive to an SSD, I recommend you to use a partition manager – MiniTool Partition Wizard, which is designed to maximize disk performance. It helps you to clone the system effectively.
Step 9: Transfer Data
Once the SSD is set up, you can transfer your data from your backup to the new SSD. If you cloned your old drive, you should have access to all your files and applications as they were.
Bottom Line
Installing a 2.5-inch SSD is a relatively straightforward process that can significantly enhance your computer’s performance. By following these detailed steps, you can ensure a smooth installation and enjoy the benefits of faster boot times, improved application performance, and a more responsive system overall.
Whether you’re upgrading an old desktop or boosting a new build, an SSD is one of the best investments you can make for your computer.
User Comments :