What Is Hyper-V Server 2019
Hyper-V Server 2019 is a free product of Windows Hypervisor that’s used to run virtual machines. It is a standalone product that contains Windows Hypervisor, a Windows Server driver model, and virtualization components. If you want to enjoy free and reliable Server virtualization, Hyper-V Server 2019 is a good choice.
There are key benefits that make Hyper-V Server 2019 widely popular:
- Completely free, simple, and reliable to install.
- Support almost all popular operating systems, including all Windows, FreeBSD, Hyper-V, and modern Linux.
- A product key is not required for activating Hyper-V Server 2019.
- It is familiar to a popular Windows Server platform and easy to work with.
- There are many different ways to back up Hyper-V virtual machines.
- Support multiple languages, including Chinese, English, French, German, Italian, Japanese, Portuguese, etc.
So, how to install Hyper-V Server 2019 and manage it on your PC. Let’s keep reading.
How to Install Hyper-V Server 2019
This part provides a full Hyper-V Server 2019 download and install guide. It also discusses the general requirements of the Hyper-V Server 2019 installation.
Before You Do
Before you get the Hyper-V Server 2019 ISO installed, you’d better check the Hyper-V Server 2019 system requirements. Make sure your machine meets the general requirements below:
- A 64-bit processor with second-level address translation (SLAT).
- Prepare at least 4 GB of RAM or more because you need enough memory to run the host and virtual machines at the same time.
- Virtualization support turned on in the BIOS or UEFI.
- VM Monitor Mode extensions.
Of course, if you want to enjoy some specific features like discrete device assignment and shielded virtual machines, you need to meet more requirements. You can read this post from Microsoft to know more details.
Hyper-V Server 2019 Download & Install Guide
Now, I believe that you have been ready for the Hyper-V Server 2019 installation. Here’s how to Hyper-V Server 2019 downloaded and installed on the computer.
Step 1. Click here to open the official Hyper-V Server 2019 ISO download page. Then you need to have a short registration until the Hyper-V Server 2019 download appears.
Step 2. Select the language of the ISO file according to your needs and click the 64-bit edition download link. Wait patiently until the Hyper-V Server 2019 download is complete. The ISO files is about 3 GB, so it may take your some time.

Step 3. Once downloaded, you can create a bootable Hyper-V Server 2019 installation USB drive. To do so, you can burn Hyper-V Server 2019 ISO via Rufus.
MiniTool Partition Wizard DemoClick to Download100%Clean & Safe
- Download Rufus on your computer and plug in a USB flash drive. Then Rufus will automatically detect your USB drive.
- Select Hyper-V Server 2019 ISO from the Boot selection and configure other options, including partition scheme, target system, file system, volume label, cluster size, etc.
- Click on Start to create the bootable USB.
Step 4. Once created, restart your PC and press F2 or Delete key while starting to enter BIOS. Then set the USB drive as the first boot order so that your PC boots from the USB.
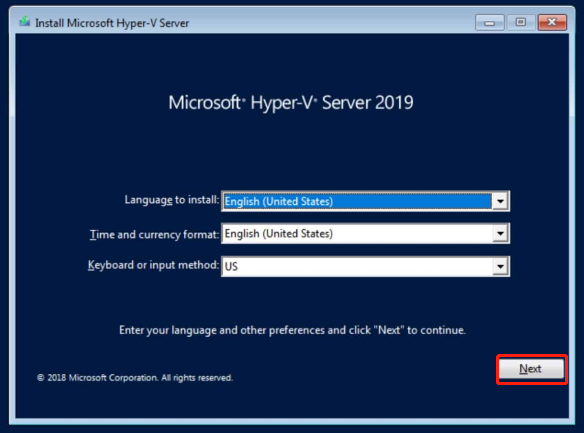
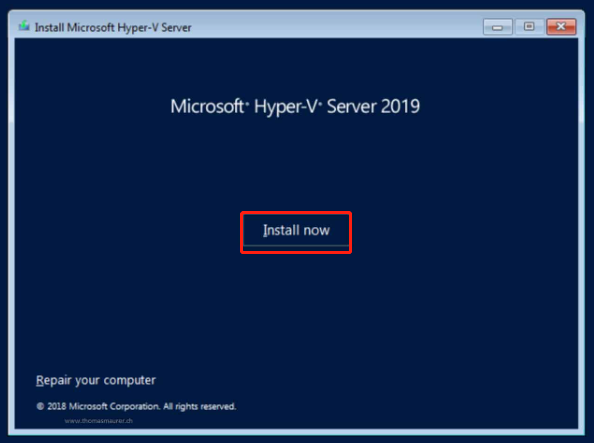
Step 5. When starts up, configure the Language, Keyboard or Input, and click Next. Then click on Install Now.


Step 6. Then you need to accept the license terms, choose the location to save the Hyper-V Server 2019 installation, and wait for the process to complete. It is similar to other Windows operating system installations. So, just follow the on-screen instructions to finish it.
Once you have the Hyper-V Sever 2019 installed successfully, it will prompt you to change the administrator password. Change and confirm the password. Then restart the computer and configure the most basic settings of Hyper-V Server 2019 according to your preference.
Bottom Line
This post shows you how to download Hyper-V Server 2019 and install it on a PC. You need to get Hyper-V Server 2019 ISO first, create a bootable USB using Rufus, and then install it. After that, you can configure Hyper-V Server 2019, like a hostname, local administrator user, Windows update, etc.

User Comments :