Do you know how to do Hyper-V change resolution on Windows 10/11? This post from MiniTool Partition Wizard will show you how to change Hyper V resolution.
When a Windows 10 virtual machine is opened in Hyper-V, it always displays in a non-full-screen window size, which results in inconvenient viewing and experience. Therefore, this article describes effective methods for Hyper-V change resolution.
How to Change Hyper-V Resolution
Here, we will introduce two ways to help you adjust Hyper-V resolution on Windows 10/11.
Way 1. Change Hyper-V Resolution in Hyper-V Settings
You can do Hyper-V change resolution in Hyper-V Settings. Now let’s see how to do that.
Step 1: Type hyper-v manager in the Windows Search box, and then press Enter.
Step 2: In the Hyper-V Manager window, select Hyper-V Settings from the right pane.
Step 3: Click on Enable Session Mode Policy from the left pane, and then select the Allow enhanced session mode box.
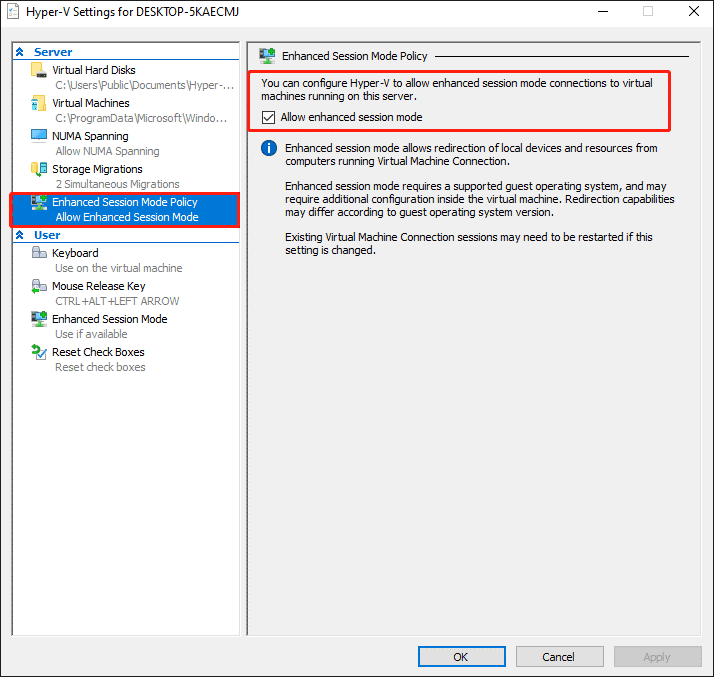
Step 4: After you have enabled Enhanced Session Mode Policy, continue to select Use enhanced session mode from the User pane, and then click on OK. In this way, you have turned on Hyper-V Enhanced Session Mode for your account.
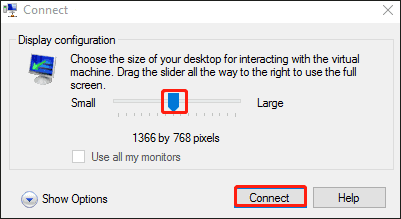
Step 5: Power on the virtual machine and you can see a VMconnect configuration wizard pop up, then drag the slider to configure the display as you want. After that, click on Connect to close the window.
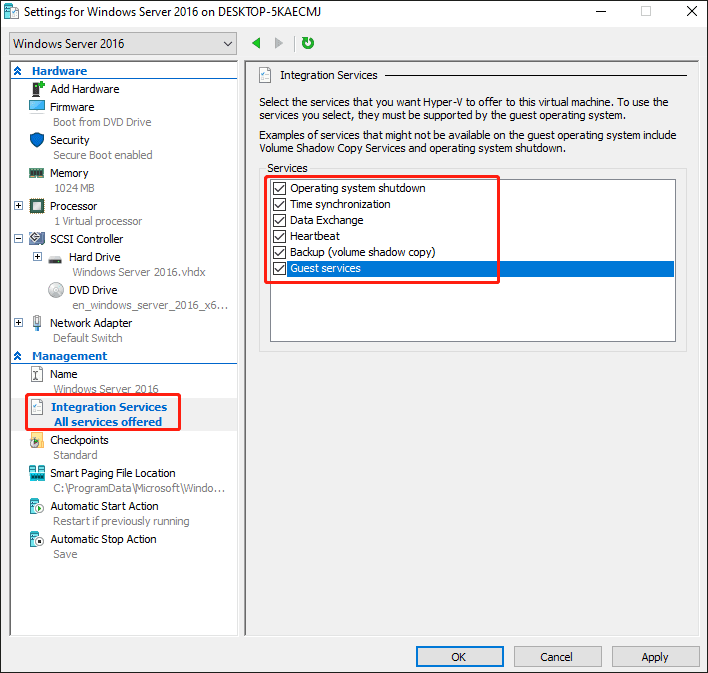
Step 6: Access the Windows 10 virtual machine and select Settings on the right pane.
Step 7: Click on Integration Services, then select all the services on the right box.
Step 8: After that, back to the virtual machine and select View > Full Screen Mode.
After that, the Hyper-V virtual machine will automatically use the window size as its native resolution. You have made the Windows 10 full-screen successfully.
Way 2. Change Hyper-V Resolution in PowerShell
You can do Hyper V change resolution in PowerShell and Settings. Here’s how to do that.
Step 1: Type powershell in the Windows Search box. Then right-click on Windows PowerShell to choose Run as administrator.
Step 2: In the Windows PowerShell window, type the following command to see the current status of Hyper-V Enhanced Session Mode for All Users and press Enter.
Get-VMHost | fl -Property EnableEnhancedSessionMode
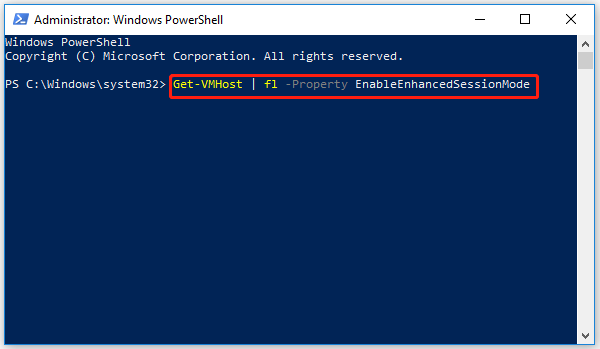
Step 3: If the status is false, it means the mode is disabled. To enable it, type the following command and press Enter.
Set-VMhost -EnableEnhancedSessionMode $True
Step 4: Close the PowerShell window. Then press the Win + I key to open Settings.
Step 5: Go to System > Display. Locate the Display resolution section and click the drop-down next to it. You will get options like 1920*1200, 1920*1080, & 1600*1200. You can choose any of them or select the default screen resolution option to get the best output.
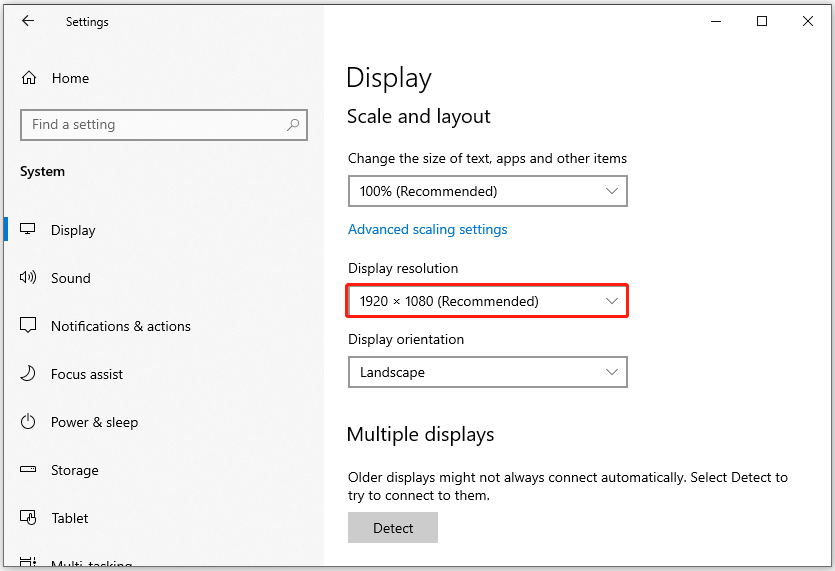
Step 6: Click on the Keep changes button to confirm your choice.
Bottom Line
Now, you should know how to change Hyper-V resolution on Windows 10/11. If you need to do Hyper-V change resolution Windows 10, just follow the steps in this post.
MiniTool Partition Wizard is a functional tool. It can migrate OS, clone disk, recover partitions, recover data from hard drive, etc. If you have this need, download it to have a try.
MiniTool Partition Wizard DemoClick to Download100%Clean & Safe



User Comments :