Worried about losing important data if you send your computer for repair? Don’t worry. This article from MiniTool Partition Wizard will explain the detailed guide on how to protect data during computer repair.
Today, computers have become an indispensable part of everyone’s work and life. Apart from inconsequential entertainment content, more and more important data is stored on computers.
For users, much valuable data may also contain sensitive information, such as identity information, resumes, financial details, photos, and even some confidential work documents that may be saved on the computer.
But if your desktop or laptop develops a problem that can’t be easily fixed and you have to send it in for repair, how to protect sensitive data during computer repair? In this post, we provide a guide to protect your sensitive data.
How to Protect Data During Computer Repair
In this part, I will introduce how to use MiniTool Partition Wizard to protect data. It is a professional partition manager that enables you to backup and erase disks. Additionally, the program allows you to create/delete/resize partitions, check disk health, migrate OS to SSD/HDD, etc.
The following tutorial is based on a scenario where your computer cannot boot normally. If the computer can boot normally, just follow the last two steps. It is easier.
Step 1. Create a Bootable USB Flash Drive
First, you should create a bootable media so that you can boot your computer to the MiniTool PE Loader screen. MiniTool Partition Wizard can help you perform operations in just a few clicks.
MiniTool Partition Wizard DemoClick to Download100%Clean & Safe
1. Insert your empty USB flash drive into a working computer. Then download and install MiniTool Partition Wizard. Then launch it to get into the main interface.
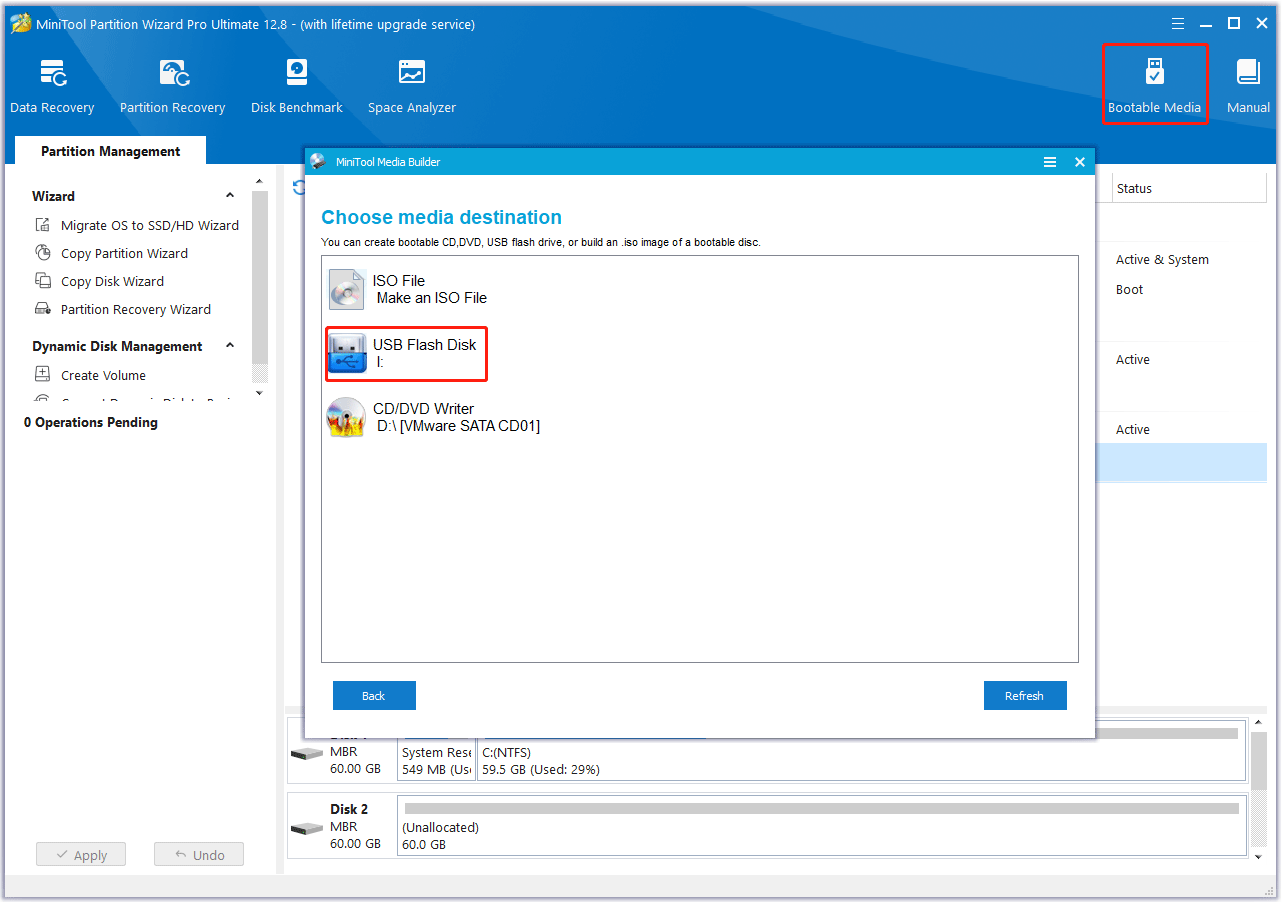
2. Click Bootable Media at the top-right corner.
3. In the prompted window, click WinPE-based media with MiniTool plug-in.
4. After that, select the USB Flash Disk. Then click Yes to confirm this operation when you see a warning window show up.

5. Wait patiently until the process ends and click Finish to close the window.
6. Finally, eject the USB drive from the computer safely.
Step 2. Back up Important Data
Now, you can boot from the bootable USB flash drive to back up your important data.
1. Boot your problematic computer from the bootable USB flash drive.
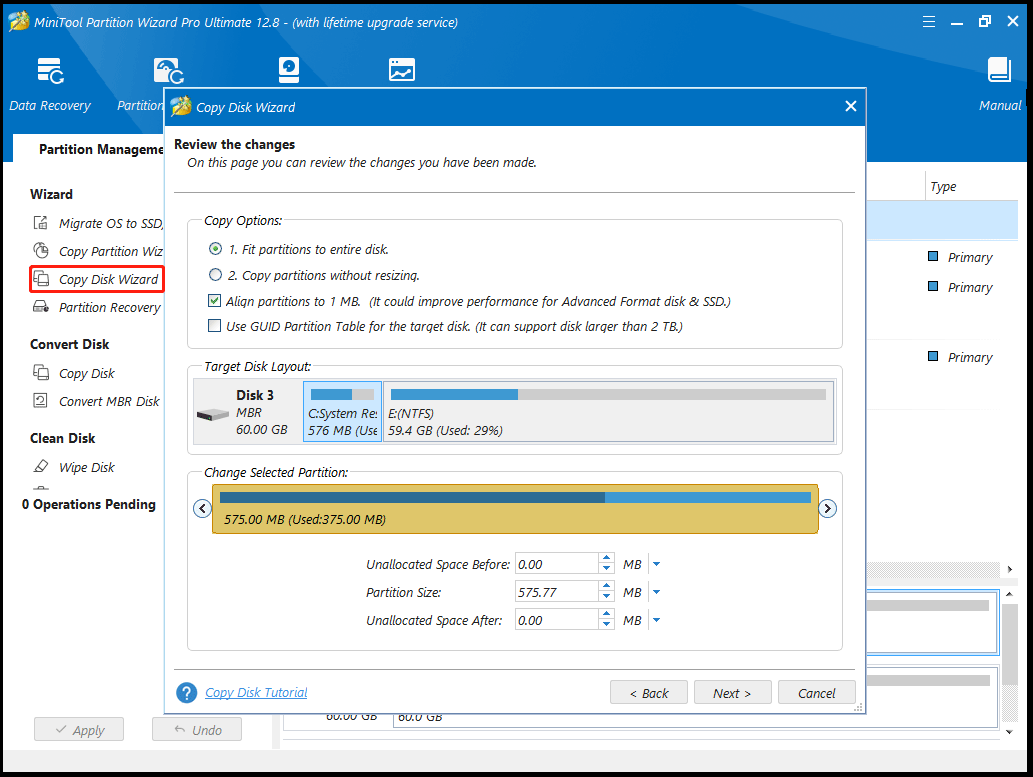
2. After entering the main interface of MiniTool Partition Wizard, choose Copy Disk Wizard from the left action panel. Then click Next to continue.
3. Select the disk you would like to copy and click Next.
4. Choose a target disk where the copy will be stored and click Next to continue. Then click Yes to continue.
5. Choose a copy method and click Next.

6. Read the note carefully which shows how to boot from the target disk, and click Finish to go back to the main interface. Then click Apply to execute all changes.
Step 3. Erase Data
To protect data during computer repair to avoid privacy leakage, you should erase the data.
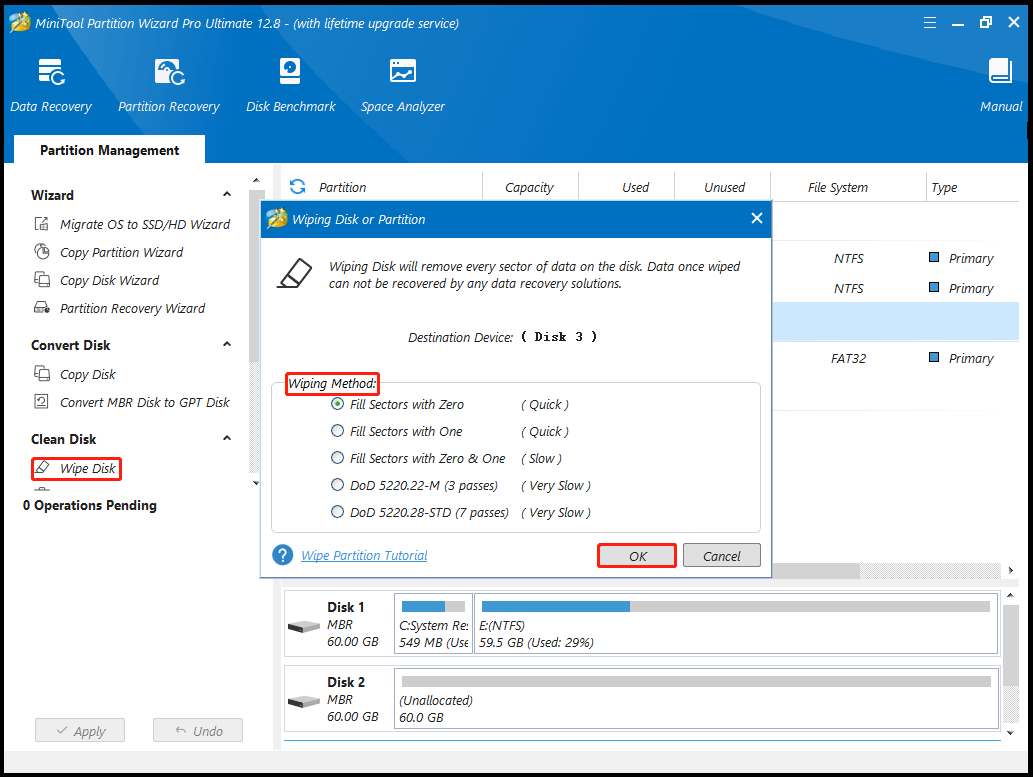
1. In the main interface of MiniTool Partition Wizard, select the drive storing important or sensitive data and then select Wipe Disk from the left action panel.
2. Choose one of five wiping methods listed on the pop-up window and click OK. The more time it costs, the higher security you will have.
3. Click on Apply to carry out the operation. Then the wiping process starts automatically and you just need to wait patiently until the process ends.

Bottom Line
There are many ways to protect sensitive data during computer repair. One of the safest methods is to back up important files first and then perform a data wipe.


User Comments :