Sometimes, some users may run System Extensive Text on their HP PC, but the test result shows “hard drive optimized DST check not available”. DST, short for Disk Self-Test, is a useful program integrated into most PC and server workstations from HP, Dell, and other brands to verify the physical integrity of the hard drive.
How to fix this error? If you also run into the same problem, please read the following content.
Way 1. Stop All Operations and Check Connections
The best option is to suspend all activity and seek expert advice. Also, you can try checking the cable connections. Check the hard drive and motherboard connections and make sure the IDE or SATA cable is plugged in correctly.
Although uncommon, loose or broken wires can cause false short or long DST fault results. Simply reinserting or replacing the cable can quickly solve the problem.
Way 2. Update Windows Driver
If your computer can boot, you might resolve the hard drive optimized DST test failed issue by upgrading the device driver.
Step 1: Right-click on the Start menu and choose Device Manager from the list.
Step 2: Locate the Disk drivers section and expand it.
Step 3: Right-click on the target drive and select Update Driver.
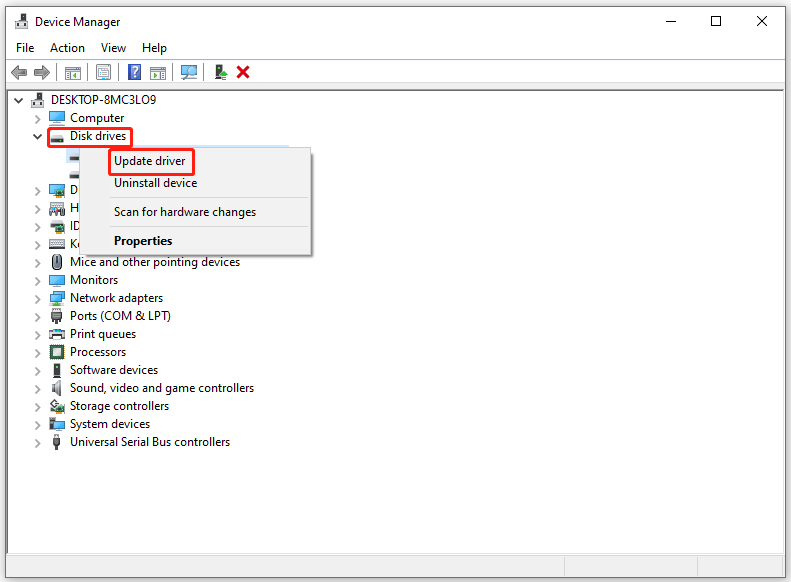
Step 4: Select Search automatically for driver software. Then your system will check if a new update is available for the drive and prompt you to install it if it finds one.
Way 3. Restore to a Previous Point
You can try to restore your PC to a previous point when faced with the “hard drive optimized DST check failed” issue. But this method only works when the System Restore has been enabled before this error. The installation media is still necessary if you’re not able to enter the OS.
Step 1: Start your computer with the Windows installation media.
Step 2: Select language, time, and keyword settings, and then click on Next.
Step 3: Click on Repair your computer in the lower left corner of the Install now screen.
Step 4: Choose Troubleshoot > Advanced Options > System Restore.
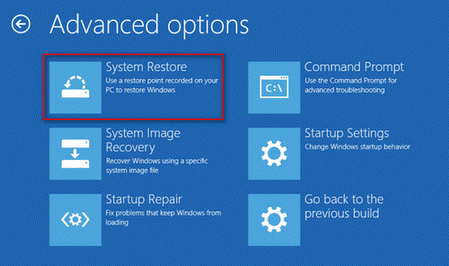
Step 5: Choose a proper Restore Point created automatically or manually.
Way 4. Replace a New Hard Drive
If none of the above methods help fix the “hard drive optimized DST check failed” issue, we’d like to recommend you replace the problematic disk with a new one. Before replacing the drive, you should back up your important data to a safe location. Here is a tutorial on how to back up data with the help of MiniTool Partition Wizard.
MiniTool Partition Wizard DemoClick to Download100%Clean & Safe
Step 1: Boot the PC from the created bootable USB flash drive.
Step 2: In the main interface of MiniTool Partition Wizard, click on Copy Disk Wizard in the action panel. Then click on Next.
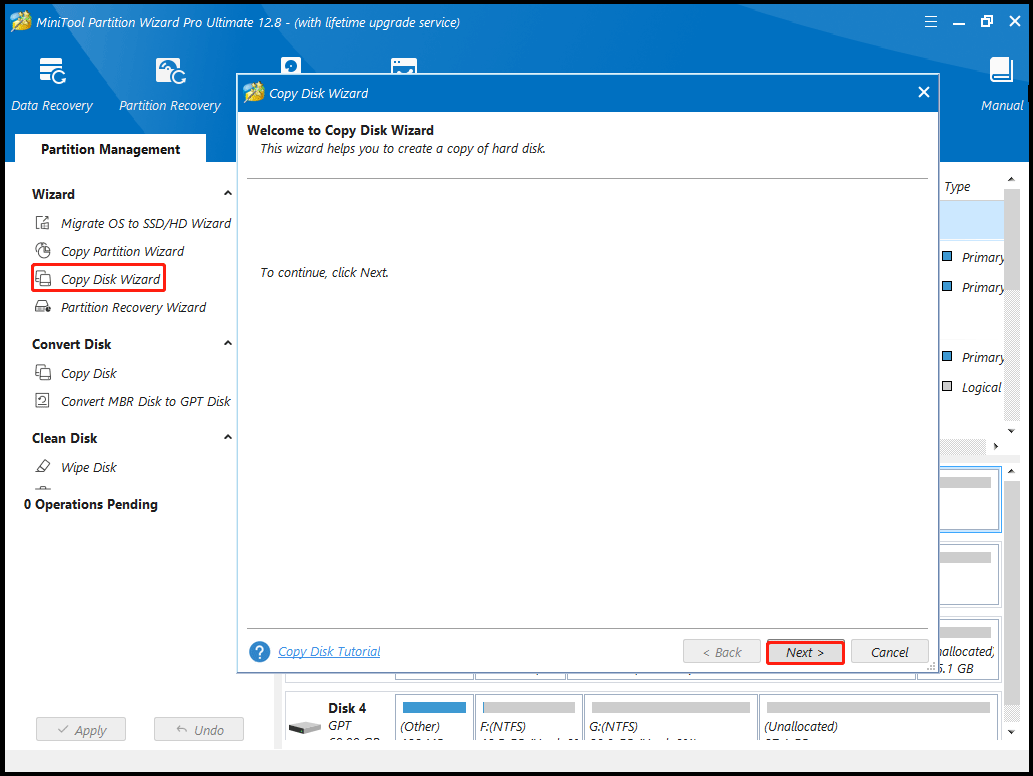
Step 3: In the pop-up window, select the disk to copy and click on Next.
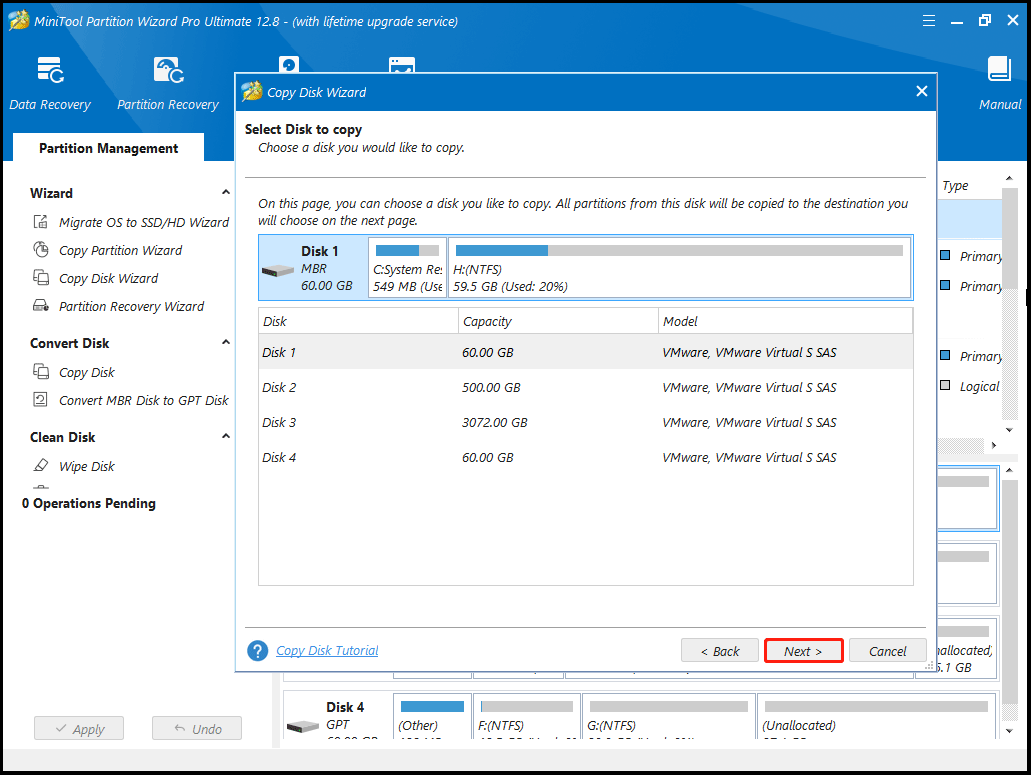
Step 4: Select the destination disk in the next window and click on the Next button.
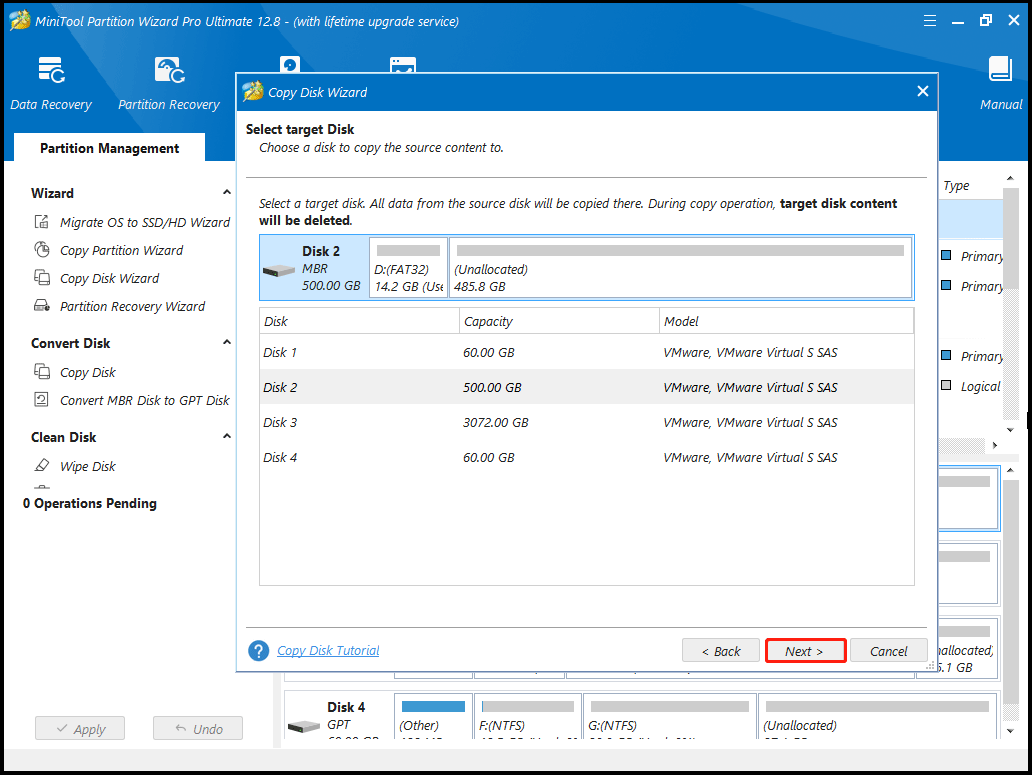
Step 5: Pick Copy Options based on your needs or situation.
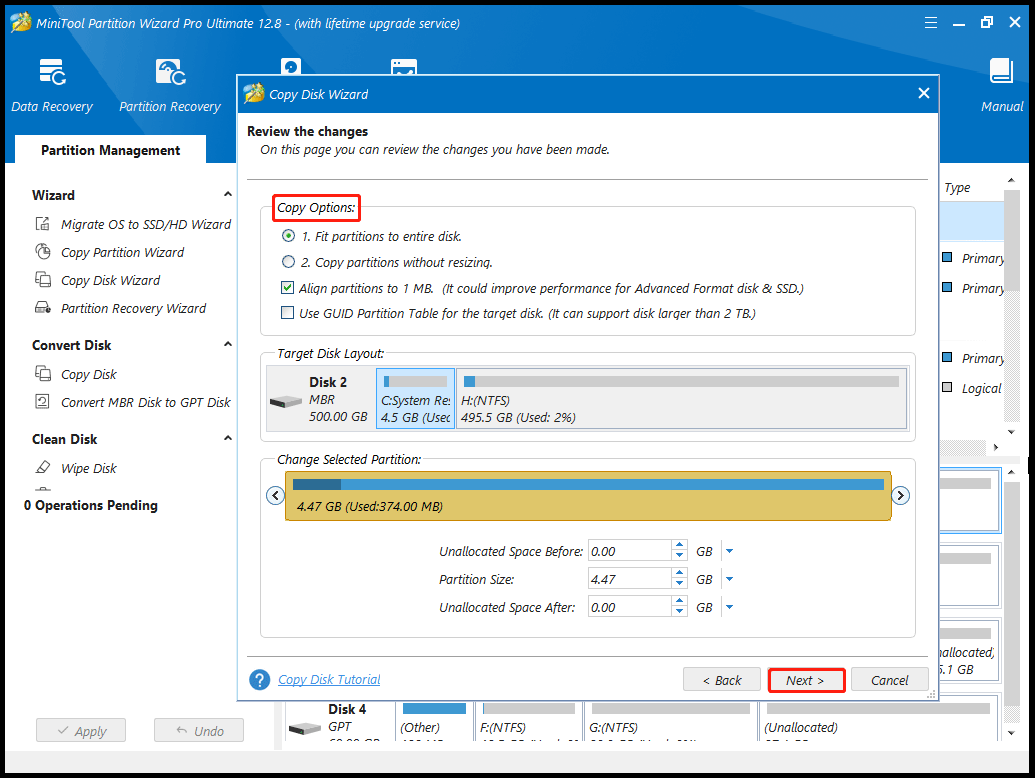
Step 6: Click Finish > Apply > Yes to carry out the pending operation.
After finishing the disk cloning, you can replace the hard drive. This post may help you complete this operation: How to Replace Laptop Hard Drive?
Bottom Line
When faced with the hard drive optimized DST check failed problem, you can try three methods shared in this guide. If you have any other solutions to this error, you can leave them in the following comment zone.

![[Solved] Windows Does Not Boot After Compressing System Drive](https://images.minitool.com/partitionwizard.com/images/uploads/2023/09/windows-does-not-boot-after-compressing-system-drive-thumbnail.png)
User Comments :