Glyph Blackbox Plus is a super compact and rugged mobile hard drive that is great for storage on the go. Although it’s reliable to use, sometimes you may suffer from data loss on the Glyph Blackbox Plus drive. Fortunately, this post offers a Glyph Blackbox Plus data recovery guide for you. You can refer to it to recover your data.
What Causes Data Loss on Glyph Blackbox Plus Hard Drives
Before starting the Glyph Blackbox Plus data recovery, you need to figure out the reasons behind the data loss. Here, we summarize some common causes of data loss on the drives.
- Virus or Malware Infection: Viruses or threats in your system may affect the hard drive, deleting or damaging data.
- Human Errors: If you delete files or format the drive by accident, data loss may also occur.
- System Issues: You may lose data due to unexpected shutdown, system crash, or other system errors.
- File System Corruption: File system errors on the hard drive may lead to data loss as well.
- Physical Damage: If the hard drive is damaged physically, you cannot access the drive and data anymore.
How to Perform a Glyph Blackbox Plus Data Recovery
What if you get data lost or deleted from Glyph Blackbox Plus drives? How can you recover data from Glyph Blackbox Plus drives? Well, in this part, we’d like to recommend you execute Glyph data recovery with MiniTool Partition Wizard.
It’s a powerful and safe data recovery tool that enables you to get data back from various storage devices. In addition, MiniTool Partition Wizard is also a professional partition manager that allows you to create/resize/delete partitions, wipe/clone a hard drive, format SD card FAT32/NTFS/exFAT, convert MBR to GPT without data loss, etc.
For Glyph Blackbox Plus data recovery using MiniTool Partition Wizard, follow the steps below.
Step 1: Download and install MiniTool Partition Wizard on your PC. Then launch it to the main interface.
MiniTool Partition Wizard DemoClick to Download100%Clean & Safe
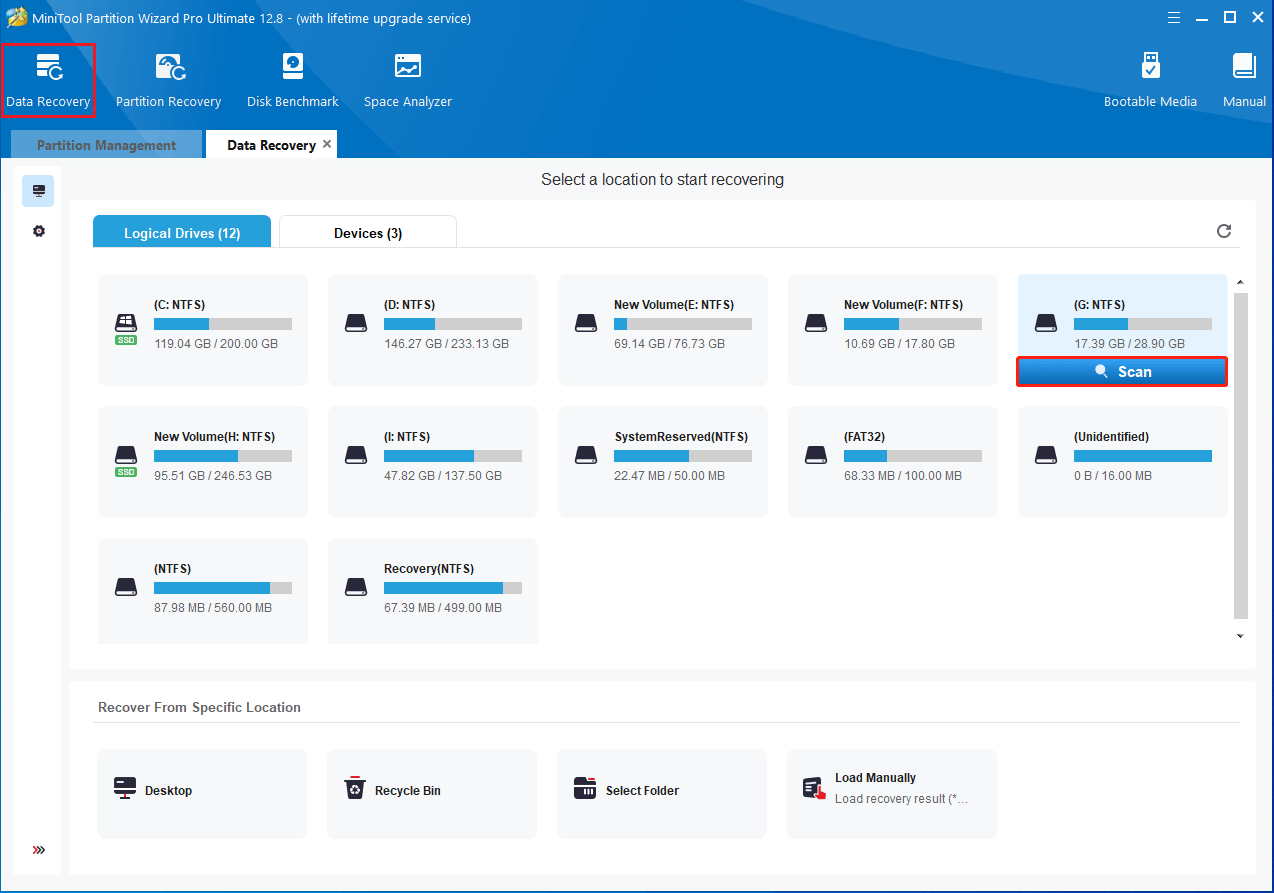
Step 2: Click Data Recovery at the top-left corner to move on.
Step 3: In the next window, move your cursor to the Glyph Blackbox Plus partition and then click the Scan button to scan for files.
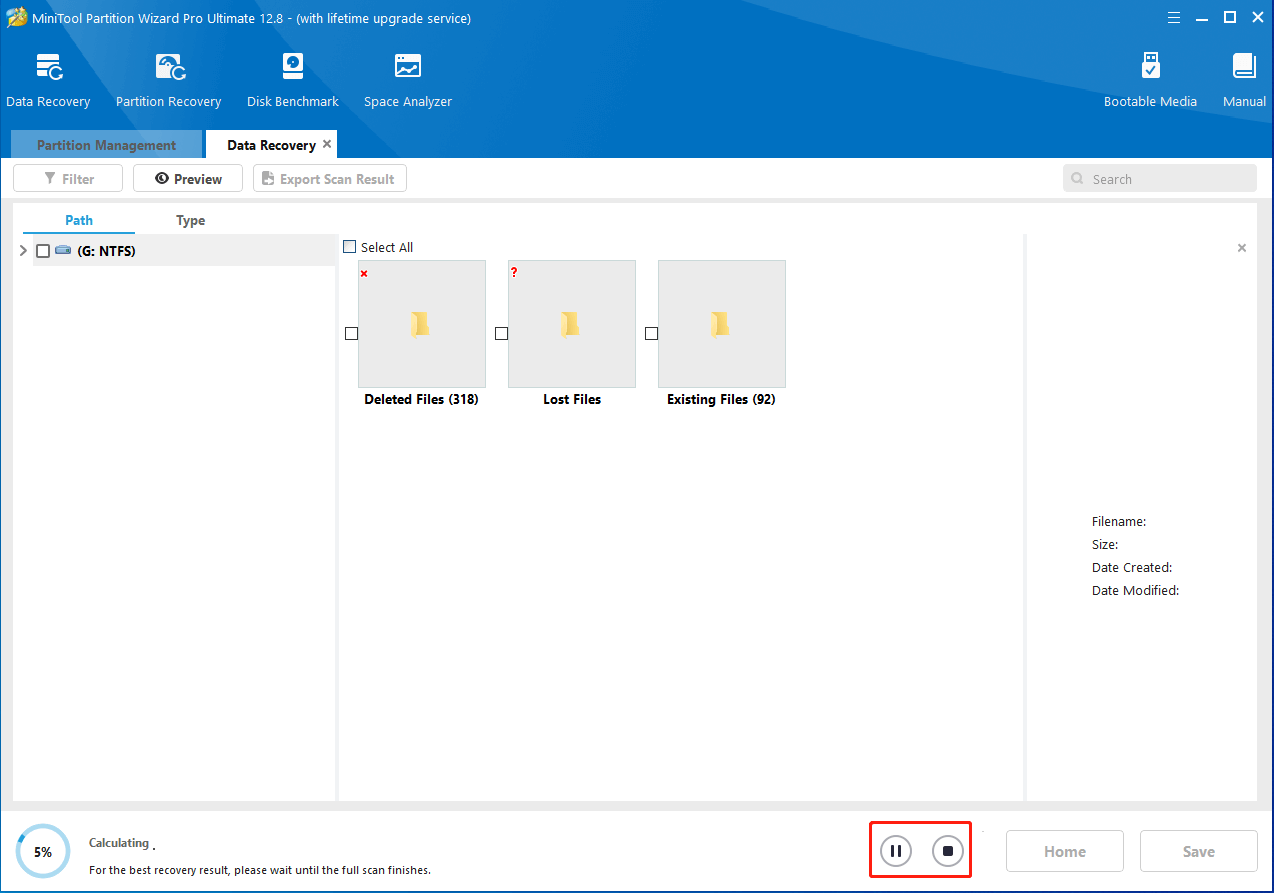
Step 4: If you find the files you want to recover during the scanning process, you can click the Pause or Stop icon to end the scan. Certainly, to get the best recovery result, it’s better for you to wait until the full scan finishes.
Step 5: After the process completes, check the files to recover and click Save.
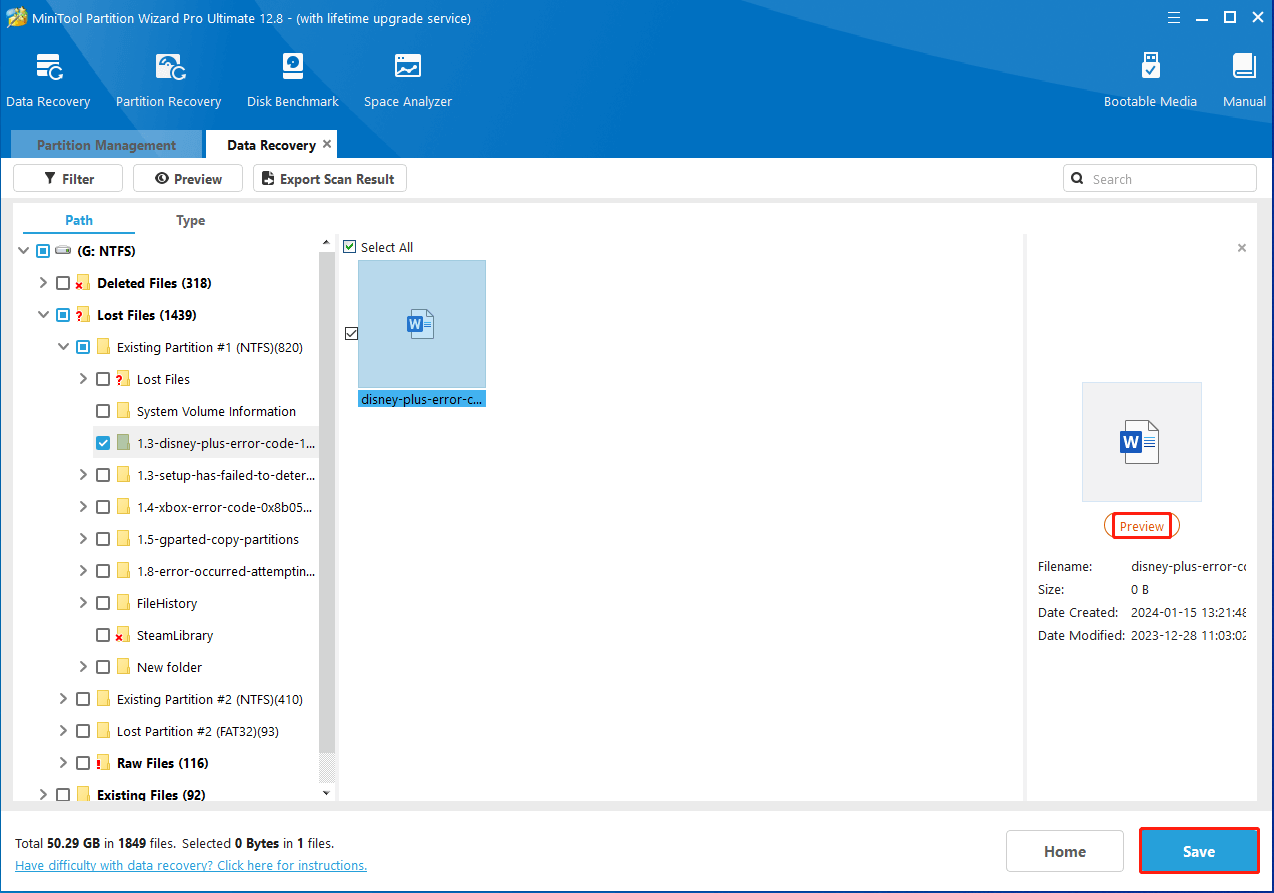
Step 6: After that, select a location to finish Glyph data recovery. You’d better choose another drive to save the selected files. Otherwise, the deleted or lost data would be overwritten.
Bottom Line
This post shows detailed information about Glyph Blackbox Plus data recovery. If you want to recover data from Glyph Blackbox Plus, you can follow the instructions in this post.
User Comments :