External hard drives are often used to store or back up data. Due to the compatibility of different devices, you need to format the external hard drive. However, when you connect the external hard drive to a Windows PC, you may find that the external hard drive is not visible on the computer. So, how to format an external hard drive that is not visible?
Why External Hard Drive Is Not Visible
There are many reasons why external hard drive is not visible on a Windows computer. Here are some common issues:
- Connection issues due to port failure
- Outdated or corrupt drivers
- External hard drive not receiving power
- Corrupted system drive
- Partitioning issues with external drives
How to Format an External Hard Drive That Is Not Visible
How to format the invisible external hard drive? It can be divided into two steps: first, make the external hard drive visible, and then format the external hard drive.
Part 1: Make the External Hard Drive Visible
#1. Some Quick Way
Before applying advanced troubleshooting methods, here are some quick fixes you can try:
- Restart the computer and connect the external hard drive to troubleshoot temporary failures or causes that prevent the hard drive from being detected.
- Connect the hard drive using a different USB port or a different computer.
- If the external drive has a dedicated power cord, plug it into a different power outlet or replace it.
If the above doesn’t work, read on to try other fixes.
#2. Update Windows Driver
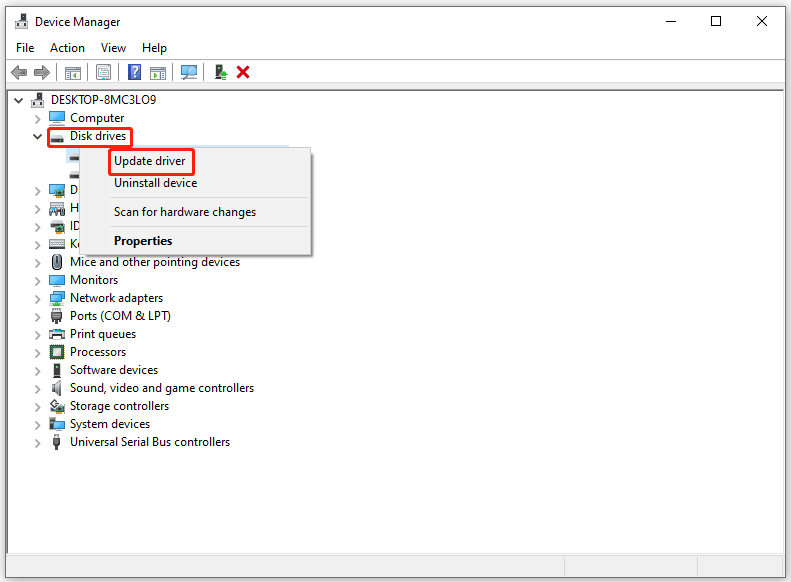
If Windows Disk Management does not list the external drive, you can check for drive issues on Windows through Device Manager. If the drive is outdated or damaged, you can update the driver and restart the computer.
Step 1: Right-click on the Start menu and choose Device Manager from the list.
Step 2: Locate the Disk drivers section and expand it. Then check if any listed devices have a yellow exclamation mark next to them. If it does, then it has a problem.
Step 3: Right-click on the problem drive and select Update Driver.

Step 4: Select Search automatically for driver software. Then your system will check if a new update is available for the drive and prompt you to install it if it finds one.
#3. Run the Troubleshooter
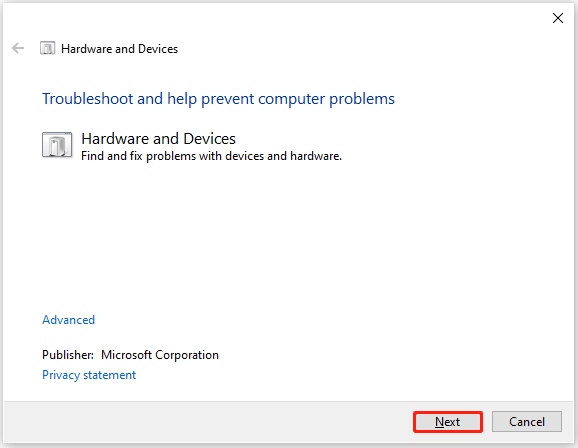
You can view hardware and device failures and fix them by running troubleshooting:
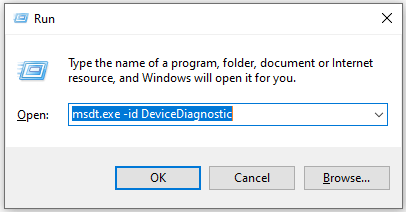
Step 1: Press the Win + R key to open the Run dialog box.
Step 2: Type the following command and press Enter to open the Hardware and Devices troubleshooter.
msdt.exe -id DeviceDiagnostic

Step 3: In the pop-up window, click on Next to start the troubleshooting. Then follow the instructions on the screen to complete the troubleshooting.

Part 2: Format an External Hard Drive
Once the drive becomes visible, you can format the external hard drive in several ways. You can use Windows built-in tools: Disk Management and CMD. However, the command line requires you to be familiar with your computer’s commands, and Disk Management does not allow you to format external hard drives larger than 32G.
Here I strongly recommend you choose a professional formatting tool – MiniTool Partition Wizard, which breaks the limitation of Windows built-in tools and allows users to easily format the external hard disk into NTFS, FAT32, exFAT, and other formats.
Besides, this partition software can help you upgrade to a larger hard drive without reinstalling the OS, back up data to keep your data safe, check disk health, and more.
MiniTool Partition Wizard FreeClick to Download100%Clean & Safe
Step 1: Download and install MiniTool Partition Wizard on your PC. Then launch it to get its main interface.
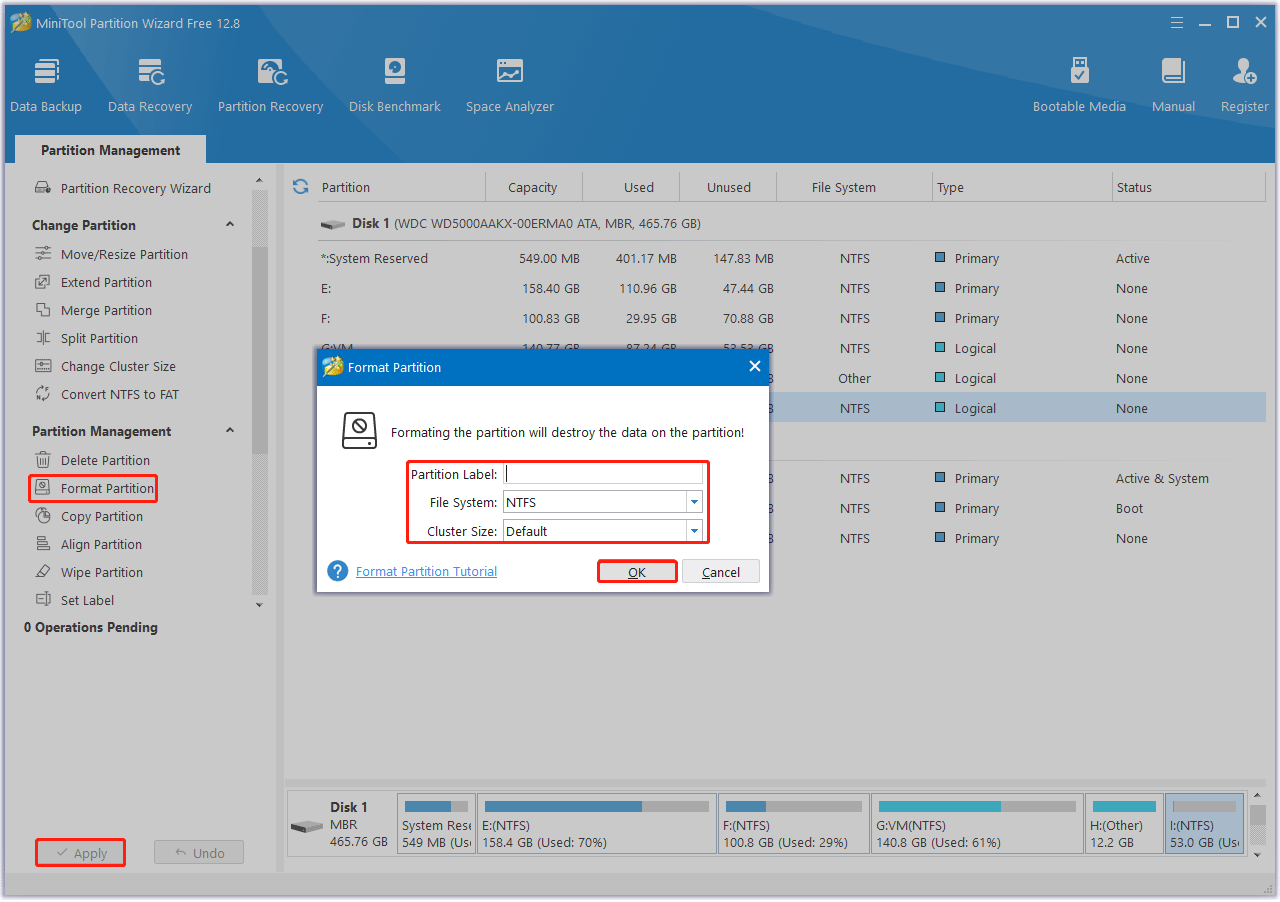
Step 2: Select the partition you want to format and choose Format Partition from the left action panel.
Step 3: Then set the Partition Label, File System, and Cluster Size. Then click on OK to continue.
Step 4: Click on Apply to confirm the changes.

Bottom Line
This post introduces how to format an external hard drive that is not visible. We recommend you use a free partition manager called MiniTool Partition Wizard.

![[Solved] Windows Does Not Boot After Compressing System Drive](https://images.minitool.com/partitionwizard.com/images/uploads/2023/09/windows-does-not-boot-after-compressing-system-drive-thumbnail.png)
User Comments :