You may see Event ID 10010 in the System Logs under Event Viewer after you upgrade Windows. How to get rid of it? Here, MiniTool Partition Wizard provides you with 5 solutions. You can try them one by one to repair Event ID 10010 restart manager.
What Does DistributedCOM Error Codes Mean
The Even ID 10010 error usually comes with a “The server did not register with DCOM within the required timeout” message. Do you know what does it mean? The content below tells you the meaning of Event ID 10010 and other DistributedCOM error codes.
- 10005 – It means that a service is disabled or there are no active devices associated with it.
- 10006 – It means that there are issues while activating the server.
- 10009 – It indicates that DCOM can’t communicate with the computer.
- 10010 – It means that the remote server didn’t register in the allotted time.
- 10016 – It is a permission-related error.
Fix 1: Enable the Function Discovery Resource Publication Service
Step 1: Press Windows and R keys to open the Run window.
Step 2: Type services.msc and hit Enter.
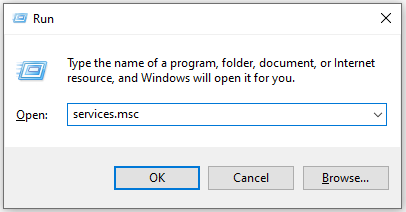
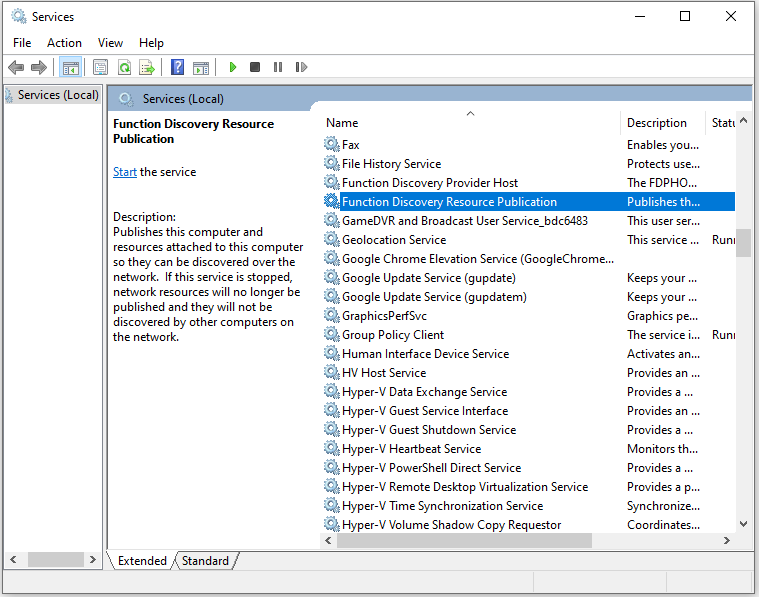
Step 3: In the Services window, find and double-click the Function Discovery Resource Publication service. By doing so, you will open the target service.
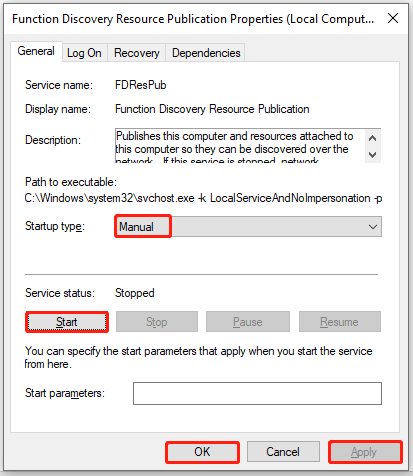
Step 4: Set the startup type as Manual, click the Start button under the Service status section, click Apply > OK to save changes.
Step 5: Restart your computer to make the changes to take effect.
Fix 2: Modify Access Permissions
Step 1: Open the Run window, type dcomcnfg in it, and then click OK or press Enter to open the Component Services window.
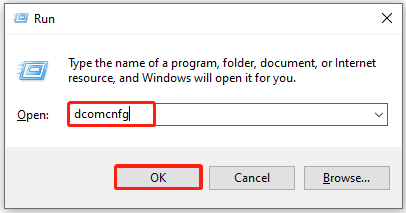
Step 2: In the opened window, double-click Computers, and then right-click My Computers and tap Properties.
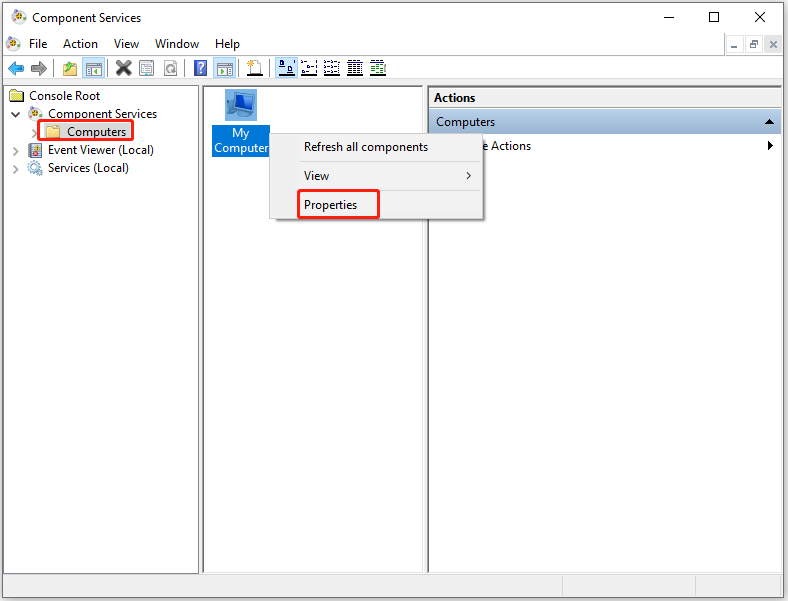
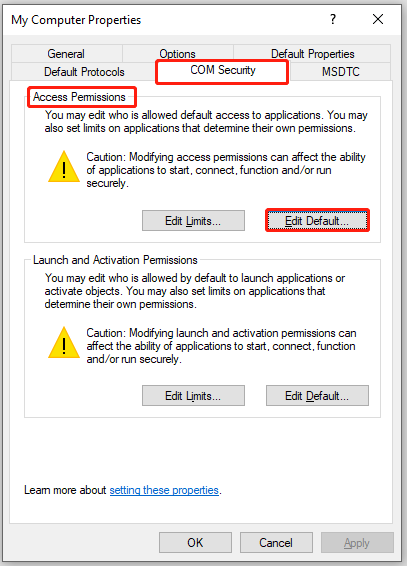
Step 3: In the Properties window, navigate to the COM Security tab.
Step 4: Click Edit Default under the Access Permissions section.
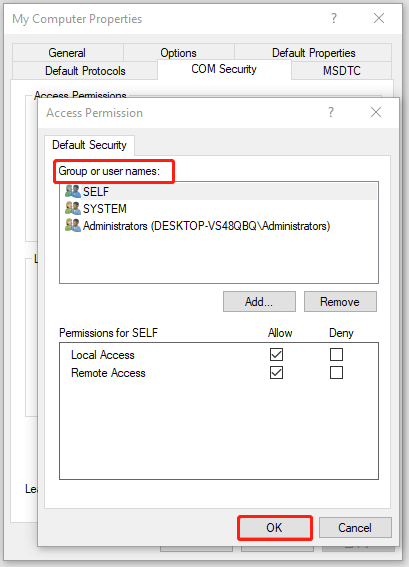
Step 5: Choose your group or user names under Default Security and set the correct permissions. After that, click OK to save the changes you have made.
Step 6: Restart your computer and check if Event ID 10010 is solved.
Fix 3: Reset DCOM Permissions
Step 1: Open the Properties of My Computers in the Component Services window by following the steps in Fix 2.
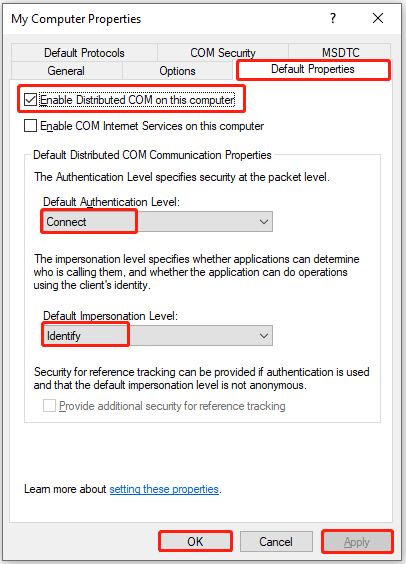
Step 2: Switch to the Default Properties tab.
Step 3: Check the Enable Distributed COM on this computer option.
Step 4: Select Connect from the Default Authentication Level drop-down menu.
Step 5: Choose the Identify option from the Default Impersonation Level drop-down menu.
Step 6: Tap Apply > OK to execute the operation.
Fix 4: Perform a SFC Scan
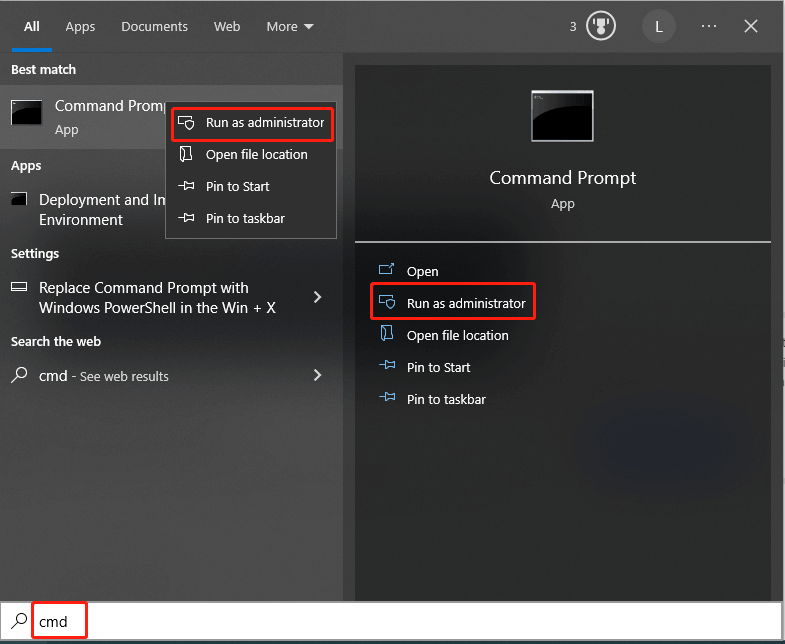
Step 1: Run Command Prompt as administrator from the search box.
- Type cmd in the search box.
- Click the Run as administrator option under the Command Prompt App. Alternatively, right-click Command Prompt from a list of search results and then click Run as administrator.
Step 2: In the pop-up window, type sfc /scannow and press Enter.
Step 3: Then wait for the finish of the scan process.
Fix 5: Update Windows
According to user reports, updating Windows is also an effective way to fix Event 10010 because the new update may contain bug patches. You can update your Windows by following the steps below.
MiniTool Partition Wizard DemoClick to Download100%Clean & Safe
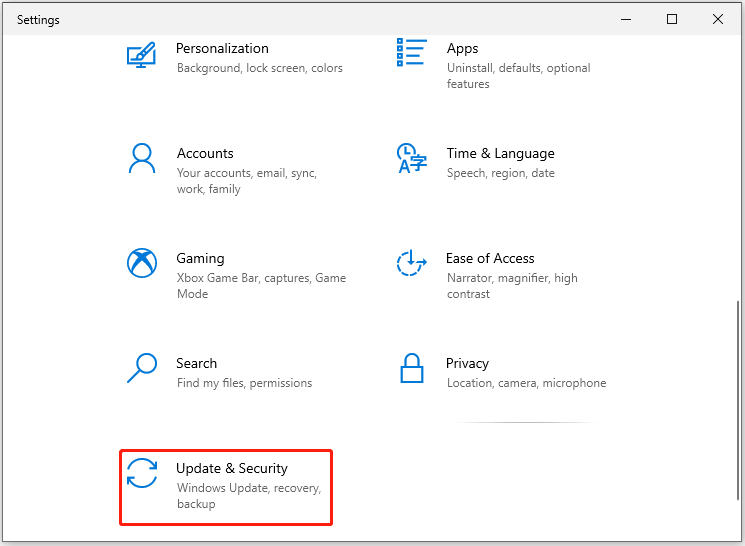
Step 1: Open Settings by pressing Windows and I keys.
Step 2: Click Update & Security in the home screen of Settings.
Step 3: Tap Windows Update and then click Check for updates to find available updates.
Step 4: If there are new updates, they will be listed. Simply click the Download and install button next to the corresponding update.
Step 5: Wait patiently until the update process completes.
Conclusion
How to fix Event ID 10010? Well, this post summarizes 5 available troubleshooting methods. You can pick one from them to get the Event 10010 error solved.

User Comments :