Method 1: Enable Disk Controller in BIOS
When you are trying to Windows operating system on a PC, you may receive the error message “Windows cannot be installed to this disk. This computer’s hardware may not support booting to this disk. Ensure that the disk’s controller is enabled in the computer’s BIOS menu.”
Step 1: Power off the computer and then power on the device. While the PC boots up, keep pressing the BIOS key to enter BIOS setup menu.
The BIOS key can vary according to the brands and models of your computer. It could be F1, F2, F10, F12, or Del.
Step 2: Navigate to Advanced > IDE Configuration. Then the IDE Configuration menu will be displayed.
Step 3: Choose Configure SATA as and hit Enter. After that, all the SATA options will be listed on a menu.
Step 4: On the SATA Options menu, select one of the following items.
- AHCI for a system using SATA disks (non-RAID)
- RAID to create an Intel Matrix RAID
Step 5: Press F10 to save the changes.
Step 6: Press Enter to exit the BIOS setup menu.
Method 2: Enable Disk Controller in BIOS via Registry Editor
Alternatively, you can also follow the guide below to enable disk controller in BIOS.
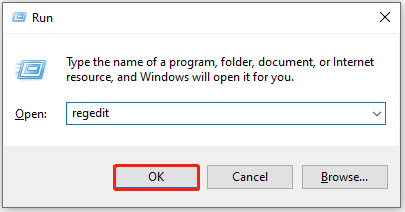
Step 1: Open the Run window by pressing Windows and R keys.
Step 2: Type regedit in the opened Run window and click OK.
Step 3: After the Registry Editor window opens, follow the path below to locate to the destination.
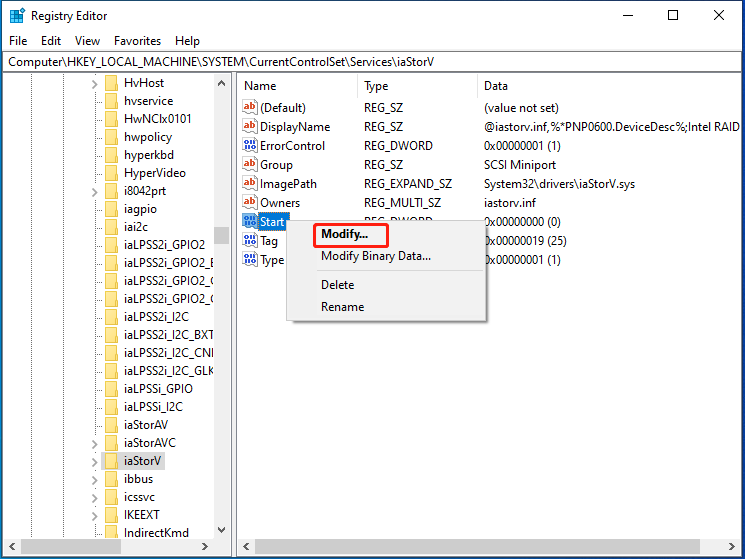
HKEY_LOCAL_MACHINE SYSTEM CurrentControlSet Services iaStorV
Step 4: Move to the right side of the Registry Editor window, right-click on the Start icon, and then click the Modify option.
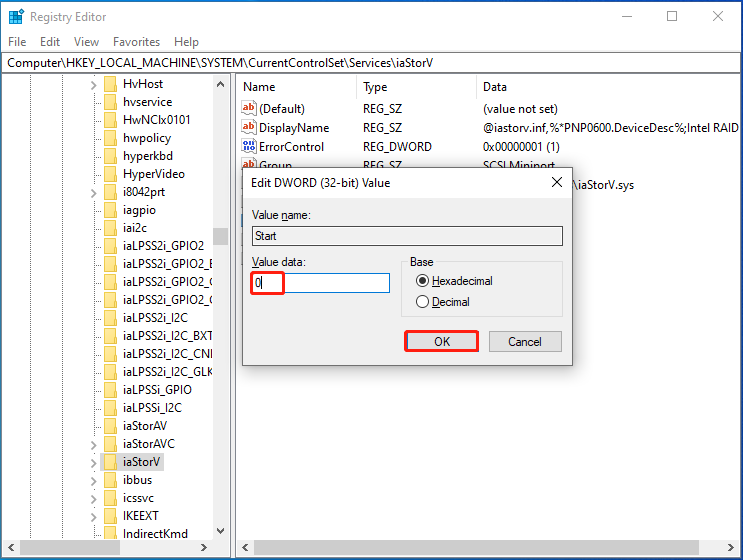
Step 5: In the pop-up window, configure the value to 0 and click OK to save changes.
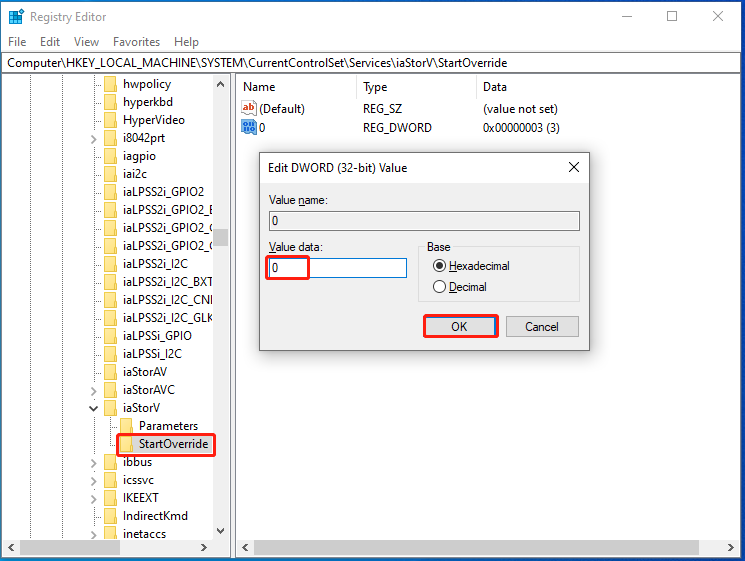
Step 6: Double-click iaStorAV in the left panel to expand it.
Step 7: Click on StartOverride, and then right-click on 0 value and set the value data as 0. Then click OK to save the changes.
Step 8: Then back to the Services and find storahci. Right-click on the Start icon and click Modify. Then set the value to 0 and save changes.
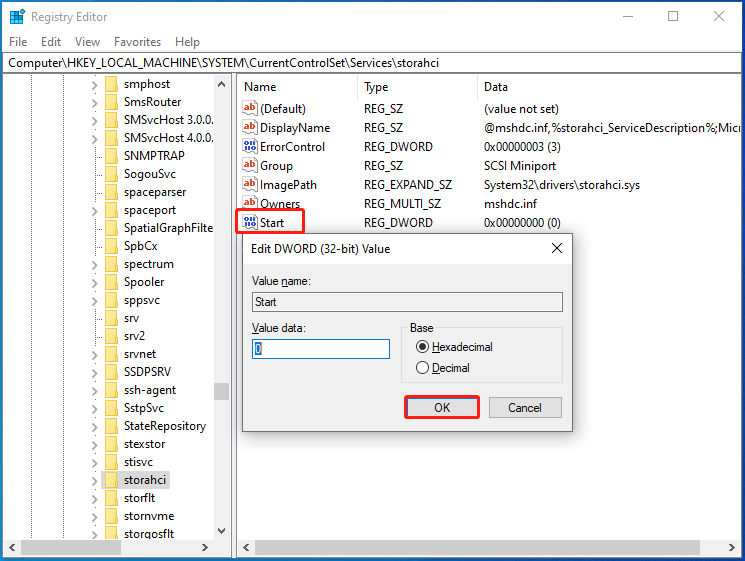
Step 9: Double-click storahci to navigate to StartOverride and then set zero value for element 0.
Step 10: Close Registry Editor and restart the computer to boot into BIOS or UEFI.
Step 11: Find SATA settings to choose the particular mode for memory devices. Switch all of them to AHCI, save settings, and then restart the computer.
Step 12: After the PC restarts, Windows can start the installation of SATA drivers. When it finishes, it will ask for another restart. To do that, you will enable the AHCI mode in Windows.
How to enable disk’s controller in the BIOS menu? Two available methods have been shown to you. Simply choose one from them to finish the operation.
Further reading:
In addition to enabling disk controller, you can also fix “Windows cannot be installed to this disk” error by converting MBR to GPT (or conversely convert GPT to MBR), converting dynamic to basic disk, removing the hard disk protection, changing SATA controller mode, repairing/replacing the hard drive, formatting the partition to NTFS, or cleaning the whole drive.
As a multifunctional partition manager, MiniTool Partition Wizard enables you to perform various operations related to hard drives or partitions. Well, many of the solutions mentioned above can be conducted by MiniTool Partition Wizard.
MiniTool Partition Wizard FreeClick to Download100%Clean & Safe
Download and install this partition managing tool on your computer. Then launch it, click on the corresponding feature, and follow the on-screen instructions to complete the operation.


User Comments :