Enable or disable Compact OS? The answer depends on your condition. If your disk space is not enough, you should enable Compact OS. On the contrary, you need to disable Compact OS. How to enable or disable Compact OS in Windows 10/11? Here, MiniTool Partition Wizard tells you the answer.
Compact OS is a feature that compresses all operating system binaries and sets the system state to Compact. It is supported on both UEFI-based and BIOS-based devices. While running CompactOS, Windows update may replace or clear individual files as needed to keep the drive footprint size over time.
On average, Compact OS can free up 20% of drive space, which is helpful for users who run low disk space. This feature only compresses Windows core files.
If your PC has enough disk space, you don’t have to enable Compact OS to reduce the size of the Windows system. You can increase disk space for laptops by using the Extend Partition and Move/Resize Partition features of MiniTool Partition Wizard.
MiniTool Partition Wizard FreeClick to Download100%Clean & Safe
Enable or Disable Compact OS in Windows 10/11
How to enable or disable Compact OS in Windows 10/11? Command Prompt lets you complete the operation by executing a few command lines.
Steps to Enable Compact OS
Here’s the guide on how to enable Compact OS in Windows 11/10.
Step 1: Open the Run window by holding the Windows and R keys simultaneously.
Step 2: Type cmd in the Run window and then press Ctrl + Shift + Enter keys to open Command Prompt as administrator.
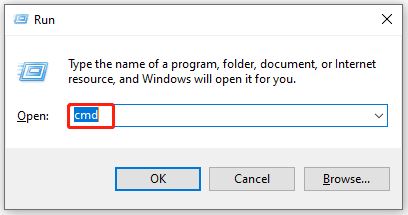
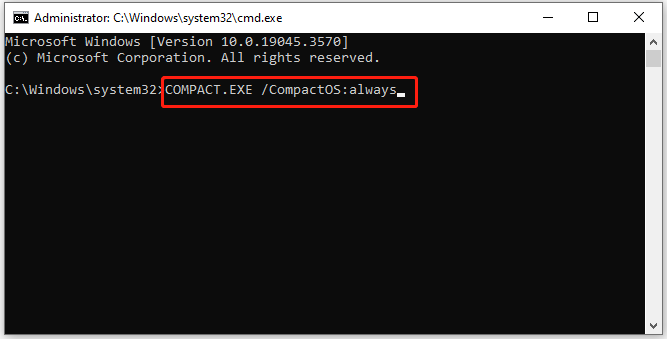
Step 3: In the Command Prompt window, type COMPACT.EXE /CompactOS:always and hit Enter. Then it will compress your system automatically. If you run Windows 10, it frees up 1-1.5GB of space (for 32-bit) and around 2.65GB for (64-bit). The whole process may take you one or two minutes.
Alternatively, you can also use the DISM command to compact the OS while you install it. Before executing the DISM command, you need to format the hard disk and partition it. This operation has the risk of losing data. So, you should clone the hard drive or make a Windows backup via MiniTool Partition Wizard in advance.
MiniTool Partition Wizard DemoClick to Download100%Clean & Safe
After that, input and execute the command below.
DISM.exe /Apply-Image /ImageFile: Install.WIM /Index: 1 /ApplyDir: C:\ /COMPACT:ON
After you apply the image to the C drive, use the BCDBOOT command to specify the bootable partition.
BCDBOOT C:\WINDOWS
Then, restart the computer to compact the OS.
Steps to Disable Compact OS
If your PC has enough disk space, you don’t have to reduce the size of Windows OS. It means that you don’t have to enable Compact OS. If you have enabled it, disable the option manually. The following steps show you how to disable Compact OS.
Step 1: Type cmd in the search box and then click Run as administrator under the searched Command Prompt App.
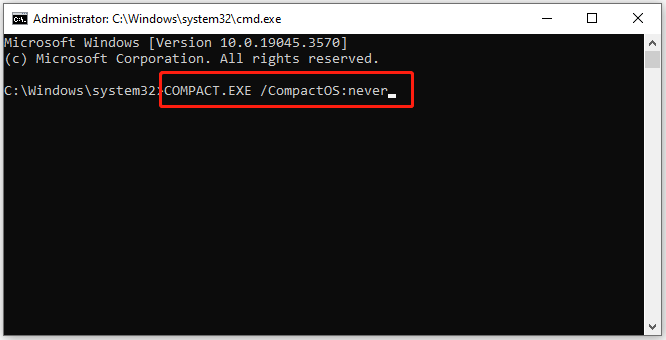
Step 2: In the pop-up window, type COMPACT.EXE /CompactOS:never and press Enter to execute the command.
Related articles:
- Enable or disable Windows Recovery Environment
- Enable or disable resilient file system
- Enable or disable Dev Drive protection
Check If Compact OS Is Enabled
How to know if Compact OS is enabled or disabled? Well, you can check the status of Compact OS by yourself. Here are the steps for doing that.
Step 1: Run Command Prompt as administrator on your computer
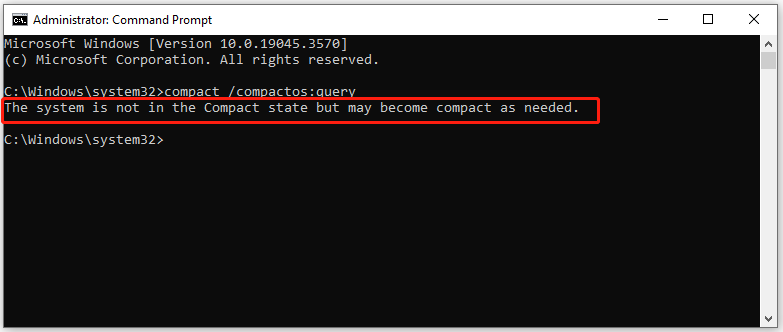
Step 2: In the Command Prompt window, type compact /compactos:query and hit the Enter key.
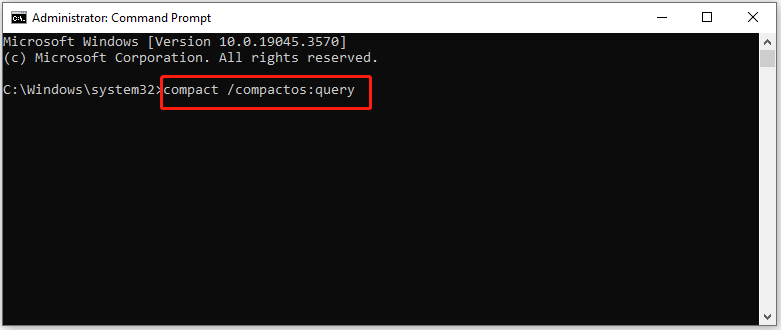
Step 3: If you see the message “The system is not in the Compact state but may become compact as needed”, it indicates that Compact OS is not enabled and the PC supports the feature.
Conclusion
How to enable or disable Compact OS in Windows 10/11? You can do that by following the steps given in this post. Besides, the guide tells you how to check the status of Compact OS in detail.

User Comments :