If you receive DirectX out of memory error while playing games, pay attention to this post. Here, MiniTool Partition Wizard lists 4 troubleshooting methods for the not enough memory error in DirectX.
The DirectX out of memory error occurs while you play games on a Windows computer. It often happens when enough page file size has not been allocated on your system. Besides, it can also show up due to corrupt or outdated graphic drivers, corrupt DirectX cache, outdated game versions, or other reasons.
After confirming the specific reason for the error, you can take corresponding measures to resolve the issue. This post collects 4 available ways for you. Try them now!
Further reading:
For errors related to storage devices like hard drives, you can fix them by using MiniTool Partition Wizard – a comprehensive partition management tool for Windows 11/10/8.1/8/7 computers. For instance, it repairs errors like can’t format external hard drive, can’t install Windows 11 on SSD, random shutdowns on Windows 11, etc.
MiniTool Partition Wizard DemoClick to Download100%Clean & Safe
Way 1: Clear the DirectX Cache
You should clear the DirectX cache first once the DirectX out of memory error occurs. To do that, follow these steps.
Step 1: Type disk cleanup in the search box and then click Run as administrator under the displayed Disk Cleanup app.
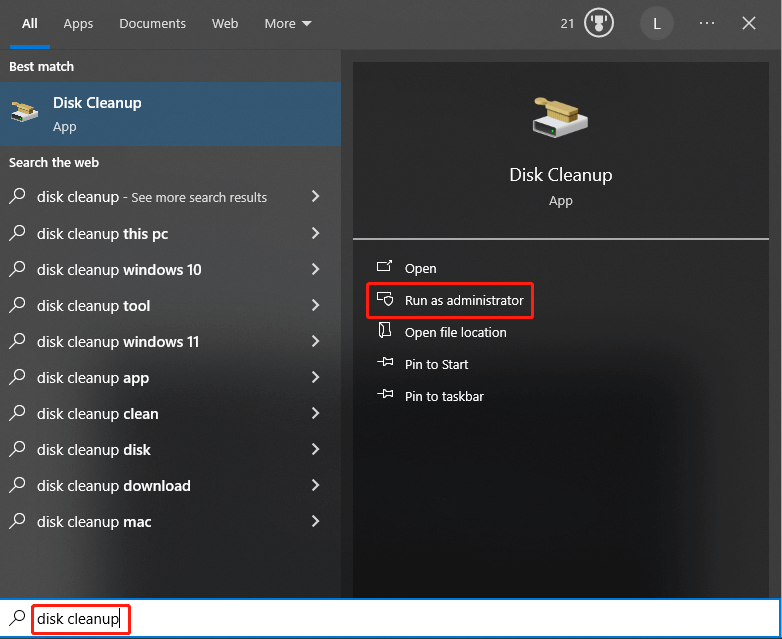
Step 2: In the prompted window, ensure that the C drive is selected and click OK.
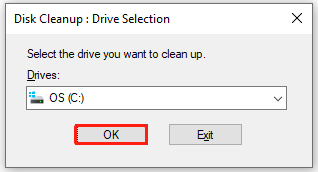
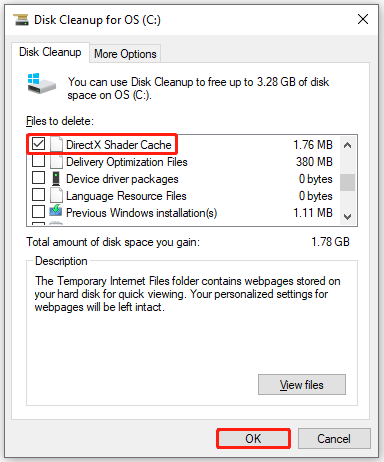
Step 3: Uncheck all the boxes and then tick the DirectX Shader Cache option.
Step 4: Click OK to save the changes.
Step 5: In the pop-up warning window, click Delete Files to confirm the operation.
Way 2: Increase the Paging File Size
Step 1: Hold the Windows and I keys to open the Settings app.
Step 2: Tap on the System tab and then choose the About option. Then click Advanced system settings in the Related links section.
Step 3: Tap on the Advanced tab and then click on the Change button.
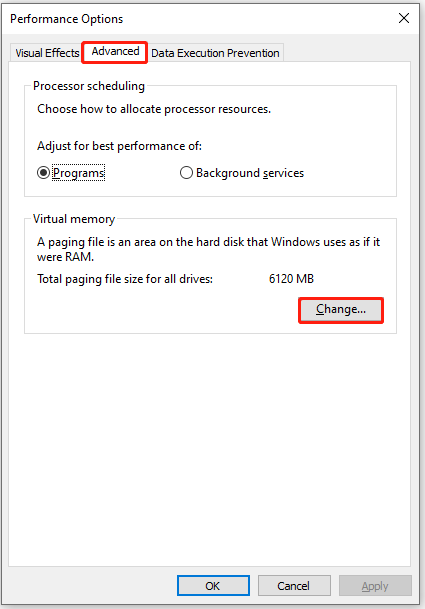
Step 4: In the Virtual Memory window, uncheck Automatically manage paging file size for all drives and tick Custom size.
Step 5: Choose the system drive and increase the Virtual memory size. Please note that the initial size should be the same as the physical RAM. The maximum size should be 1 or 2 times the size of the physical RAM installed on your computer.
Step 6: Click OK to save changes.
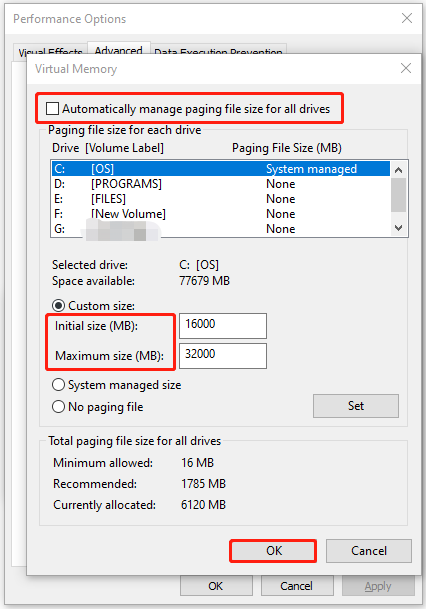
Step 7: Restart your computer for the changes to take effect.
Step 8: Now, check if not enough memory error in DirectX 12 disappears.
Way 3: Check the Integrity of Game Files
Issues with the game file integrity can lead to DirectX out of memory error too. So, you’d better check the integrity of game files when not enough memory error in DirectX 12 takes place.
Step 1: Launch the Steam Client.
Step 2: Find and right-click on the target game, and then select Properties.
Step 3: Tap LOCAL FILES in the left panel and click Verify integrity of game files.
Step 4: Wait for the finish of the verification.
Way 4: Update Display Drivers
Step 1: Press the Windows and X keys simultaneously and then click Device Manager on the elevated menu.
Step 2: In the Device Manager window, double-click Display adapters to expand it.
Step 3: Right-click on your graphics driver and click Update driver.
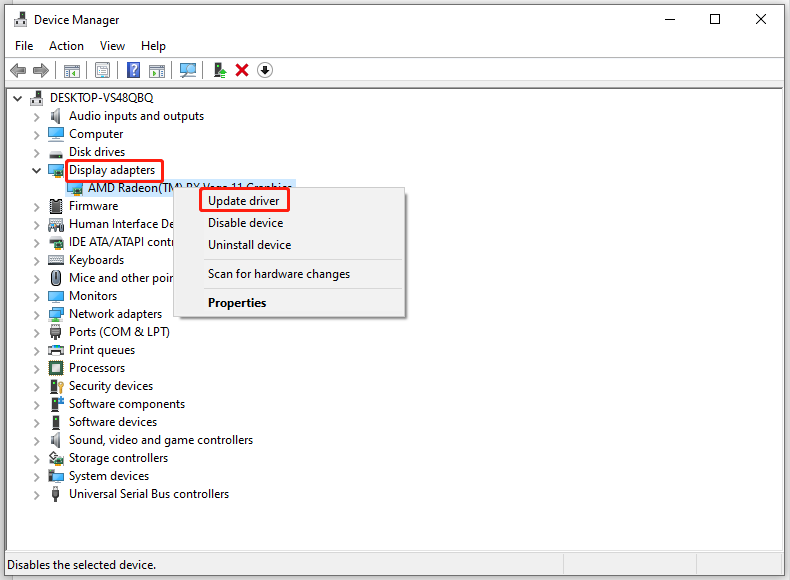
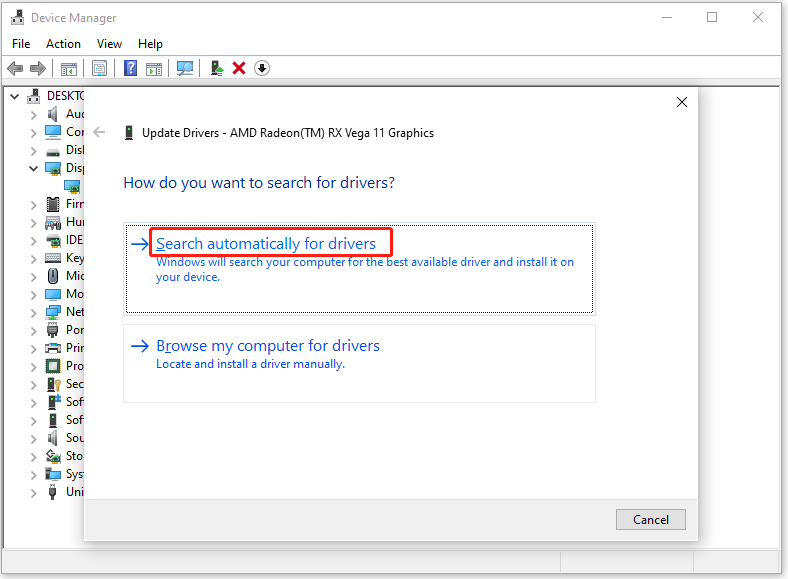
Step 4: In the pop-up window, choose a way to update the driver. In this scenario, we select Search automatically for drivers.

User Comments :