If you are bothered by the Device Encryption not working issue, this post is what you need. Here, MiniTool Partition Wizard tells you why encryption is not working and how to troubleshoot the Device Encryption not working issue.
Data/device encryption converts readable data into scrambled, unreadable code. Without a password or a recovery key, the data can’t be read. This can keep your data safe. However, sometimes the encryption not working on Windows 11 issue occurs.
Why encryption is not working and how to get the issue resolved? You may find the answers after reading the post.
MiniTool Partition Wizard FreeClick to Download100%Clean & Safe
Requirements to Run Device Encryption
To use Device Encryption, you should ensure that your computer meets the requirements below. Otherwise, you will experience the Device Encryption not working issue.
- TPM module 2.0 (Trusted Platform Module) with the support for Modern Standby
- TPM must be enabled (If TPM is not enabled, activate it with this tutorial: Steps to Activate TPM 2.0 and Secure Boot to Install Windows 11
- UEFI (Unified Extensible Firmware Interface) firmware (If you use legacy BIOS, you need to convert legacy to UEFI.)
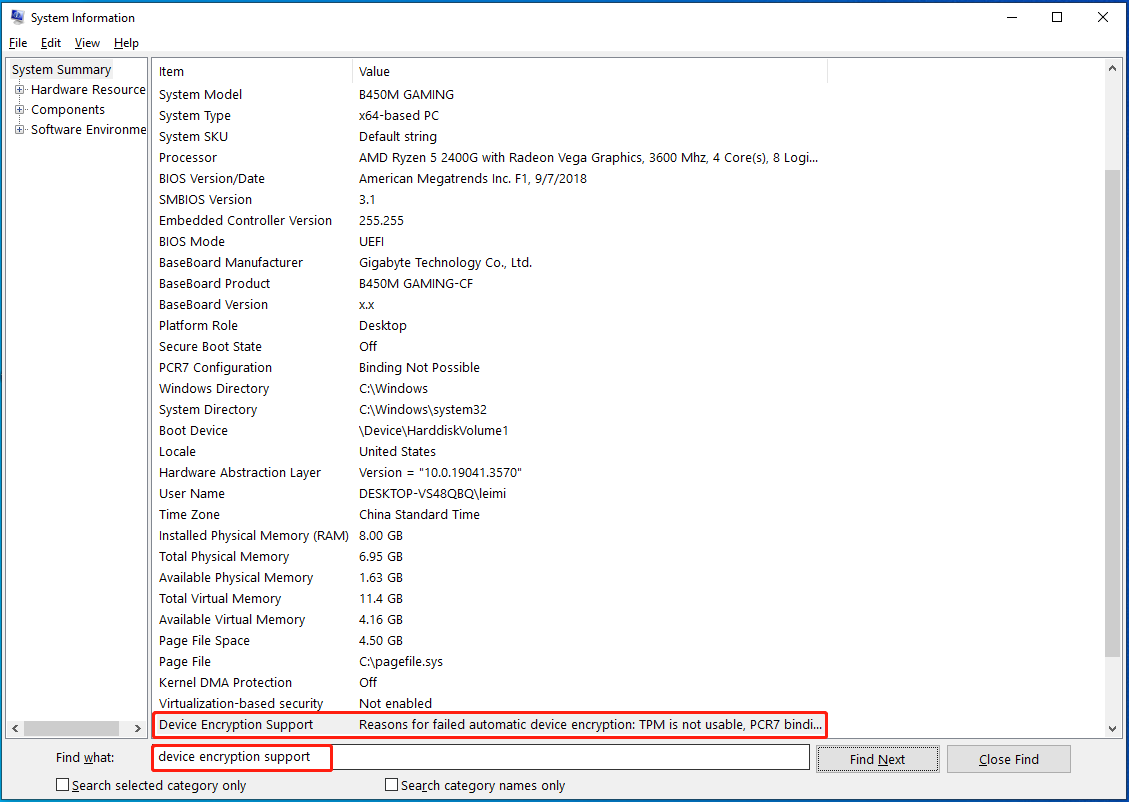
Besides, you should check if your system is compatible with Device Encryption. You can do that by using the System Information app.
- Open the Run window by pressing the Windows and R keys.
- In the Run window, type msinfo32 and click OK.
- Type device encryption support in the Find what field and press Enter.
After you find the reason why encryption is not working, take corresponding measures to resolve the encryption not working on Windows 11 issue. For instance, if the reason is “PCR7 binding is not supported”, please refer to this guide to fix the problem.

In addition to above troubleshooting methods, this post collects other available fixes for the Device Encryption not working issue.
Solution 1: Enable Device Encryption
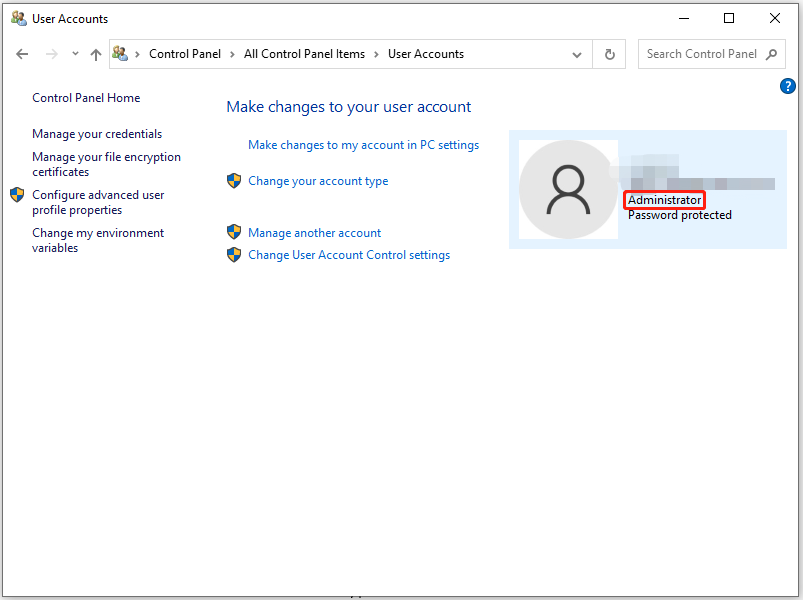
Make sure that you are an administrator before you use Device Encryption. Otherwise, you can’t enable Device Encryption. Follow these steps to check if you are an administrator and then enable Device Encryption.
Step 1: Open Control Panel.
Step 2: After you tap User Accounts, you will be prompted with the User Accounts window. If you see Administrator written under your username, it indicates that you’re the administrator. If not, switch the administrator manually.

Step 3: Open the Settings app by holding the Windows and I keys.
Step 4: Tap on Privacy & security from the left pane.
Step 5: Find and click on Device encryption on the right side of the window. Then toggle on the option and exit Settings.
Now, check if the encryption not working on Windows 11 error is fixed.
Solution 2: Update the Computer
Why encryption is not working? There’s likely a bug with your system. If so, it is recommended to update the computer to solve the issue because new updates usually contain new features and bug patches. You can manually download and install the update or check for updates in Settings with the steps below.
Step 1: Open the Settings app.
Step 2: Tap on Windows Update > Check for updates.
Step 3: Click on the download and install link under the listed update to get the new update installed.
Step 4: Wait until the process ends.

User Comments :